Showing posts with label How to. Show all posts

Tuesday, February 19, 2019

How to Roast Red Chillies | Kitchen Basics

During my initial days of cooking,while writing down recipes given by my MIL,I always wondered about the ingredient - roasted red chillies.At home,amma added red chillies as is to the coconut and made masala.But most recipes from South Canara(Mangalore side) used chillies in the roasted form.


MIL always has a big container of roasted chillies ready to be added to make chutney or any coconut based masala required for most of the curries in our cuisine.Initially,I roasted the required amount of chillies and used but that was tedious.So I started doing this.It is not actually a recipe or such.Just a method to keep the chillies roasted and ready to be used.


I use a mix of regular red chillies and Byadgi chillies.It gives the required spice and a lovely colour to the curry.You could use either chillies or a mix of both like how I am doing.


In a kadai add a couple of Tbsp of coconut oil and 
roast the byadgi chillies for about 5 minutes.

Then mix in the regular chillies 
and roast further for 10-15 minutes.The chillies become crisp and break when you crush it.That is the stage when you should switch off the kadai and let it cool down completely.Store in an airtight container.

Here are some recipes which use the roasted red chillies

Kellya Koddel

Palak and Vegetables Ambat

Alambe Saung

Ambya Gojju

Karaate Saglen

Tuesday, February 4, 2014

How to make Whipped Buttercream | Easy Frosting Recipes

Before I ventured into a cake decorating craze,I knew of only a few frostings.I kept going back to the basic ABC aka American Buttercream or a simple chocolate ganache.Though I liked the ease at which ABC could be made and the consistency as well,I was not entirely happy with the texture.Despite using fine icing sugar,sifting it a couple of times,I could taste the grainy feeling in my mouth after having a slice of cake.
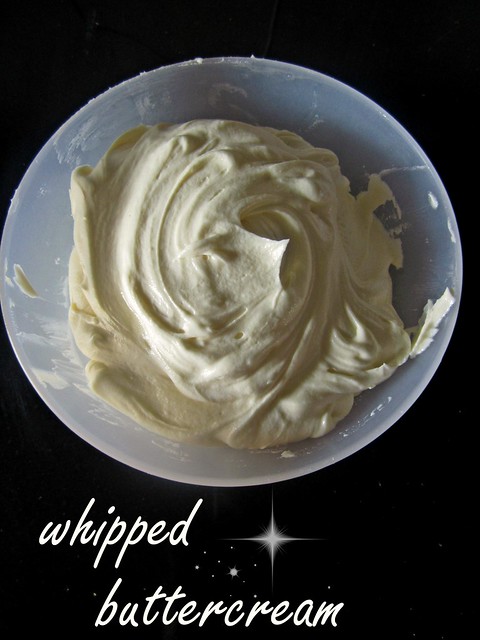
Whipped Buttercream
My frosting 'guru',as I'd like to call her,directed me to this recipe by Veena's Art of Cakes.It is called a 'whipped buttercream' and uses a unique method of beating together icing sugar and cream and then adding butter at the final stage.I was intrigued at this amazing method and decided to try it out.However,the original recipe uses meringue powder as an added ingredient.

I was a bit apprehensive to try it out initially.But believe me,you absolutely cannot taste it in the final product.I believe it is added for that shiny texture in the buttercream which looks nice when you are piping flowers and the like.Once,I had to make an eggless cake for someone and couldn't use the meringue powder.I went ahead without the meringue powder and thankfully,it turned out as good without it.Ever since I've been making it eggless :)
Whipped Buttercream I have used this buttercream for frosting as well as filling.Though I'd suggest a different filling for a contrast in taste,however it is up to you.This recipe makes enough to frost an 8' round cake but that too depends on what decorating tip you are using.Rosette tip needs double as much whereas a star nozzle might require less.

Whipped Buttercream
Recipe source - Veena's Art of Cakes

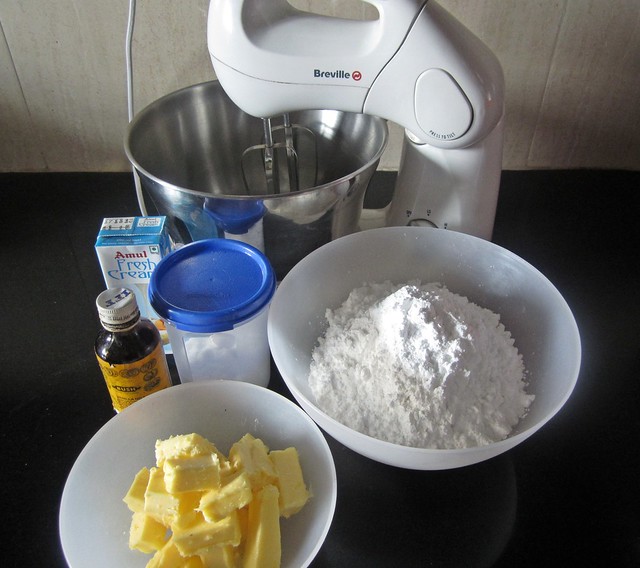
Ingredients

Icing sugar - 4 cups,sifted
Salt - 1/4 tsp
Meringue powder - 1 tbsp (optional)
Fresh cream - 1/4 cup
Unsalted butter - 1 cup/200gms at room temperature
Vanilla extract - 1 tsp

Method

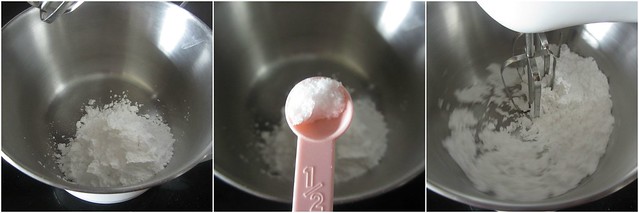
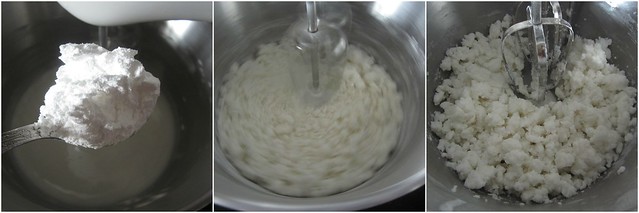
Whipped Buttercream In the bowl of your electrical mixer,add approximately 1/3 of the icing sugar,salt and meringue powder(if you are using).Stir to combine.
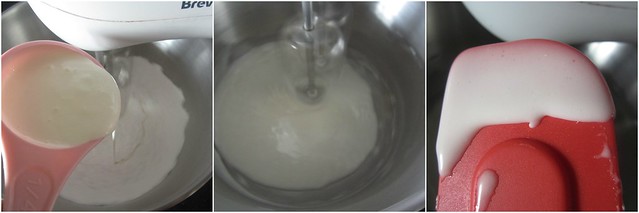
Whipped Buttercream Now switch the mixer on low and slowly add in 1/2 of the cream.Let the mixer run on medium for about 5 minutes.The mixture will become light and sticky giving your buttercream a velvety texture later.Don't make haste with this step.Let it cream well.
Whipped Buttercream After 5 minutes start adding the rest of the sugar slowly.Continue to mix on medium.If the mixture appears too dry add a tbsp or two more cream.Be careful with the quantity,add cream only if the mix appears too dry.I stop when no flecks of sugar remain.Even if the mix is lumpy,it's fine.
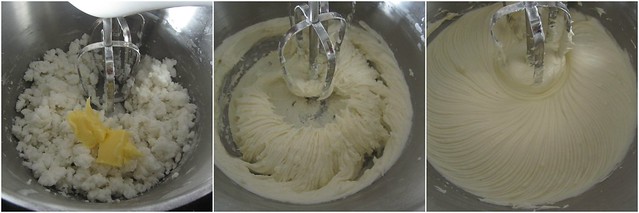
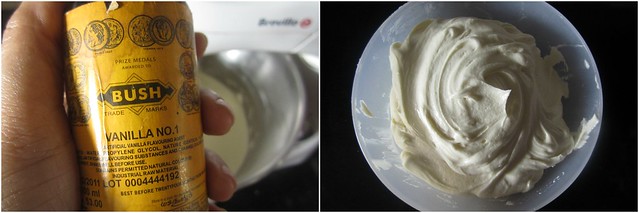
Whipped Buttercream After about 3 minutes,start adding the butter into small batches making sure it is well incorporated.Add the vanilla.
Whipped Buttercream Once all the butter is in run the mixer on high for about 3-5 minutes or more until you have a creamy velvety texture and the buttercream does not taste grainy.
When you taste it,you should have a smooth velvety texture in your mouth with no trace of any sugar grain.

Variations - You can flavor the buttercream with your choice of extracts.Strawberry,Almond,Pineapple and so on.For a chocolate version,add cocoa powder along with the icing sugar.A couple of spoons of Nutella would taste great as well.
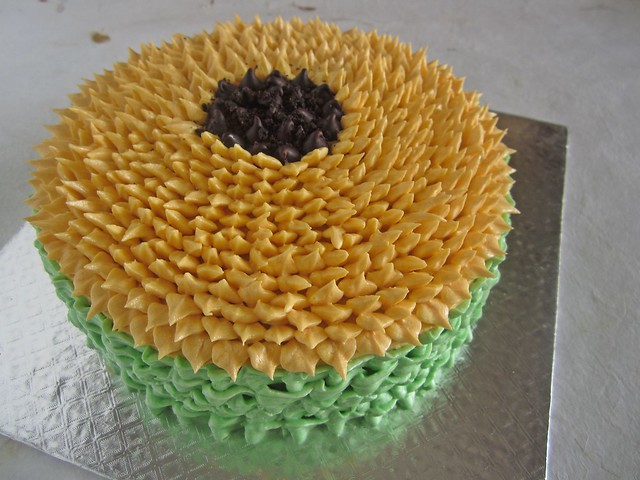
IMG_5783 Here's a cake I decorated using whipped buttercream.I used two different leaf tips for the top as well as the sides.I posted a query on the facebook page regarding a step by step for this one and thanks to all of you for the tremendous response.I will be putting up the tutorial shortly.
 

Thursday, November 7, 2013

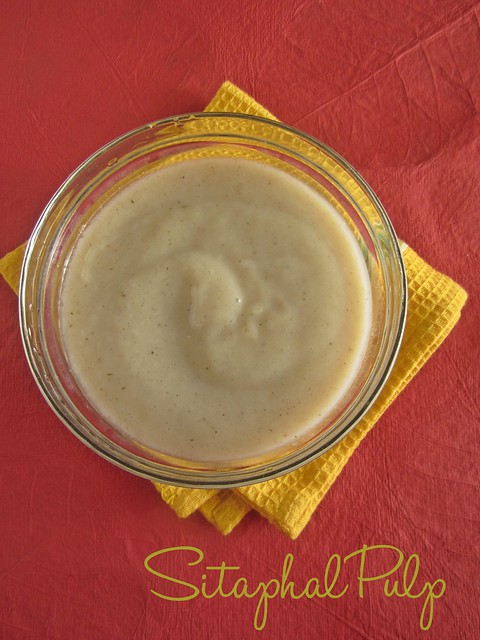
How to make Sitaphal Pulp | Custard Apple Pulp

How to make Sitaphal Pulp
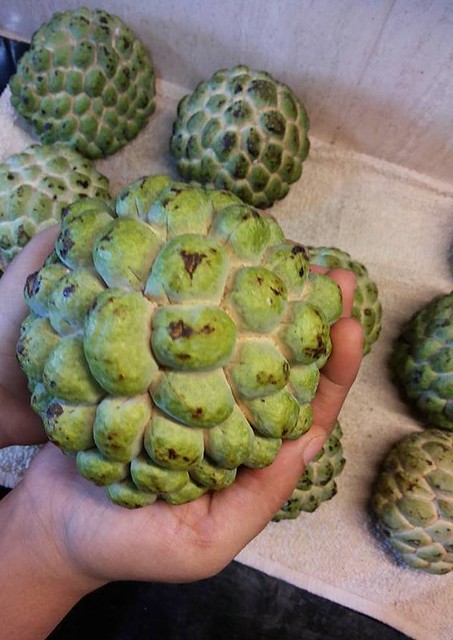
If there is any fruit which I love,but hate the way I have to work to enjoy the 'fruit' of labour,it has to be Sitaphal/Custard Apple.It is so very delicious but pretty difficult to eat since with every bite there would be a couple of seeds to spit out.Whenever it is in season,our house sees kilos after kilos of this sweet fruit.I've never ventured into making anything with it other than to eat,it is pretty difficult to eat,leave alone making anything with it.

After tasting Sitaphal ice-cream in Naturals,I think the flavour just got more prominence in my mind.I've also tasted milkshakes and kulfis with a predominant sitaphal flavour.I wanted to try a phirni with it for Diwali for which I needed sitaphal pulp.I remember how in juice shops,they just pulp the fruit and seeds together and then sieve it.I followed the same method.
How to make Sitaphal Pulp
Having a stash of the pulp in the fridge gave me a lot of ideas.I did make a super small batch of phirni which we ate up before it had time to properly set,so made milkshakes with the rest of the pulp.I think the no-churn ice-cream would be a safe bet too,if I don't eat up the pulp on its own :)

How to make Sitaphal Pulp

Ingredients

Sitaphal/Custard Apple - 5-6,big or 7-8 medium
Milk - 1/3 cup
Sugar - 1 tbsp,optional

Method

How to make Sitaphal Pulp 
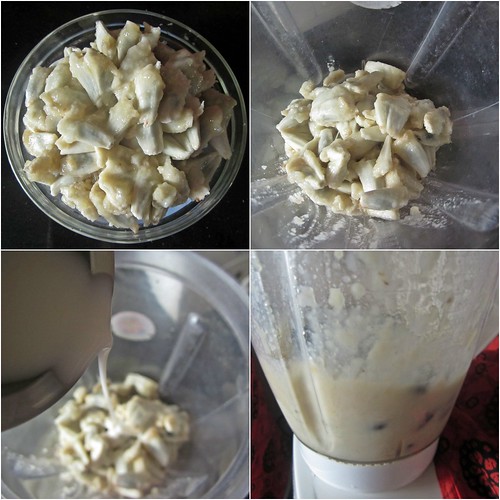
Scoop out the pulp with the seeds into a bowl.Into a mixer,add the pulp along with the milk and pulse for 5-10 seconds.

How to make Sitaphal Pulp 
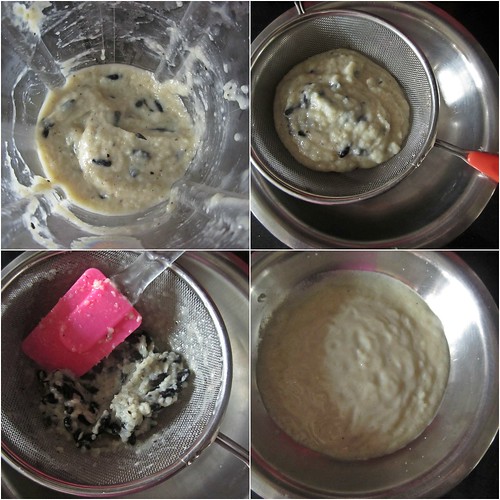
In a wide bowl,place a fine meshed sieve and pour the mix into it.
Using a spatula sieve the pulp.Store in an airtight container and keep refrigerated.You can add sugar at this point or skip it.
It is necessary to use milk as it aids grinding.If not,the seeds may get ground into the pulp and make it grainy and bitter.
How to make Sitaphal Pulp
Works best for ice-creams,kulfi,milkshakes and phirni.

Friday, May 3, 2013

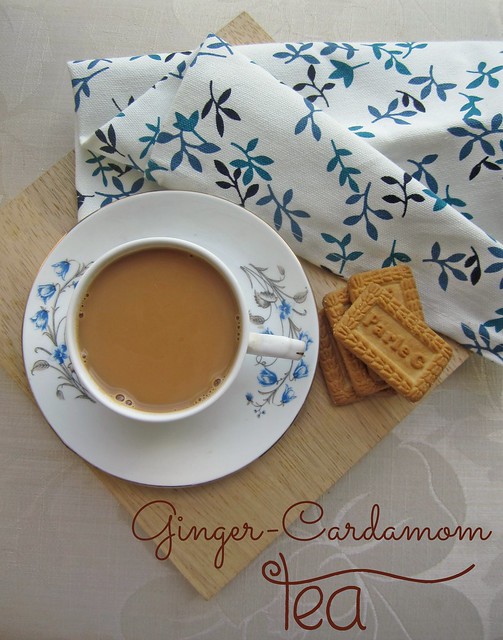
Ginger-Cardamom Tea | Adrak-Elaichi Chai

Ginger-Cardamom Tea
I've been a tea-drinker ever since I can remember.Of course,at home it shuffled between Coffee and tea since I believe amma makes out of this world Bru coffee,I always want a cup of tea for a real pep-me-up when I am tired or sleepy.Ajay being a true-blue tea lover meant it was the given choice of beverage in our house,any time.

I am not particular when it comes to the kind of tea I love.Amma makes a milky tea whereas my friend makes an awesome watery tea with just a dash of milk.I take the middle path adding equal amount of milk and water.Seriously,if it is tea,I am game.Since we have tea at least 2-3 times a day,I think of ways to make it taste different every time.
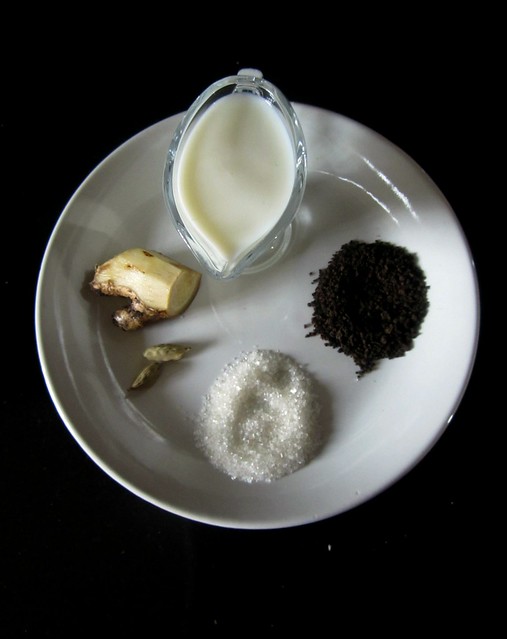
Ginger-Cardamom Tea-ingredients
Adding masala,or cardamom or ginger is a great way to make the tea delicious.Though we do prefer plain tea in the mornings,for the evening chai,some spice is allowed:)Some Parle-G or Good day biscuits on the side is truly the icing on the cake!

Ginger-Cardamom Tea | Adrak-Elaichi Chai

Ingredients

Ginger - 1 small piece[about 1/2'],peeled and washed thoroughly
Cardamom - 2,whole
Milk - 1 cup
Water - 1 cup
Sugar - 2 tsp
Tea leaves - 2 tsp[I use Taj Mahal,always have-always will!]

Method

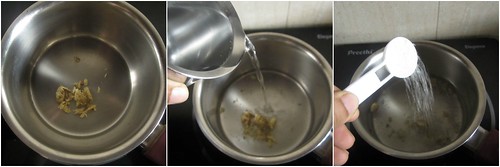
Ginger-Cardamom Tea-step1 
Crush together ginger and cardamom pods with a mortar and pestle.
Ginger-Cardamom Tea-step2 
In a saucepan add the crushed ginger-cardamom and water.Let it come to a boil.Add sugar to taste.
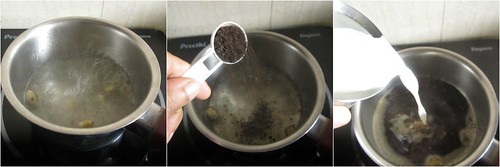
Ginger-Cardamom Tea-step3 
When it comes to a rolling boil add tea leaves.Simmer and add milk.
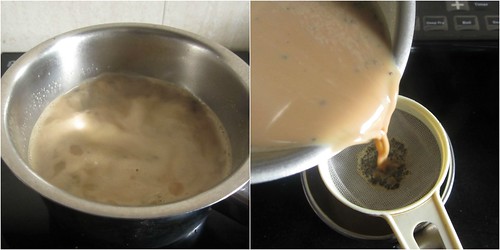
Ginger-Cardamom Tea-step4 
Let it simmer for 1 minute.Strain and serve.
Ginger-Cardamom Tea

Some tips to make the perfect cup of tea
  • Add the tea leaves to the water only when it has come to a rolling boil.This makes sure all the flavour of the tea leaves gets released into the water.Some prefer to switch off the flame and cover the pan with a lid and let the flavours infuse,that is also a good method.
  • I prefer adding equal amount of water and milk but you can add as much or as less milk as you prefer.
  • Same goes with the sugar.Add or reduce according to your choice.You can skip adding the sugar while making the tea if you prefer adding it to your cup while serving.
  • Do not simmer the tea for more than 1 minute as it will make the tea stronger and in turn bitter.Add 1 tsp of tea leaves per cup and simmer for 1 minute and you will get perfectly brewed tea.Not too strong and not too light.
Some snacks which pair perfectly well with a cup of tea -

Monday, October 8, 2012

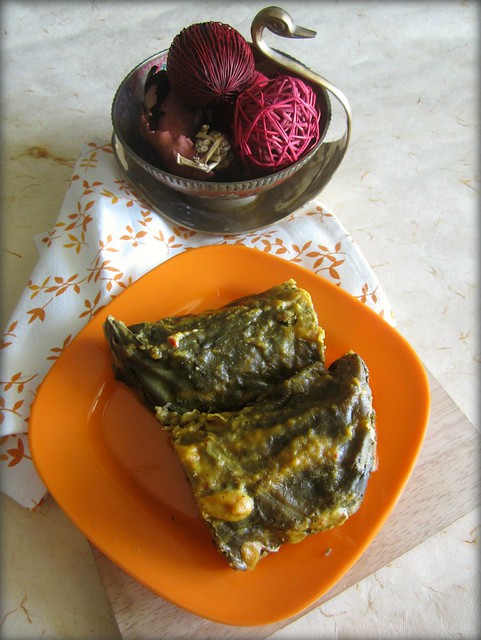
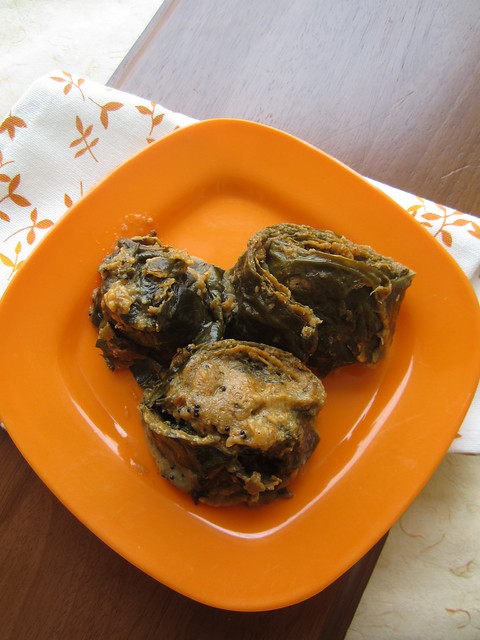
Pathrodo - A Konkani Delicacy

Sometime back a cousin of mine made a passing comment about the absence of Pathrodo/pathrode recipe here in my blog.She said a Konkani blog is incomplete without a recipe for the same.Though I didn't like the way the comment was put forth,I had to agree with her.Along with Daali thoy,Pathrodo is regarded as one of the most popular and loved dishes in Konkani cuisine.With over 100 recipes from our cuisine in the blog and no place for pathrodo is indeed a pity!
Pathrodo
It is not that I do not like/cook pathrodo,far from it.As any other amchi,I can eat pathrodo on a full stomach and still enjoy it fully.I have at least a hundred pictures taken of the various steps involved in cooking the same,but when it comes to the final dish,I do not even have one single good shot.No prizes for guessing why.No one is patient enough to take pictures when there is piping hot pathrode,straight from the steamer right in front of you waiting to be devoured.

Sometime back,I made it specifically for the blog(wow,that makes me feel good!)and struggled to take pictures as usual.Being home alone didn't help either as I just couldn't wait to plonk myself on the table and attack it.I managed somehow.
Pathrodo
                                          Phanna Pathrodo
How would it sound if I posted here not one but two kinds of pathrodo,that would be double the fun right?The second recipe is a quick version which gets you the pathrode in under 1 hour from the kitchen to the table,which of course without doubt is my ma-in-law's recipe.So get a cup of coffee and relax yourself because you need some time to go through the slightly long(but not complicated!)recipe.
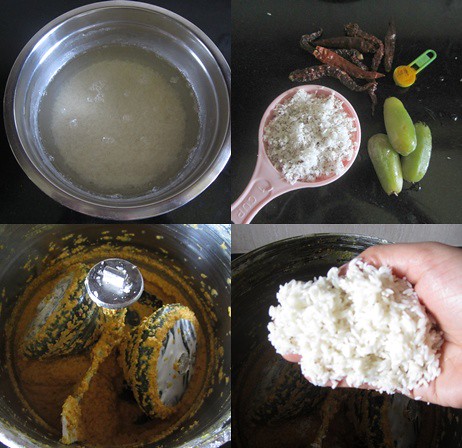
taro leaves/pathrodya paan Preparation - Pathrodo/Pathrode is a Konkani delicacy made with Colocasia leaves stuffed with a rice,coconut and spice paste and then steamed or pressure cooked or even fried.The leaves used for making the pathrode are usually known as taro leaves,pathrodya paan or terya paan.The leaves should be stored in a plastic cover(preferably in the refrigerator)as using them immediately could cause itching.Using a thin knife,remove the thick veins as otherwise it wouldn't be possible to roll the loaves.bimbul
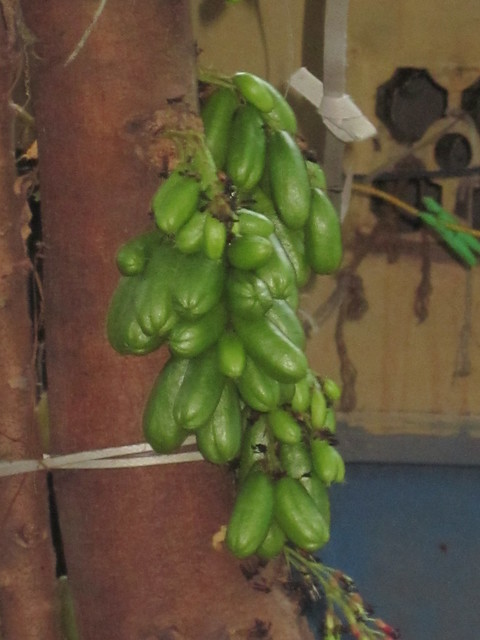
Star fruit/Bimbul/Carambola is usually used as the souring agent for the stuffing.It is also known to reduce the itching of the leaves.However,if you do not have the same,go ahead and use tamarind.
pedavan 
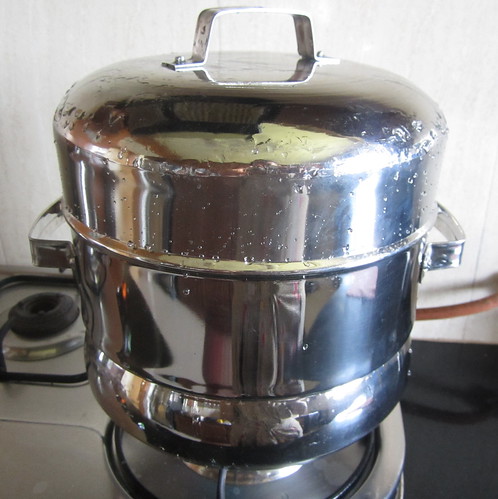
For steaming the pathrode,a traditional utensil named as the Pedavan is used.However it can be substituted with a steamer or an idli cooker.

Palak Pathrodo - A twist to the original

Pathrodo - Traditional Steaming method

Ingredients

Pathrode paan/Taro leaves - 20-22,cleaned
Raw Rice - 1 cup
Grated coconut - 2/3 cup
Red chillies - 5-6
Haldi/turmeric - 1/2 tsp
Bimbul - 5-6
Hing/Asafoetida - 1 tbsp
Salt to taste

Method

Pathrodo-step1 
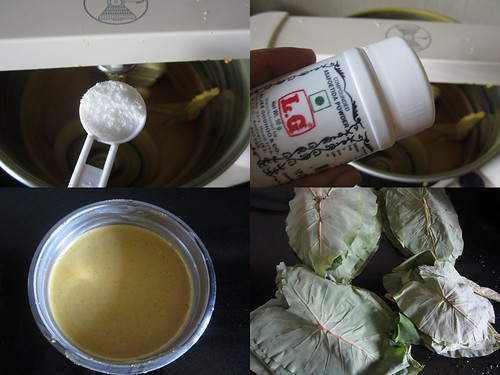
Soak the rice for 2-3 hours.Grind a masala paste using coconut,red chillies,haldi and bimbul.Mix in the soaked rice,salt and hing and grind till you get a thick paste.
Pathrodo-step2 
Keep the leaves and masala paste ready.Fill the pedavan/steamer with enough water and switch on the flame.
Pathrodo-step3 
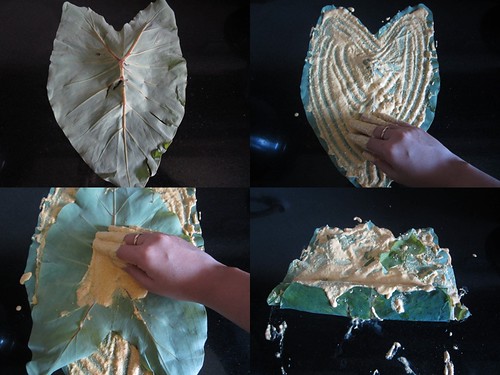
Make the stuffing - Place a big sized leaf on your work surface,smear the masala paste.Repeat with another small sized leaf and continue the process with smaller leaves till you use about 6-7 leaves. 
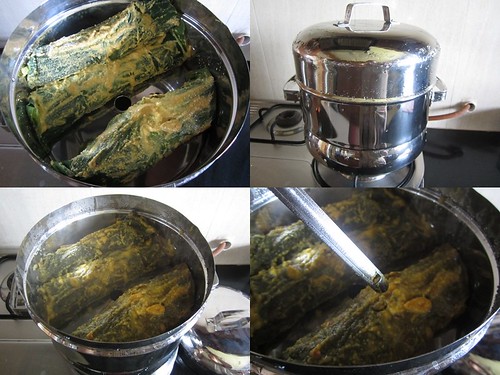
Roll the loaf tightly(as you would a swiss roll)and keep the seam side down.Place the prepared loaf in the pedavan/steamer.Repeat the process till you finish the leaves and the batter.Pathrodo-step4
Cook the pathrodo loaves for about 45 minutes to an hour on simmer.Check for doneness using a thin knife or a ladle,if it goes in smoothly and comes out clean,the pathrode is cooked.Do not cut down the cooking time as this would not cook the leaves and will cause itching.
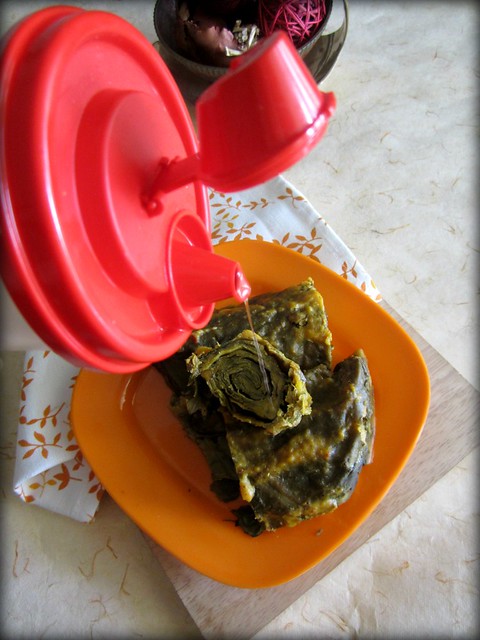
Pathrodo 
Serve hot with a drizzle of coconut oil.

Phanna Pathrodo - coming up next.

Monday, April 23, 2012

Homemade Garam Masala

I have heard varied opinions from people about garam masala.My ma-in-law for instance hates garam masala in any curries.She says it is primarily because of the strong taste of it which spoils the dish.But I love the distinct taste of garam masala and cannot imagine not adding it to my north indian gravies or pulaos.


I don't remember using a store bought garam masala at all but once when I was out of my home made one and had to rely on a very popular brand,I understood why ma-in-law hated it after all.It doesn't have a balanced taste and one flavor was very dominating.It does spoil the taste of the final dish after all.
Amma always makes a small batch every now and then.She believes freshly ground homemade garam masala wins above anything else.I completely agree.This time when I was home,we made a slightly big batch as I had to bring it back with me to last a while.It stays fresh when kept in an airtight box or tupperware.I remove a small portion and keep it for my regular use,this way you wouldn't have to keep using it from the big batch which might kill the flavors in the long run.
Homemade Garam Masala


Ingredients


Cardamom - 50gms
Clove - 50gms
Cinnamon - 50gms
Pepper - 50gms
Javitri/Mace - 50gms
Star anise - 50gms


Method


Mix together all the spices and dry in hot sun for 2-3 hours or till the spices are warm and dry.
Alternately,place the ingredients in a microproof bowl and microwave for 1 minute OR roast the spices in a thick bottom kadai for 5-10 minutes on very low flame,keep stirring now and then to avoid burning.
In small batches grind the spices in a mixer till it becomes a coarse powder.If required,sieve the mix and grind it again.
Let it cool down to room temperature and store in airtight containers.
This measure yielded 250gms of Garam Masala.


Notes
  • We have used spices in equal measures so that there is a combined flavor and no flavor dominates the other.
  • If you do not use garam masala in your recipes frequently,make a small batch to keep the flavors intact.
  • I have seen recipes which use Coriander seeds,Saunf and Jeera among other spices.Add spices according to your taste preference.
Use the freshly ground Garam Masala to make Biryani,Pulao or any North Indian gravy.Homemade Garam masala is the best choice for adding to Fruit Cakes too!

Sunday, March 11, 2012

Sreedevi's Rice Kondattam

There are many foodie groups on facebook of which I am a part of.So my facebooking also involves checking out what people(sometimes friends,sometimes family too)are cooking in their kitchen and what experiment turned into disaster and which one tasted out of this world.
Sreedevi,a dear friend's wife is someone who clicks and posts everything she cooks in her kitchen on her facebook profile.She is a very pleasant and enthusiastic girl who replies within seconds when I ask her for a recipe and I love her for that.I've been telling her to start a blog of her own since she has such an array of dishes,but (it seems)she is content with her facebook album.


So I invited her to share her recipe for Easycooking readers and she readily obliged.She has prepared Rice Kondattam from scratch,something which even I have not attempted till date.Kudos to you Sreedevi!


Rice Kondattam
Ingredients


Raw rice/Pachari - 1 cup
Boiled rice/Puzhungalari - 1 1/4 cup
Salt - approximately 3 spoons
Green chilly - 3-4
Black sesame seeds - a handful


Method


Soak the raw rice and boiled rice together for 4-5 hours.
Blend together everything except the sesame seeds to a smooth paste adding enough water.
Add 2 - 2 1/2 cups of water to the batter and mix well.
Cook this batter on medium flame stirring continuously till the batter starts turning thick.
Keep stirring till the batter attains a wobbly consistency-thicker than dosa-idli batter.Take care not to overcook after this stage which would make the odi/vadi dry.
Switch off and add the sesame seeds.Mix well.
To prepare the odi/vadis
Drop spoonfuls of batter on a plastic sheet or baking paper and dry in sunlight till the vadis get dried completely.Anywhere between 2-3 days depending on the weather.
Tip-Spread baking paper on a thick cardboard sheet so that it becomes easier to take the sheets in and out while drying.


Heat oil in a kadai and fry the odi/vadis till crisp.It takes less than a minute to fry up one batch.


Happy Cooking!

Tuesday, July 5, 2011

How to make Cake flour

Type 'Cake flour' on Google and you'll get so many links on how to make it with just 2 ingredients in your pantry.Or if you are lucky enough to spot it in your supermarket,nothing like it.Then why am I posting a well-known how-to on my blog.Well,I am making a cake which requires Cake flour and I don't get to buy it off the shelves here and have to make it on my own.Might as well tell you people how I went about it!


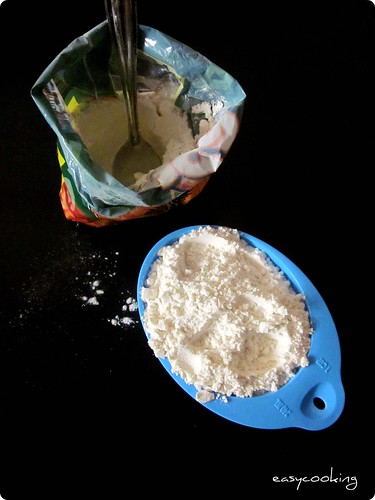
As I said,you just need two ingredients.All purpose flour and cornflour.


IMG_5391


Measure out 1 cup of all purpose flour.


IMG_5395


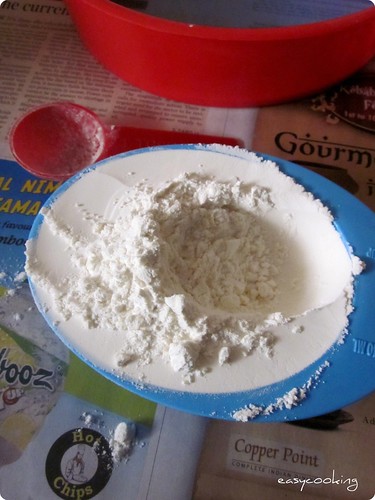
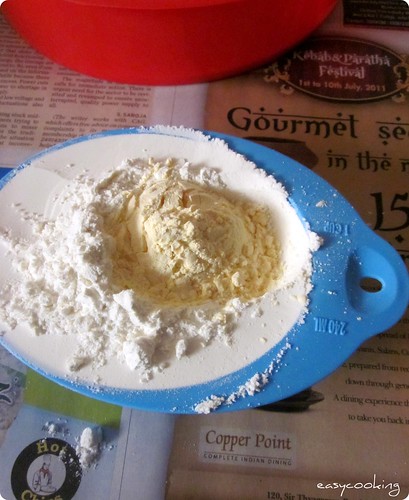
Remove 2 tbsp from the measured flour and 


IMG_5396
add 2 tbsp cornflour*.


IMG_5400


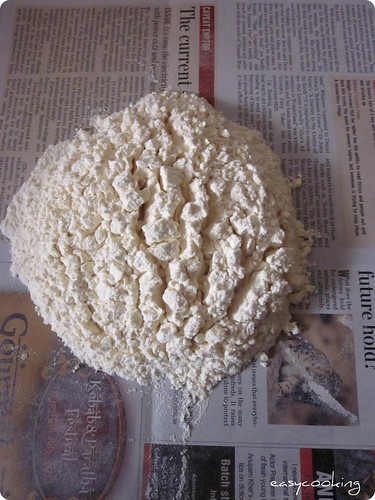
Sift together for 3-4 times so that both the flours are mixed well.There,you have your cake flour.Now go bake the cake and eat it too!!


*I ran out of cornflour,so substituted it with Vanilla flavored Custard powder.Did that make any difference to the final product,ie the cake I baked?Stay tuned and I'll let you know;)


Related Posts Plugin for WordPress, Blogger...
 
Pin It button on image hover