Showing posts with label Product Review. Show all posts

Monday, December 14, 2020

Inalsa Kratos Stand Mixer Review | Product Review


As a baker,owning a good,sturdy stand mixer has always been on my bucket list.However,we did not get any sturdy mixers in India till a few years back and the ones available were imported ones and carried a heavy price tag.

In 2013,I got myself a basic stand mixer from abroad and even though it was just a hand held mixer with a bowl,I was quite happy with it.Only when it conked off and gave up on me completely did I seriously start looking out for a stand mixer.I had only a few requirements though - a good whisk for cake batter and for mixing frostings - buttercream,whipping ganache etc and a basic dough hook for kneading dough,though I wasn't very particular about dough hook as I knead my bread dough in my food processor.

When I held a poll in Instagram,majority of the votes came in for KitchenAid,no surprises there and many told me to go for it in spite of it's hefty price(it retails for 46k in their website).I wasn't ready to make an investment that big and looked for affordable alternatives.


After checking out a lot of reviews and videos,I zeroed in on Inalsa Kratos Stand 
mixer.It was priced reasonably and had all the attachments I was looking for with a 5 liter bowl and a dough hook as well.I decided to go for it and after using it for almost 2+ months,I'm quite happy with it.

So let's see the features of the mixer first -

  • Inalsa Kratos comes with a 1000W motor 
  • It has a 5 Liter Stainless steel bowl
  • 8 level speed controls with pulse function
  • LED indicator,dust proof splash guard,Safety lock protection,Anti-slip feet
  • Attachments include - Main unit with 5 Liter Stainless steel bowl,1 Whisking cone,1 dough hook,1 mixing beater,1 splash guard along with instruction manual.
  • Also includes a Inalsa certified 2 year warranty.
I put up a Q&A on Instagram asking people what they wanted to know about the mixer and received many queries.I will address that first before going into the review.


1.What is the price of the mixer ?

 I purchased it for 9k from Amazon and the price is more or less the same today when I checked too.

2.How sturdy is the mixer?

The mixer comes with an Anti slip feet and is quite sturdy.It stays firm while mixing cake batters,making buttercream or while making cookie dough.However it moves ever so lightly while kneading bread dough.I have read reviews on Amazon which said it walks on the counter etc and moves a lot but haven't faced anything of that sort.If we stick to the recommended speed for each requirements,the mixer does not move at all.

3.What is the purpose of the stand mixer,does it make a huge difference than the usual hand beater?

Having a stand mixer makes you go hand free while mixing cake batters or kneading dough for breads.It helps when the mixing process is long(buttercream) or beating eggs(for cake).Also,stand mixer is more powerful than the regular hand beater.

4.How many cups of flour can we knead at one go?

I started with 1 1/2 cups of flour and have made dough with 4 cups of flour as well and the mixer comfortably has space for more.The maximum amount to be used is 600 gms of flour.

5.Is the mixer sturdy,does it vibrate at high speed?

I have answered this but adding a few points more.The manual comes with very clear instructions on speeds to follow while using different attachments.If we follow this there is hardly any vibrations or movements.

6.Does the mixer heat up while mixing?

Like I said before,if we stick to the basic speeds according to the attachments,it doesn't heat up.I have kneaded dough for up to 10 minutes and the mixer did not vibrate or heat up.

7.What attachments do you use most often?

I use the paddle attachment/beater attachment for making cookie dough,making buttercream.Whisk attachment for making cake batters and whisking ganache.
However the one I use the most is the dough hook for kneading bread dough.

8.Do you find any difference in hand kneaded dough or mixer kneaded dough?

No difference except in the time and effort involved.


After going through the questions I understood the majority of them wanted to know about the dough hook attachment and how sturdy the mixer was while kneading bread dough.So I will mainly focus on that in this review.


The mixer,like I said,comes with a manual which clearly indicates the speeds to be used for each attachments.For the dough hook,the speed levels are 1-5 and the time is 3-5 minutes.

1 speed run for 30 seconds,3 speed run for 30 seconds and then 5 speed run for 2-4 minutes to form a cluster.It clearly indicates that the mixer will wobble if we go above speed 5.


Now after using it for a couple of times,I follow my own speed patterns.For instance,I run it on speed 4 for about 2 minutes and then switch off for a minute.Continue 2 minutes on speed 5 and then again switch off.Like this I do 2 minute runs in speed levels 4-5 and get my dough kneaded beautifully in under 10 minutes.

What this does is,the mixer does not heat up.The dough gets rested in between kneading and we get good windowpane in about 6-7 minutes.It does sound a bit confusing at first but once you start using it,you will understand the pattern and it will be so easy to operate the mixer without any wobbling or vibrating.

However I would suggest you use the mixer with a minimum of 2 cups of flour.Anything less than that and the hook struggles to reach the bottom.I have made dough with 1 1/2 cups and even though I did get a beautiful dough(and a good loaf of bread)I got better results while using more flour.


I am a happy customer and if you were considering to buy this mixer and were hesitant to do so after reading the reviews,take my word for it and go ahead.For the price it is truly a deal!


I purchased this mixer myself and this is my honest review :)

Thursday, August 2, 2012

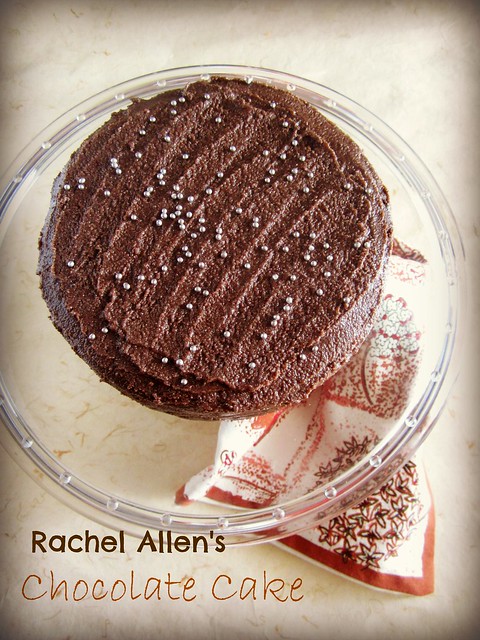
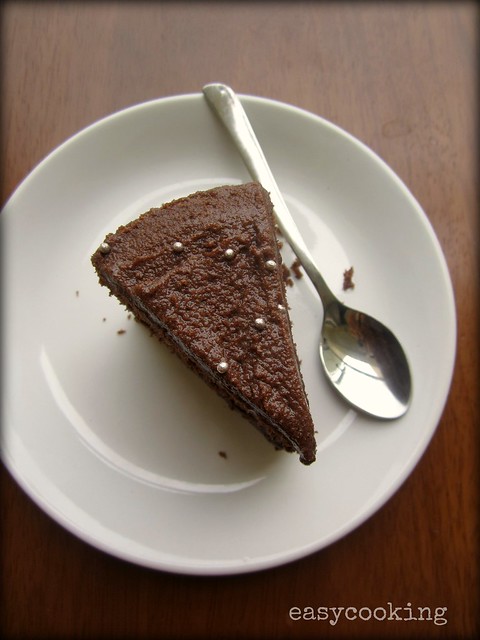
Rachel Allen's Chocolate Cake,a Product Review & Giveaway!

Rachel Allen's Chocolate Cake

I don't know how many times I've admitted it here,but saying it again anyway.I love a good chocolate cake.Any occasion which demands a cake has to be chocolate for me.Very rarely do I enjoy being a non-chocoholic when I bake stuff like these,but however it is chocolate all the way for me.(tell me how many times I've said chocolate in this paragraph and you'll win this giveaway-hehe,just kidding!)

Rachel Allen's Bake is one show I never miss on TLC.Though at times I feel she overdoes it a bit,her recipes are awesome.Her cooking classes even better.This chocolate cake featured in one of her cooking classes and the ease at which it could be made tempted me.I wrote down the recipe and planned to try it at the next opportunity.Sadly,it was forgotten soon after.
Rachel Allen's Chocolate Cake

Few days back,I saw a re-run of the same episode and I told myself I shouldn't delay baking this any further.Any cake recipe which calls for a good amount of frosting makes me sit up.I try not to put too much frosting on my cakes,but what is a good chocolate cake without a great amount of chocolate frosting on it anyway.
Rachel Allen's Chocolate Cake

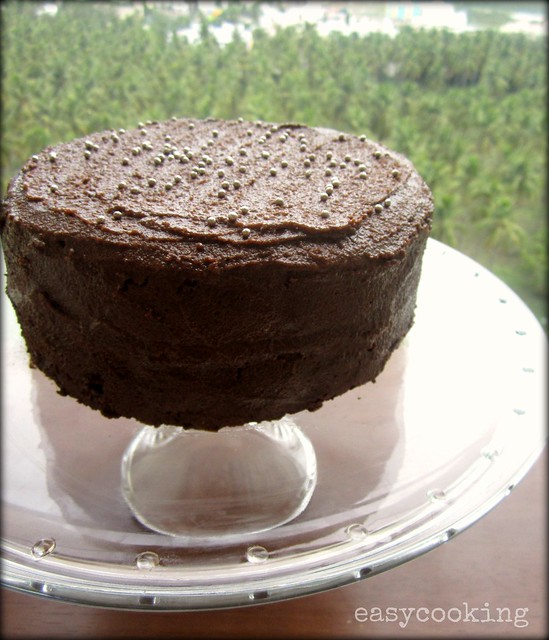
I got the perfect reason to indulge when Neelam of Urbandazzle sent me this beautiful cake platter to review.I've always wanted to own a cake platter to show off the cakes I bake,but due to the limited options available,had to resort to dessert plates.This Palladio Footed Cake platter solves the misery for me by being the perfect platter to showcase this sinful chocolate cake.
Rachel Allen's Chocolate Cake

Rachel Allen's Chocolate Cake

Ingredients

Dark Chocolate - 125gms / 4 1/2oz
Milk - 3 tbsp
Butter,softened - 150gms / 5oz
Caster Sugar - 150 gms / 5oz
Eggs - 3
Flour - 200gms / 7oz
Baking powder - 1 tsp
Baking soda - 1/4 tsp

Method

Preheat oven to 180C.Grease/Line two 8' pans.
Rachel Allen's Chocolate Cake-step2 
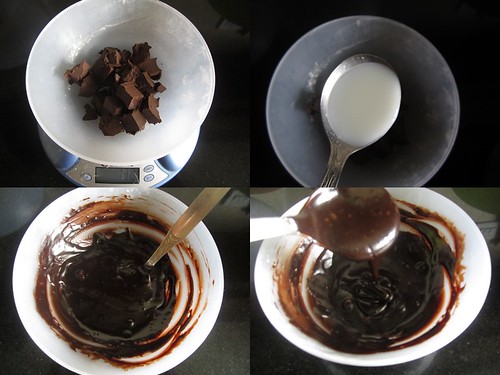
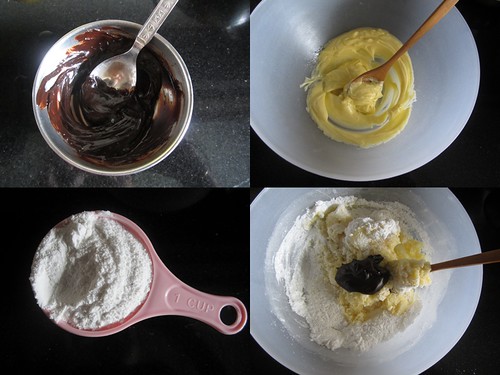
Place the chocolate and milk in a microproof bowl and microwave on full power for 1 minute.Stir well to get a smooth mixture.
OR
Place the chocolate and the milk in a bowl sitting over a saucepan of gently simmering water and heat until then chocolate has melted.
Rachel Allen's Chocolate Cake-step1 
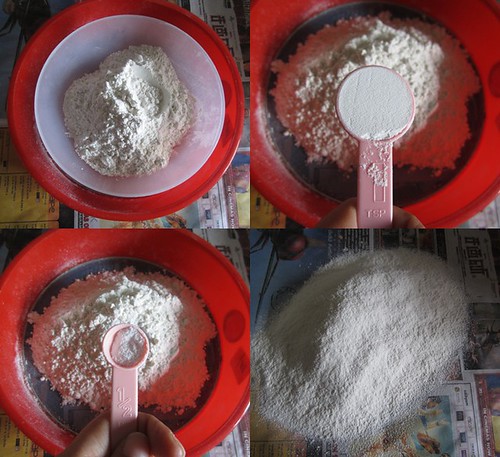
Sift together flour,baking powder and baking soda.Reserve.
Rachel Allen's Chocolate Cake-step3 
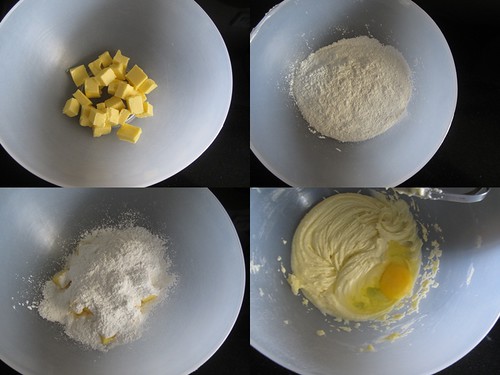
Beat the butter till soft and then mix in the caster sugar and beat together till creamy.
Mix in the eggs one at a time beating well for one minute after each addition.
Rachel Allen's Chocolate Cake-step4 
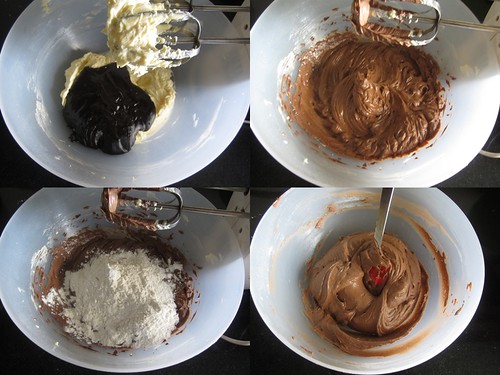
Fold in the melted(and cooled) chocolate.
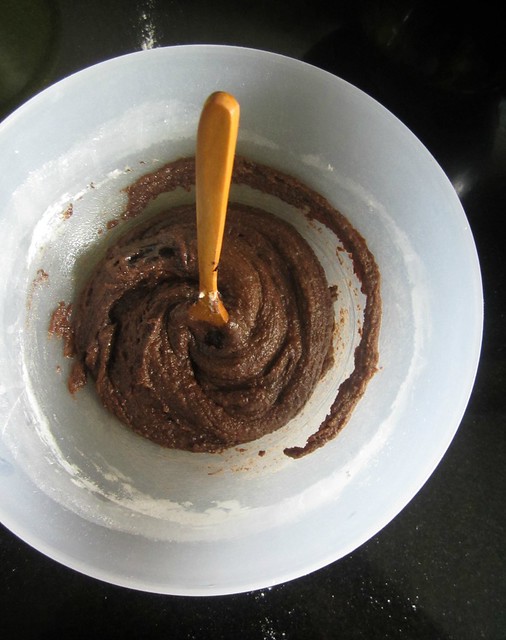
Add the flour mix and fold in gently to mix.I did this in three lots and used my hand mixer for the first two lots and then used my spatula for the last lot.
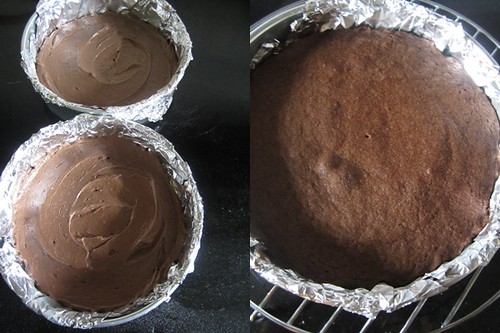
Divide the mixture between two tins and bake for 25-30 minutes or until a skewer inserted into the middle of the cake comes out clean.
Rachel Allen's Chocolate Cake-step5 
Remove the cakes from the oven and allow to sit for a few minutes before turning them out of their tins and placing on a wire rack to cool.
Rachel Allen's Chocolate Cake

 
Chocolate Buttercream Icing

Ingredients

Softened butter - 1/2 cup/100 gms
Icing sugar - 2 cups(I used powdered sugar which makes the frosting a bit grainy)
Cocoa powder - 2 tbsp
Boiling water - 2 tbsp

Method
Rachel Allen's Chocolate Cake-step6 
Mix together cocoa and boiling water to a smooth paste.Let it cool.
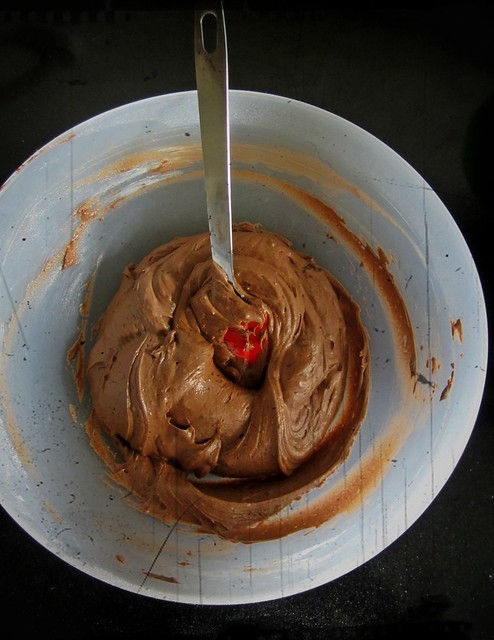
Beat together butter and icing sugar till creamy.Fold in the cooled cocoa paste and mix together to form a smooth icing.
Rachel Allen's Chocolate Cake

Assembling the cake
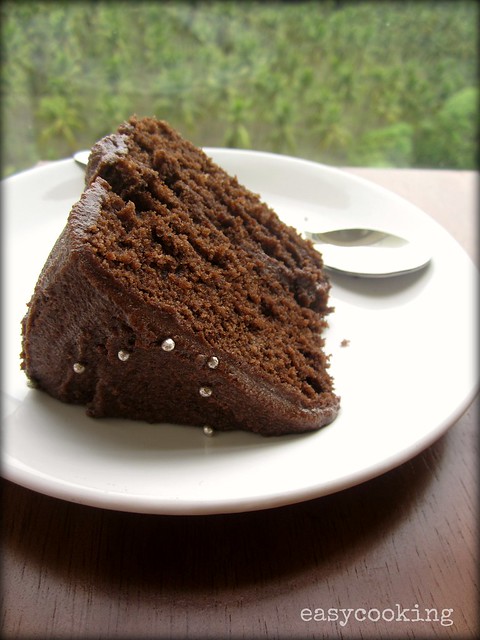
In a cake platter place one of the cakes and apply 1/3 of the frosting on top.Place the other cake on top and put another 1/3 of the icing to cover the top and use the rest to coat the sides.
Top with sprinkles or silver dragees.
Urban Dazzle Product Review & Giveaway 

Much has been written about how difficult it is to procure bakeware and baking tools in India.Not anymore.Check out Urban dazzle for some amazing collection of bakeware,which includes Ramekins,Springform tins,Brioche tins,Silicone pans,Glassware etc.They also have in store Cheese Domes,Tiered plates(perfect to showcase those pretty cupcakes!)and not to forget those pretty Cake plates I've longed to own.

They have a wide variety of Kitchen essentials too.Non-stick cookware,Mixing bowls and a Home Bakery Mini Breadmaker too.
The packing is immaculate.Makes sure what you've ordered for doesn't come in bits and pieces(what a horror!)

And here's the most interesting part.Urban Dazzle is offering a Giveaway to one of the lucky readers of Easycooking.

All you have to do is comment on this post.You can say a word or two about what you wish to own or what you wish to see in the bakeware list or just anything.
The lucky winner gets a Devnow Ceramics Ramekin with Cover(set of 3 pieces).So what are you waiting for-start commenting!

I will be picking a random winner on 7/08/12.  Giveaway is closed.

Disclaimer - The Cake platter was sent to me by UrbanDazzle as part of a product review.The Giveaway too is sponsored by them.

Wednesday, December 21, 2011

Crust N crumb Plum Cake Mix-Product Review

I seldom bake using cake mixes.Or rather if cake mixes were cheap(and good!)I'd have never learnt to bake.So it was with slight apprehension I got this packet of cake mix which was highly recommended by the shopkeeper at Staines,Ernakulam where I do my shopping for baking products,tins and other stuff.It has been almost 3 months since I got it and it would have definitely have gone unnoticed if not for the kitchen clean up during our shifting.
I have no clue if I'd be baking my yearly Fruit cake this year as I'd be neck deep in settling down in the new house and I have family visiting during Christmas.So I decided to try this anyway.It is quite easy to bake using a cake mix as you are basically required to mix everything together without all the weighing and sifting.


Have to say the cake batter smelt wonderful and I had high hopes about how the cake's gonna turn out.Not disappointing at all.Though honestly,it is no match to the meticulously made fruit cake but works out well as a substitute in a hurry.It is easier to bake this cake than to go out to bakery to buy one and it costs only 60rs!
I found the cake to be a little on the dry side but taste wise it was like those plum cakes you get off the shelves from bakeries.The taste improves as you keep it so make sure you bake the cake in advance if serving for guests.There are options to bake this cake in the microwave and also in the pressure cooker.
Check out their website for more info.


Disclaimer-This is not a paid review.I used this product and thought of sharing my experience with my readers.


Wishing all my readers who celebrate a very Merry Christmas.If you are looking to bake a fruit cake from scratch,do check out my archives and posts-


Christmas Fruit Cake - 2008
Christmas Fruit Cake - 2009
Christmas Fruit Cake - 2010

and here's an Eggless Version.Happy Holidays!!


Wednesday, November 30, 2011

Maggi Bhuna Masala-Product review

Most of the times,when required to make a North Indian gravy one thing which puts me off is the whole onion-tomato slicing-sauteing and the grinding part.Of course,when I feel like eating something badly,nothing looks like an effort.But for those lazy times,Maggi Bhuna masala is the perfect answer.
There are two varieties available.One with ginger-garlic and one without.They say the onions and tomatoes are sauteed using just 1 spoon of oil,a relief for us who think a lot about the fat content in packaged foods.Maggi is a trusted brand in India,so this one was on my must-try list.I got around 5-6 packets and decided to explore the possibilities,fueled by the ads.
I made Dal Tadka using the Bhuna masala for Vegetables/Dal and was pleasantly surprised.I haven't tried making anything else with dal other than the usual yellow dal or dal tadka.This one had a typical dhaba kind of taste to it.I don't know if I'd try it again using homemade ground masala,but it tasted good with rotis and I guess that's what counts.
Speaking of rotis,how can a tomato fry with vegetables fall behind?I resort to good ol' tomato fry whenever there's a dearth of vegetables or I am too lazy to try something elaborate.Using the bhuna masala for vegetables,I added tomatoes,green peas and capsicum and gave a li'l twist to our regular tomato fry.It was a bit too tangy for Ajay but perfect for me to mop up those rotis.
Next recipe I tried was Rajma masala.We both love Rajma masala and I had high hopes from the same dish made with bhuna masala for gravies.I loved the final dish but felt the masala was not enough for the Rajma dish if it was to be served for a family of four.It was just sufficient for us.Ok,I could just go ahead and add two packets and more Rajma,but just saying.
Mention north Indian and how can we forget Paneer.I wanted to try out Paneer butter masala but the Paneer matar they showed in ads was too tempting and I decided to try just that.I am amazed by the ease in which we can make this delicious dish in just 15 minutes or less if you have Paneer and frozen green peas ready in the fridge.(sorry for the straight out of the pan pic!)


Check out their site for more recipe ideas and more info about the product.


This is not a paid review.I used and liked this product and just thought of sharing it with my readers.


--------


For my readers who love their cup of coffee,Times deal have an amazing offer of Buy any beverage and Get another one absolutely Free @ Barista Lavazza. This deal is available Pan India.


Tuesday, May 31, 2011

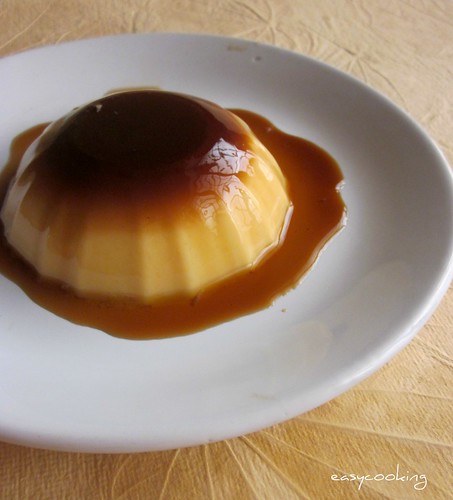
Cremelle ~ Instant Caramel Custard-Product review

IMG_51055
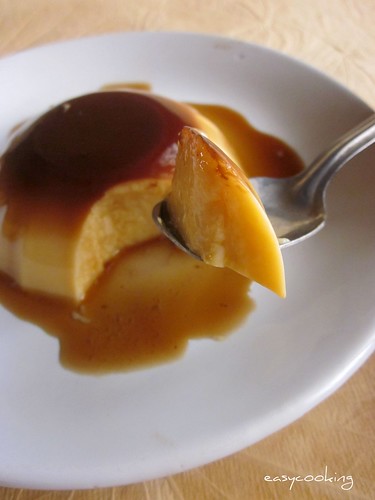
Do you like Caramel Custard?I used to love it but these days cannot eat it to my heart's content  because of the strong eggy smell,seems like my taste buds have changed over time.I searched a lot for eggless Caramel custard recipes but I was told the texture of the custard is difficult to achieve if no eggs are added.I came across this instant Custard mix which gives a perfect result,without eggs.


Cremelle is a product by Weikfield and is an instant Caramel Custard mix.While the traditional custard recipe requires a mixing-steaming-cooling process and the caramel part,this one gets done in less than 10 minutes from start to finish.
IMG_51066
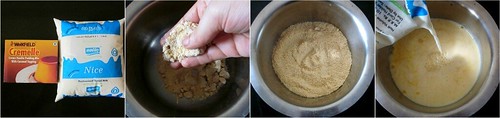
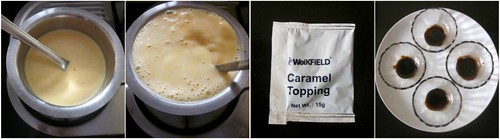
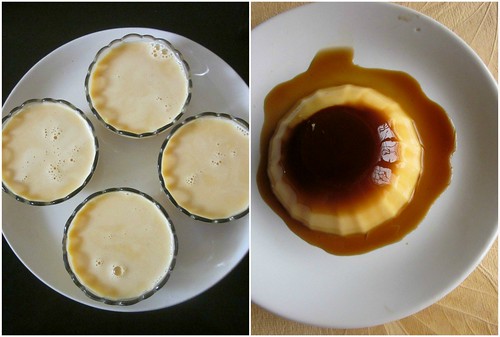
Cremelle comes with an Instant mix Custard powder and a ready-made Caramel syrup which you just need to pour into one big bowl or 4-5 small ramekins or dessert bowls.Boil 500ml milk with the custard powder mix provided till the milk boils.Cook for another minute stirring continuously and then switch off the flame.Let it cool for another 5 minutes and then pour into the bowl/bowls into which the caramel syrup has been poured.Keep in the fridge to cool and then invert and serve.
Picnik collage

Picnik collage


Picnik collage
Only disadvantage I find with this is the Caramel part.First thing,it is not enough for 4-5 bowls,since I like the custard to be in caramel syrup and not just a caramel coating.Sometimes,the caramel has a faint smell and is a deep black color.Times when I am in a good mood,I prepare caramel myself and use only the custard part,which gives me Golden colored caramel and the custard looks [and tastes] great!


I've been using this to make Caramel Custard for years now and love it that each and every time I get the same taste and texture,but without the egg smell[and the eggs!]


Disclaimer-Cremelle has not paid me for this review.I've been using this product for some time now and just thought I'd share this with you!
Related Posts Plugin for WordPress, Blogger...
 
Pin It button on image hover