Friday, October 23, 2015

Arjun is ONE!

A week back we celebrated Arjun's First Birthday,can you believe it?He turned ONE,I mean,wasn't it few days back I shared the Happy News with all of you?Apparently not,time just flew past without us even noticing and just like that he grew up from an infant to a toddler :)
Arjun is ONE 
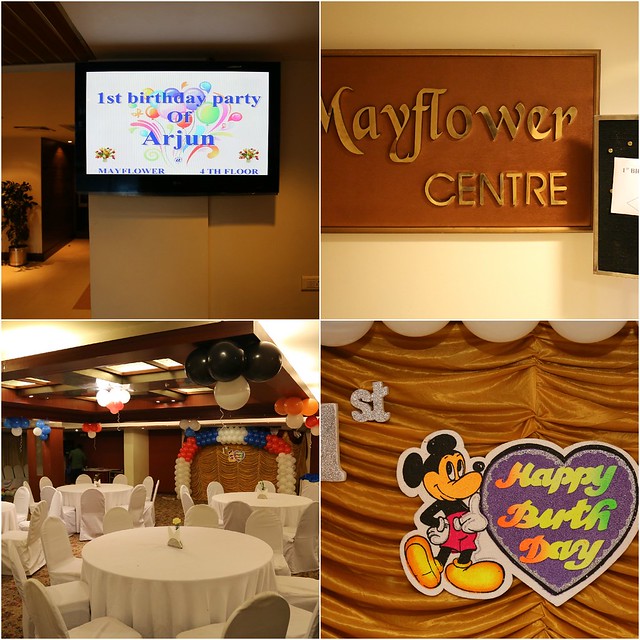
Just like every mother does,I started planning for his birthday right from the time he was a few days old.Plans kept changing a number of times and in the end we decided on having a small get together of very close family and friends.Date was fixed,venue was decided and menu chosen too.I had decided to bake his Birthday cake despite knowing I get stressed if at all there are any glitches.I chose quite a few cake designs and discussed with Ajay.He was very clear-I either bake a simple cake or else we'll outsource the cake.

He knows me too well.Whenever there is a cake order and if there is even a minor problem,I stress.It is a different thing that I've overcome that stage of fearing-if-anything-goes-wrong,but I didn't want to take a chance.I chose a very simple cake design and decided to stick with it.
Arjun is ONE Call me fortunate that I have the Cake Goddess Subhashini at my beck and call for any doubts I have and I had plenty!I hadn't done a tiered cake before and she rendered her full support to me.A week back,I purchased all the ingredients required and planned on a timeline around which I had to start baking/filling/crumb coating the cake.
Arjun is ONE 
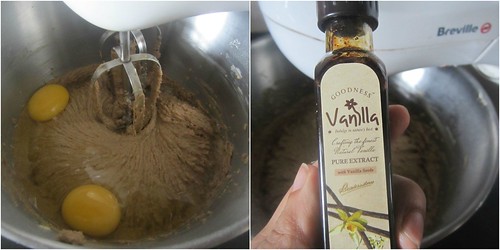
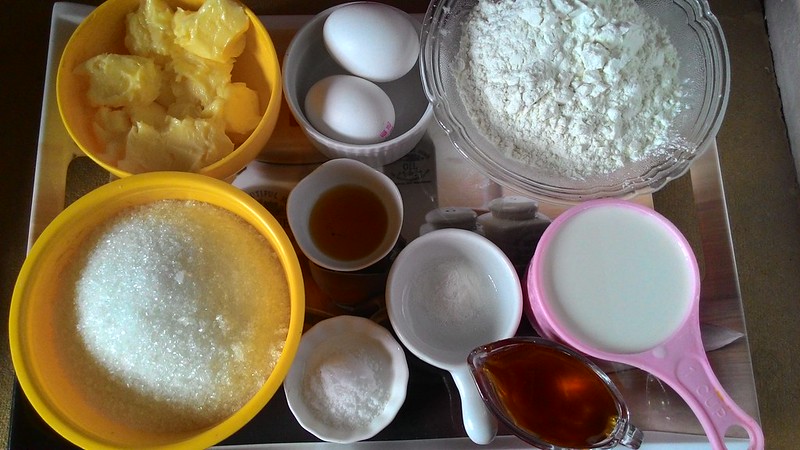
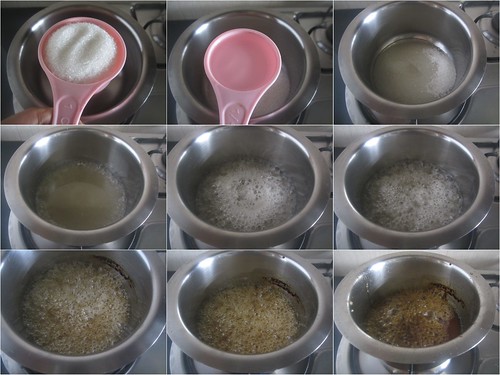
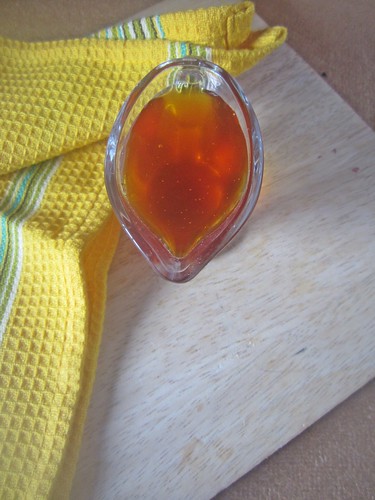
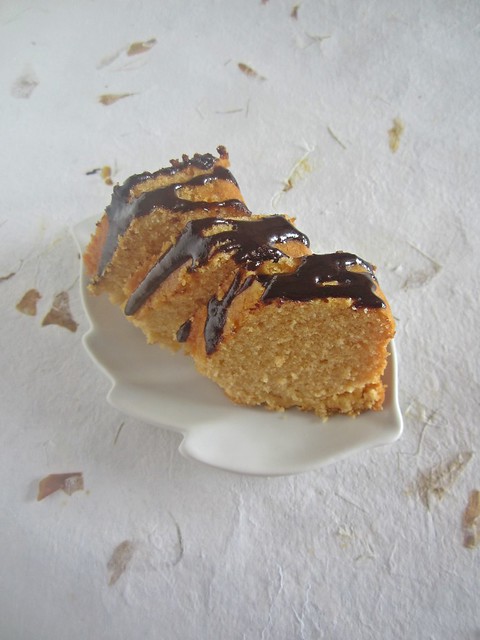
The flavors were decided much earlier too.I am a big fan of Neapolitan cake and the flavors were inspired by that one-base tier was Vanilla with Caramel filling,middle tier was Chocolate with ganache filling and top tier was Strawberry with ganache filling.I baked the cake one day in advance,cling wrapped and refrigerated it.The fillings-ganache,caramel sauce and the frosting-white chocolate ganache too were made a day in advance.
Arjun is ONE 
I thought I had everything planned and ready but things were not supposed to be so smooth.Sadly,Arjun fell ill on the day of the party.He was running high temperature and all my cake plans came to a halt.Luckily,I had both sets of parents around and somehow I managed to pull it off.Not without the help and support of our parents,Ajay,Subhashini and last but not the least,my maid who made sure everything was cleaned and organized :)
Arjun is ONE 
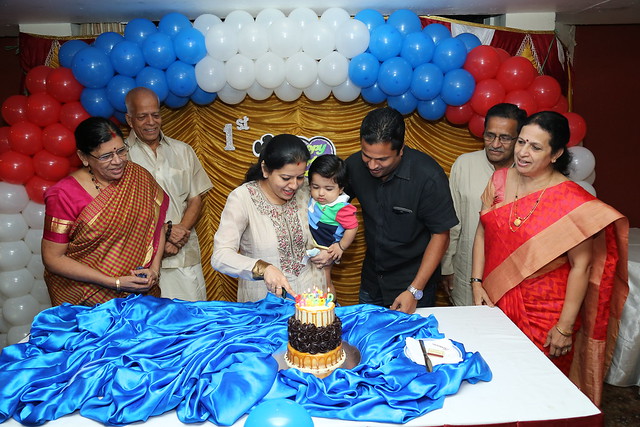
Party went on well by God's grace and seeing happy faces all around made every effort worth it :)I am already looking forward to his second birthday :) :) 

Wednesday, September 30, 2015

Tomato Biriyani | Easy Rice Cooker Recipes

Tomato Biriyani
Repeating a recipe twice or thrice after trying it out for the first time,that too in a span of 10 days does say a lot about the recipe isn't it?I had bookmarked this recipe from Yummy Tummy a while back but never got a chance to try because mention Tomato rice or in this case Biriyani Ajay makes a face.He likes vegetables in his biriyani or else it has to be a non-vegetarian one.
Tomato Biriyani
One day when I was alone for lunch,I made this.These days getting everything ready for cooking seems to occupy a lot of my time.I have to keep a tab on Arjun who is now too anxious to know what is inside my kitchen cabinets :) All cooking happens when he is asleep and I schedule everything around that time.
Once you have everything ready,cooking this one is a breeze.Primarily because it is made in rice cooker.You can try making it on stove-top too or pressure cooker as well.

The best part is that Ajay loved this one.He tasted whatever was leftover for dinner and the flavors were spot on.I made this again for a ladies lunch potluck and they loved it too.I feel the recipe is a good base for adding core ingredients of your choice,maybe mushrooms or even paneer and green peas!
Tomato Biriyani
If you are a Biriyani lover like me,don't forget to check out some of my favorite Biriyani recipes

Cauliflower Biriyani
Mushroom Biriyani
Baby Potato Biriyani

Tomato Biriyani
Recipe source - Yummy Tummy

Ingredients

Basmati Rice - 1 cup
Ghee/Oil - 1 tbsp
Fennel seeds/perumjeeragam - 1 tsp
Cinnamon - 1' piece
Cloves - 2
Cardamom - 2
Onion - 1 medium,sliced
Green chilly - 1
Ginger garlic paste - 1 tsp
Red chilly powder - 1 tsp
Garam masala - 1 tsp
Haldi powder - 1/4 tsp
Sugar - 2 tsp
Salt to taste
Tomato - 2 medium,chopped finely
Coriander leaves - 1/4 cup,chopped
Mint leaves - 1/4 cup,chopped
Thick coconut milk - 1/2 cup
Water - 1 1/2 cups
Bread cubes fried - optional

Method

Tomato Biriyani 
Wash the rice well in running water twice or thrice and soak in enough water for 30 minutes.
Tomato Biriyani 
In a kadai add oil/ghee and splutter fennel seeds.Add cinnamon,clove and cardamom and stir for a minute.
Tomato Biriyani 
Mix in the onions and green chilly and stir till the onion starts changing colour.
Add ginger garlic paste and stir for a minute after which add the spice powders - chilly powder,garam masala and haldi.
Tomato Biriyani 
Mix in the sugar and salt to taste and give a good stir.
Add the tomatoes and mix well so that the masala coats the tomato pieces.Let it cook till the tomatoes turn mushy.Mix in coriander and mint leaves and switch off the flame.
Tomato Biriyani 
Add this into the rice cooker,top with soaked and drained rice and mix in coconut milk and water.Check the seasoning and switch on the rice cooker.
Tomato Biriyani 
Fry some bread cubes in oil(if you are using)till golden brown and drain on a kitchen towel.
Tomato Biriyani 
Once the rice is cooked,fluff it up using a fork and add the fried bread.
Tomato Biriyani
Serve with raita and pickle.


Thursday, September 24, 2015

Chocolate Chip Cookies

Chocolate Chip Cookies
I've been baking for about 7 years now and it is strange that I have not yet tried "the" chocolate chip cookie.I love it actually,so many new variants available in the market these days.But I've never tried making it on my own.Long back I did try an eggless version and liked it but the fact is,it never crossed my mind to try the original recipe.
Chocolate Chip Cookies
It could be due to one reason,for a long time I was averse to baking cookies with eggs.I was okay with adding eggs to my cake batter but not cookies.Over a period of time however I realized that I shouldn't have such preconceived notions if I am to try/better a recipe.It was when I tasted homemade chocolate chip cookies made by a friend that I felt I should make some too.Yup,as easy as that I decided I should make it myself.Aversion goes out of the window:)
Chocolate Chip Cookies
I looked around for recipes which did not call for copious amount of butter and chocolate chips and zeroed in on this recipe from JoB.As always,the recipe didn't disappoint.The cookies were chewy in the middle and crisp on the edges and loaded with chocolate chips.I messed up with the size the first time I made it though.My ice-cream scoop yielded massive palm sized cookies which in turn required more baking time.But I tried it again and used a spoon to measure out the dough and it gave me perfect sized cookies.
IMG_6267
Chocolate Chip Cookies
Recipe source - JoB

Ingredients

Butter - 1 cup/ 2 sticks /226 gms
Granulated white sugar - 3/4 cup / 150gms
Brown sugar - 3/4 cup /160gms
Eggs - 2
Vanilla - 1 1/2 tsp
All purpose flour - 2 1/4 cup/295gms
Baking soda - 1 tsp
Salt - 1/2 tsp
Chocolate chips - 1 1/2 cups

Method

Preheat oven to 375 degrees F (190 degrees C) with rack in center of oven. Line two baking sheets with parchment paper.

Chocolate Chip Cookies 
In the bowl of your electric mixer (or with a hand mixer), beat the butter until smooth and creamy. Add the white and brown sugars and beat until fluffy (about 2 minutes). 

Chocolate Chip Cookies 
Beat in eggs, one at a time, making sure to beat well after each addition. Add the vanilla and beat until incorporated.

Scrape down the sides of the bowl as needed.


Chocolate Chip Cookies 
In a separate bowl, combine flour, baking soda, and salt. Add the dry ingredients to the egg mixture and beat until incorporated, adding the chocolate chips and nuts (if using) about half way through mixing. If you find the dough very soft, cover and refrigerate until firm (from 30 minutes to two hours).

Chocolate Chip Cookies 
For large cookies, use about a 2 tablespoon ice cream scoop or with two spoons, drop about 2 tablespoons of dough (35 grams) onto the prepared baking sheets. Bake about 10 -14 minutes, or until golden brown around the edges. Cool completely on wire rack.
IMG_20150901_183030 
Makes about 4 dozen - 3 inch round cookies.

Monday, September 14, 2015

Pasta with Tomato Cream Sauce and Roasted Vegetables

Pasta with Tomato cream sauce &roasted vegetables
It's been a while isn't it,well every time I blog I hope it isn't a one-time thing and plan to continue with it at least once in a week but life has other plans.I've decided to take it as it is and post as and when when time permits :)


We love having Pasta for dinner at least once in a week.I make it the same way every time,with lots of vegetables,white sauce and very less cheese.So when we were dining out once and I saw Pasta with tomato and cream sauce in a restaurant,I was anxious to try it and see how it tasted.I love having a blob of marinara sauce on my plate when I have pasta anyway,so I was sure I'd like it.
Pasta with Tomato cream sauce &roasted vegetables
I wasn't wrong,the pasta was delicious.I wanted to try it at home and decided to go by my taste buds while adding the ingredients.To give it a healthy twist,I added some roasted vegetables as well.Paired with a cheesy garlic bread,this was a meal I was very eager to serve and eat :)

Check out other Pasta recipes here

Pasta with vegetables in white sauce
Whole-wheat Pasta in Roasted Red bell pepper sauce
Pasta with Tomato cream sauce &roasted vegetables Pasta with Tomato Cream Sauce and Roasted Vegetables

Ingredients

Mixed Vegetables - loosely 2 cups (I used Broccoli,Baby corn,Capsicum,Mushroom)
Onion - 1,cubed
Garlic - 2-3 cloves
Salt and Pepper to taste
Italian seasoning to taste
Olive Oil - 1 tbsp
Pasta - 1 cup,cooked al dente
Butter - 1 tbsp
Marinara sauce - 4 tbsp
Cream - 200 ml
Water-1 cup ( I used the water in which pasta was cooked)
Cheese - 1 cube (Amul)

For the garlic bread

Bread slices - 5-6
Garlic butter - 2-3 tsp
Grated cheese - 1 cube(Amul)

Method

Preheat oven to 200C.
Pasta with Tomato cream sauce &roasted vegetables In a baking tray mix together onion,garlic and the mixed vegetables.Add salt,pepper and Italian seasoning with Olive oil.Roast the vegetables for 20-25 minutes.
Pasta with Tomato cream sauce &roasted vegetables In a pan add butter and marinara sauce.
Pasta with Tomato cream sauce &roasted vegetables Mix well and add cream.Add enough water to make thin it down(I used about a cup).Add salt to taste.
Pasta with Tomato cream sauce &roasted vegetables Mix in the cooked pasta, Pasta with Tomato cream sauce &roasted vegetablesroasted vegetables and cheese.

Pasta with Tomato cream sauce &roasted vegetables For the garlic bread - smear the garlic butter on each bread slice,top with grated cheese and bake for 5-7 minutes.

Pasta with Tomato cream sauce &roasted vegetables


Friday, June 5, 2015

Vegetable Dum Biryani | Pressure Cooker Recipes

As I was going through my recent posts here,I couldn't help but notice the handful number of posts last year.It is not as if I deliberately kept away from blogging,actually I was missing it way too badly.The regular chore of cooking,photographing,editing and then composing a post,it's something I enjoyed doing immensely but somehow then I couldn't find energy to even cook our daily meals.So naturally blogging took a backseat.
Vegetable Dum Biryani 
I was craving spicy food by the end of my first trimester and during those times,one pot dishes like pulao,biryani came to the rescue.A Paneer curry and a pulao saw me battle my hunger cravings big time :)To all who say a good Biryani isn't made in a pressure cooker,I have to tell you-you don't know what you are missing :)

Vegetable Dum Biryani 
It is for the same reason I was drawn towards this recipe to make this delicious Dum Biryani.I had a slight apprehension though because this recipe does not use water,yes you heard me right.NO Water!But wonder of wonders,the Biryani comes out just perfect,with each grain of rice separate and the lovely smoky flavor as the onions form the base of the cooker.What's more,you can substitute the vegetables for chicken/seafood to create a Biryani which suits your taste palate!
Vegetable Dum Biryani *Follow the recipe exactly,However you can use the masala powders of your choice or liquid of your choice.

Vegetable Dum Biryani 

Vegetable Dum Biryani 

Ingredients

Basmati Rice- 1 cup
Thick curds - 1 cup
Garam Masala - 2 tsp
Chilly powder - 2 tsp
Salt - 2 tsp
Ginger garlic paste - 2tsp
Mixed vegetables chopped - 2 1/4 cups (I used Cauliflower,Carrot,Capsicum,Baby corn,Green peas)
Mint leaves,Coriander leaves - 1/4 cup each
Ghee - 3 tsp
Bay leaf,Cardamom,Clove,Cinnamon - 2 each
Onion - 1 sliced

Method

Vegetable Dum Biryani 
Soak rice for 2 hours,drain and keep aside.
Vegetable Dum Biryani 
Mix together curds,garam masala,chilly powder,ginger garlic paste and salt with the vegetables.(while the rice is soaking,marinate the vegetables)
Vegetable Dum Biryani 
In a 2ltr Stainless steel Pressure cooker,add ghee and bayleaf,cardamom,clove and cinnamon.Add the sliced onions.
Vegetable Dum Biryani 
Layer vegetables and rice in alternate layers.Cook at 600W in an induction cooker or on low heat on the gas stove for 15 minutes.
Vegetable Dum Biryani 
Open the cooker and mix the rice,serve hot.


Tuesday, May 26, 2015

Caramel Cake

It was a few years ago,when I noticed many bloggers posting the same recipe on a particular date of the month.One after the other,the recipes looked complicated to me,and that too baked recipes.For a beginner baker like me,all those looked like recipes which I could only gape at but never try.Later I came to know it was all a part of Daring Bakers,daring recipes they sure were!


P_20150416_153151.jpg
I remember seeing a Caramel cake recipe challenge where the caramel syrup was made from scratch,so was the cake and the buttercream frosting plus caramel shards for garnish.I still remember,I saw it first on Deeba's blog PAB and thought to myself how one could even attempt something like that,I was too dumbstruck.

P_20150416_153404.jpg
Years later,when me and a baker friend were having a conversation about adding caramel to cakes for the intense flavor it provides,I was immediately transported back to this particular recipe.Suddenly,it didn't seem so complicated at all.Making caramel from scratch is indeed a breeze,you've got to be cautious that's all,and the cake is a basic butter cake.I decided to skip the frosting,but let me tell you,the cake tastes awesome even when served plain.


P_20150416_153949.jpg 

Ever since,I've made this cake a number of times.This recipe even fights to take the first spot among my all time favorite cakes,a spot which currently belongs to this gem.The flavor of caramel intensifies after a day,so make sure you resist the urge to cut and serve it immediately.I had some chocolate sauce in the fridge,which I had to use up so I drizzled the sauce over the cake.


P_20150416_141947_1.jpg 

Caramel Cake

Recipe source - Baking Obsession

Ingredients

Unsalted butter – 150 gms, at room temperature
Granulated white sugar -  1 1/4 cups
Salt – 1 teaspoon
Caramel syrup – 1/3 cup
Eggs – 2, at room temperature
Pure vanilla extract – 1 teaspoon
All-purpose flour – 2 cups
Ground cardamom – 1 teaspoon
Baking powder – 1/2 teaspoon
Milk – 1 cup, at room temperature

For caramel syrup
Granulated white sugar – 2 cups
Water - 1/2 cup
Water to stop crystallization - 1 cup  

P_20150416_125641.jpg Method

For making the caramel syrup

Caramel cake1
Add sugar and 1/2 cup water in a heavy bottomed sauce pan and put it on high flame until the sugar dissolves. Keep stirring with a wooden spatula. It will start boiling and bubbling and colour starting to change. Stir once in a while but not constantly.Let the colour change. Now switch off stove and remove the sauce pan to the kitchen counter. Take all precaution, step back and stretch your hands to just pour a bit of the water and keep away while it splatters. Now again pour some more of the water and let it splatter some more. Now you can pour all of the remaining 1 cup. Mix well and bring it back on to fire on high flame and keep on high flame for 2 to 3 minutes until it reduces a bit and thickens. Do not leave it for long, then it would really thicken making it difficult to pour once it cools down. 
Caramel Syrup 
You got to have a fairly thin syrup while switching off the stove, which when cooled down is honey consistency.
For making the cake
Pre-heat oven to 160 degree C. 
Caramel Cake 
Butter and flour an eight inch round pan. 
Sift together flour,
 Caramel Cake
salt
Caramel Cake
and 
Caramel Cake 
baking powder. Keep aside.
Caramel Cake 
Add butter into your bowl and whip it with beater until fluffy and then 
Caramel Cake 
add sugar and whip on medium high speed for 5 minutes until the mixture has become really creamy and paler. 
Caramel Cake
This process needs all that time, because here is when air is incorporated into the batter which gives the cake its real texture.
Caramel Cake 
Add the eggs one by one and beat well for a minute after each addition. 
Caramel Cake 
Now add vanilla extract and beat again until incorporated well.
Caramel Cake 
Now add caramel syrup and beat well again until incorporated.
Caramel Cake 
Add flour mixture and milk alternating both and beating just until incorporated after each addition. 
Caramel Cake 
(Start with 1/3rd of flour mixture, followed by 1/2 of the milk mixture, then again 1/3rd of the flour mixture, remaining milk and then the final part of flour. You got to beat just until they get incorporated into the batter). 
Caramel Cake 
You should NOT over beat at this stage, else you might end up having a tough and dense cake.
Caramel Cake 
Pour the batter filling half of the pan and tap the pan on your counter to release air bubbles if any.Bake in pre-heated oven for 35 to 40 minutes or until the top of the cake is well risen, and a tooth pick inserted into the center comes out clean. 
Caramel Cake 
Cool on wire rack.The cake keeps well at room temperature for 3-4 days and upto a week,refrigerated.

Caramel Cake

At the cost of sounding repetitive(I seem to be saying this in every post of mine!)let me thank all my readers from the bottom of my heart for being so supportive of me,it gives me a huge confidence boost and that's what brings me back here even when all my time is taken by a piece of my heart,my 8 month old Arjun.
Related Posts Plugin for WordPress, Blogger...
 
Pin It button on image hover