Showing posts with label We Knead to Bake. Show all posts

Friday, January 24, 2014

Focaccia Caprese-Focaccia Bread topped with Tomato,Mozarella&Basil~We Knead to Bake#13

I love a good Focaccia.With a crisp crust and the deep flavours of olive oil and garlic in every bite.I have tried a few recipes for Focaccia myself and loved it.Moreover Focaccia recipes are pretty forgiving,there are no hassles involved and you can personalize the toppings according to your taste.
Focaccia Caprese
Focaccia is a type of flatbread from Italy,thought to have originated in ancient Greece but now associated with the north eastern part of Italy. Today however, it is a flatbread that is found all over Italy and baked in a variety of ways.The name Focaccia originates from the ancient Roman "Panis Focacius" which was originally a flatbread that was baked on the hearth.

Focaccia Caprese is a basic focaccia dough topped Caprese style."Caprese" refers to something that comes from or is in the style of Capri, an island off the Italian coast near Naples. Capri is famous mostly for its villas, grottos and jutting limestone towers, and also for the salad named after it – “Insalata Caprese” whose signature is fresh tomatoes, basil and fresh buffalo mozzarella (Mozzarella di Buffala).This means that the topping of the Focaccia Caprese is sliced tomatoes, mozzarella and basil, in addition to the usual olive oil and herbs that are typically used in this flatbread.
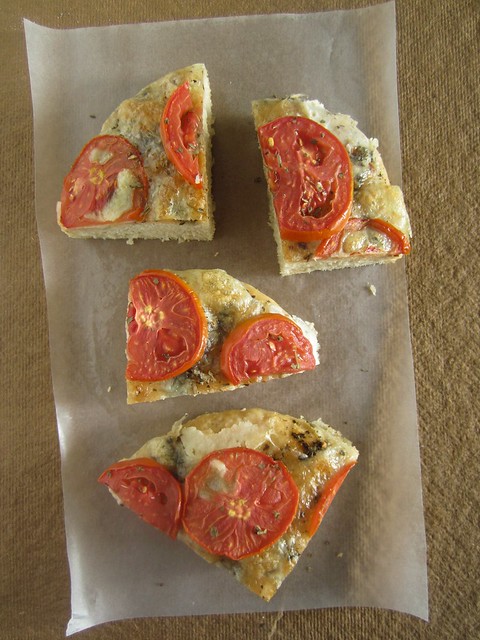
Focaccia Caprese
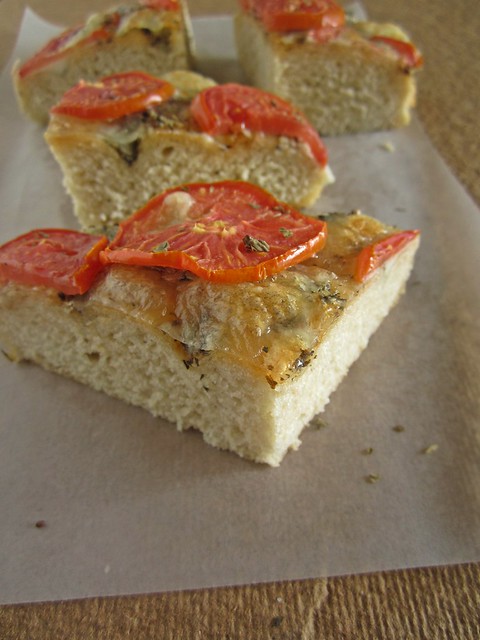
I halved the recipe and added some wheat flour/atta to the dough.The bread was still very soft and chewy,with a deep flavor from the herb oil.My basil plant is still in growing stages,so I had to make do with dried basil.I didn't add too many tomato slices as that's how we prefer and the cheese melted so much that the slices started to slide down the bread:)

It's been a joyous one year since my first WKtB post,time sure flies.Though I have skipped a couple of breads in the group,the ones which I tried were spectacular,my favorite has to be the Hokkaido bread,the softest and best bread I've baked so far(aside from 'the' cinnamon rolls!)This year,we have some new entrants to the group and I am so happy to continue my bread baking journey.
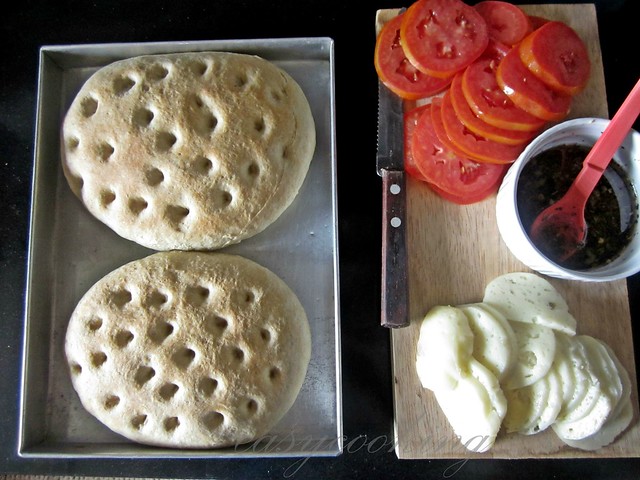
Focaccia Caprese
Focaccia Caprese - Focaccia Bread topped with Tomato,Mozarella & Basil
Recipe source - The Kitchen Whisperer;Adapted from Aparna

Ingredients

For the Dough:


2 tsp instant yeast
1 1/2 tbsp sugar
3 1/2 cups bread flour*
1 tsp salt
1/4 cup oil (preferably olive oil)
1 to 1 1/2 cups warm water

A little more olive oil for brushing dough


For the Topping:

4-5 larg-ish tomatoes, sliced thin
1 6-7” round piece of fresh buffalo mozzarella, cut into1/4” slices**
1/2 cup fresh basil leaves, cut into thin strips

For the Herbed Oil:

1/4 cup olive oil
1 tsp dried oregano
1 tsp dried basil
1/4 to 1/2 tsp red chilli flakes
1/2 tsp finely minced garlic/ paste
Salt to taste 
Fresh basil leaves for garnishing 

Note:

* If you cannot find bread flour, you can add 1 tbsp of Vital Wheat Gluten to 3 1/2 cups of all-purpose flour and mix together well. Otherwise just use 3 1/2 cups all-purpose flour.

**I don’t get fresh buffalo mozzarella where I live. So used Amul Mozarella cheese instead and it worked out fine.

Method:

First make the herbed oilFocaccia Caprese
Put all the ingredients in a bowl and whisk them together. Keep aside till required.

Then make the dough. Focaccia Caprese
The dough can be mixed and kneaded by hand or machine. Put the yeast, sugar flour, salt and oil in the bowl of the processor and pulse a couple of times to mix well. Then add 1 cup of warm water (and as much more as you need) and knead until you have a soft elastic dough that is just short of sticky.
Focaccia Caprese
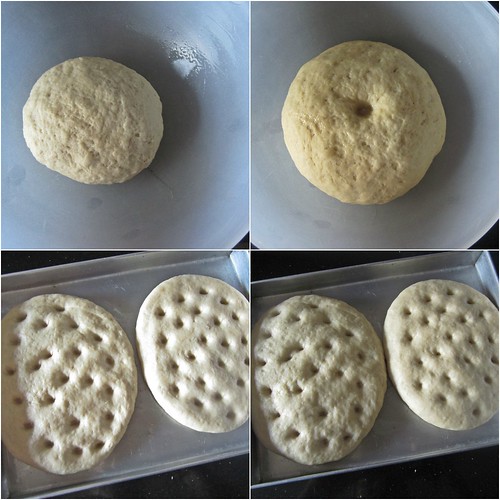
Remove the dough from the processor bowl, shape into a round and place in a well oiled bowl turning the dough around so it is coated. Cover and let it rise till almost double in volume. This should take about an hour.
You can make this as 2 medium sized Focaccia or 4 smaller ones. For the rectangular Focaccia, take two rectangular pans/ jelly or Swiss roll pans (I used an 11" by 7" tin) and oil them well. Then divide the dough into two equal portions and lightly roll them (or press out) out into approximately 11” by 7”. If making 4 Focaccia, then divide the dough into 4 equal portions. Roll each portion out (or press out) evenly into approximately 5” by 7”. It alright if it’s an odd shape because Focaccia is really a “rustic” bread.
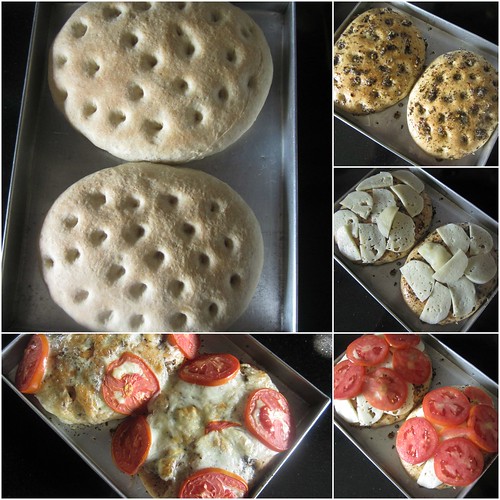
Transfer the dough to the baking tins. The dough will shrink a little. Use your fingers and push it out a bit making sure it’s evenly thick throughout. Let it rise for 20 minutes. Lightly oil your finger tips and press into the dough creating evenly spaced “dimples” in it. Generously brush the surface with oil
Focaccia Caprese
Bake at 210C (410F) for about 18 to 20 minutes till it is almost done and is beginning to turn golden brown. Take the Focaccia out and turn up the heat of your oven to 230C (450F).
Lightly drizzle some of the Herbed Oil over the Focaccia and then evenly arrange some slices of mozzarella over the bread, leaving very little space between them. Arrange the tomato slices over this and a little sprinkle the chopped basil over this. The topping should cover most of the surface of the bread.
Drizzle some more Herbed Oil over the topping and return the bread to the oven. Bake the Focaccia for 5 to 8 minutes or until the cheese has just melted. Remove from the oven and garnish with fresh basil leaves.
Focaccia Caprese
Yeastspotted
Cut the Focaccia into slices and serve while it is still hot. This recipe should serve 4 if served alone or 6 if served with a side.

Saturday, December 14, 2013

Whole Wheat Sandwich Bread ~ We Knead to Bake #10

Time flies..and how!I thought I missed baking only the whole wheat loaf,but I see I've missed the Cinnamon rolls and time's running out for this month's WKtB as well.What better way to kick start the bakes than with this good ol' sandwich loaf.I'd be lying if I told you I didn't find the steps too long.I mean,it's after all a sandwich loaf right,wrong!
Whole wheat sandwich loaf
We love our bread loaf at home.White,spongy and melt in the mouth bread from the local bakery.Whenever we've tried to switch to whole wheat bread,we've come right back to the white bread.Either the loaves are too dry and tasteless or they are just white bread in brown colour(with caramel added).Ever since I've started baking breads,the thought of baking with atta/whole wheat flour has always been there at the back of my mind.

Somehow,breads baked with atta/wwf tend to be a little dense,tasty nevertheless but for someone who's been accustomed to super soft bread made with APF all their lives,this one is a bit hard to digest(no pun intended!)
Whole wheat Sandwich Loaf
When Aparna suggested a 100% Whole wheat sandwich loaf for WKtB,I was apprehensive to try it.But when I read through the recipe,there was an option for adding 50-50 combination of whole wheat flour and all purpose flour and I knew I had to try it.The recipe intrigued me,using a soaking procedure and a Biga/Sponge which is the secret to the softness and texture of this bread.
Whole wheat Sandwich Loaf
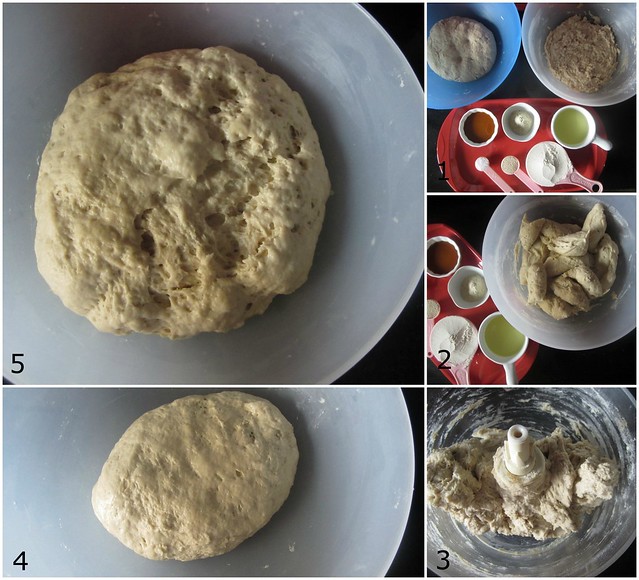
Though the steps seem a bit daunting at first,all you require to make this bread is a little planning.Make the soaker and biga a day before you plan the bread.Rest of the procedure is simple.I used my food processor to knead the dough but you can knead it with hand as well,though I have to warn you-the dough would be a little messy to knead by hand as it is a lot stickier than regular bread dough.

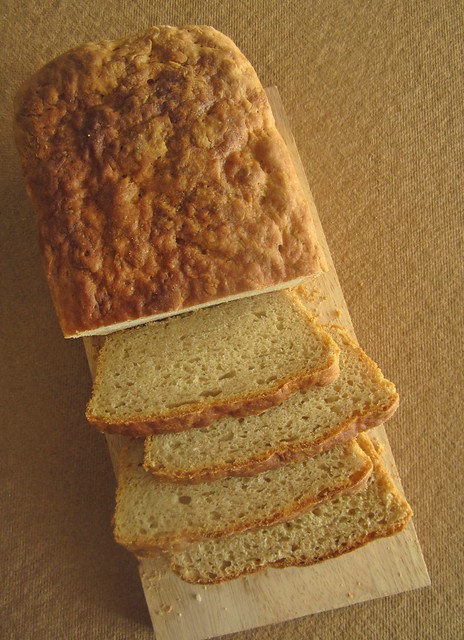
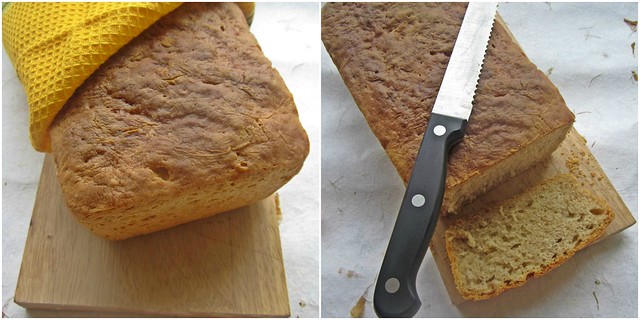
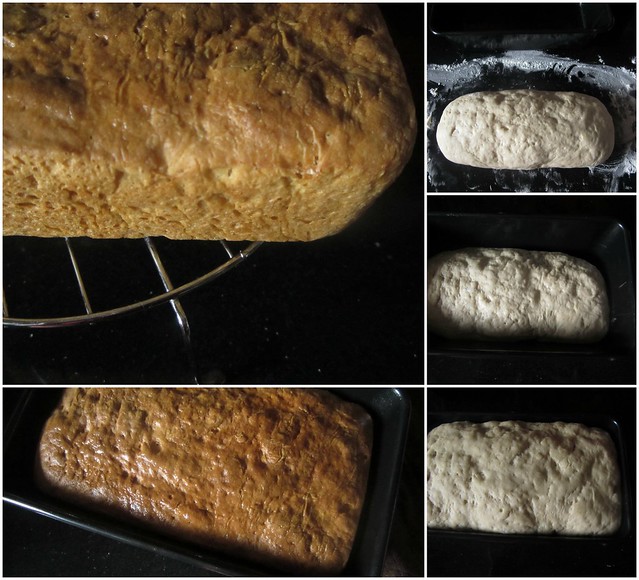
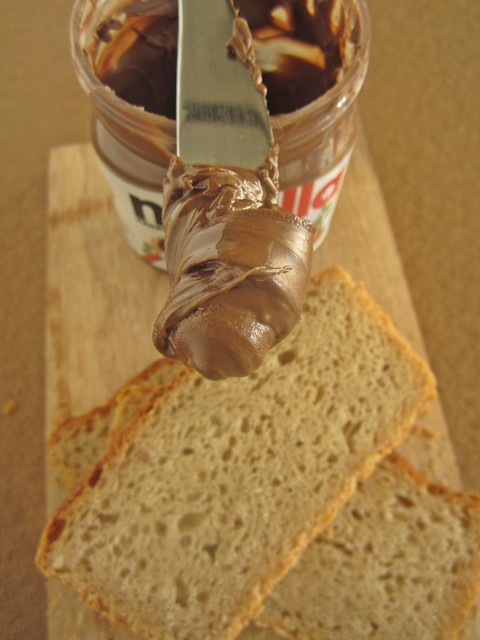
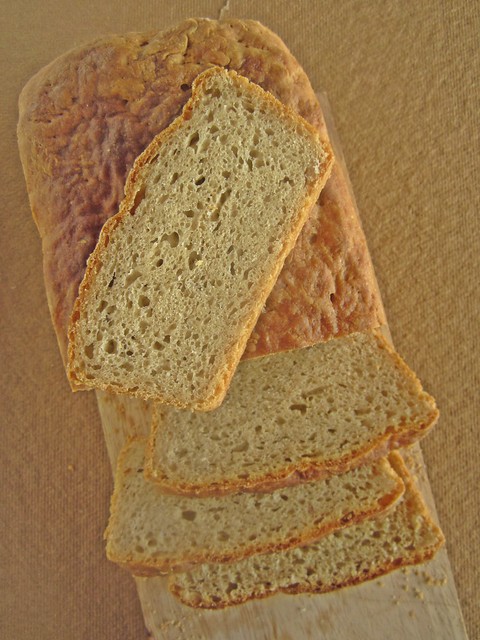
My bread looks a bit flatter and wider because of the size of my loaf pan.I had initially planned to make two loaves but ended up making one big loaf.Wait for the loaf to cool down completely before slicing to get neat slices.With a chewy crust and a soft inside,this one was a successful bake.We had some plain,some sandwiched in Nutella and some toasted as well.If you are not consuming the bread immediately,keep it refrigerated.
Whole wheat Sandwich Loaf Whole Wheat Sandwich Bread - We Knead to Bake #10
Recipe source - Aparna;Original Recipe from  Peter Reinhart’s Whole Grain Breads


Ingredients: 

For The Soaker:

1 3/4 cups whole wheat flour(I used 1 cup all purpose flour and 3/4 cup whole wheat flour)
1/2 tsp salt
3/4 to 1 cup water at room temperature
1 tbsp vinegar (apple cider or plain) 

For The Biga/ Sponge:

1 3/4 cups whole wheat flour(I used 1 cup all purpose flour and 3/4 cup whole wheat flour)
1/4 tsp instant yeast
3/4 cup milk (or a little more)
1 tbsp vinegar (apple cider or plain) 

For The Final Dough:

All of the Soaker
All of the Biga/ Sponge
1 1/2 tsp Vital Wheat Gluten (optional)
1/2 to 3/4 tsp salt
1/3 cup whole wheat flour (and a few tbsp. more if required)
2 tsp instant yeast
1/8 cup oil (or melted butter if preferred)
2 tbsp honey
Method: 
First make the Soaker. 
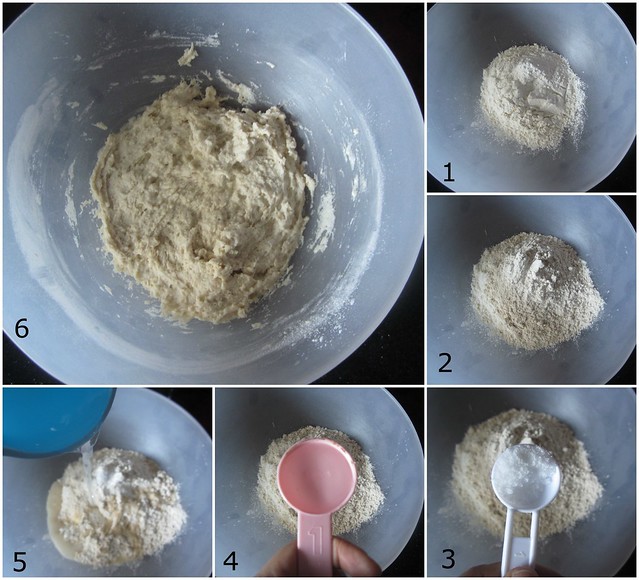
Whole wheat Sandwich Loaf Mix all of the Soaker ingredients together in a bowl until all of the flour is hydrated.Depending on the flour,you might need more than the original 3/4 cup of water suggested. So I would suggest using 3/4 cup water and then adding a little at a time, until you have the desired consistency. Your Soaker should be somewhat like reasonably firm bread dough in consistency. Cover the bowl loosely with plastic wrap and leave at room temperature for 12-24 hours. 

Now make the Biga/ Sponge. 
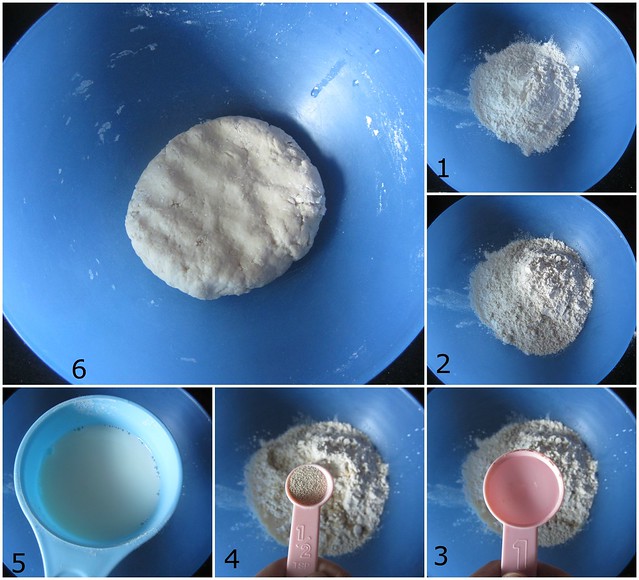
Whole wheat Sandwich Loaf Mix all of the Biga/ Sponge in a bowl and knead together well till a soft ball forms. Again you might need more than the originally suggested 3/4 cup of liquid. Cover and refrigerate for at least 8 hours or overnight. This will keep for up to 3 days.
Two hours before you plan to mix your dough for the bread, remove the Biga from the refrigerator and allow it to come to room temperature. You might find your Biga rising a little during this time. 


Divide the Biga and Soaker into small pieces (about 12 pieces each) using a sharp knife or scraper and put them in the food processor bowl (or stand mixer). You can knead this by hand too, but the dough will be tacky and a little difficult to manage. Do not be tempted to add more flour, when it is time to, than necessary.
Add the remaining ingredients for the dough, except the 1/3 cup flour) and knead for about 3 minutes.  Let it rest for 5 minutes, then add as much flour as needed (if necessary) to the dough and  knead for another 3-4 minutes. Your dough should now come away from the sides of the bowl but still be a little sticky but somewhat manageable. It’s really important to not add too much extra flour during this step. 
Whole wheat Sandwich Loaf 
Place the dough in a lightly oiled bowl and let rise until almost doubled (about 1 1/2 hours). Then turn out the dough onto a lightly floured surface and pat the dough out into a rectangle with a width that just a bit less than your loaf tin. See that you do not tear the dough. Roll it up and shape into a loaf (see the video, if you need it).

Whole wheat Sandwich Loaf Place your loaf in a greased and floured loaf tin  and let it rise until it is just higher than your loaf tin. Bake the loaf at 180C (350F) for about 40 to 45 minutes until the top is a nice deep brown colour and the loaf sounds hollow when tapped.
Whole wheat Sandwich Loaf
Let the loaf cool completely (at least for about 2 hours), before slicing it. Refrigerate the loaf if not consuming immediately.

Wednesday, September 25, 2013

Khaliat Nahal{Honeycomb Buns} ~ We Knead to Bake #9

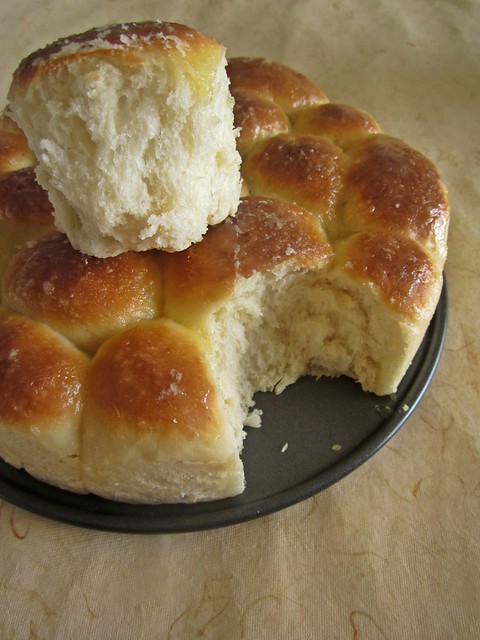
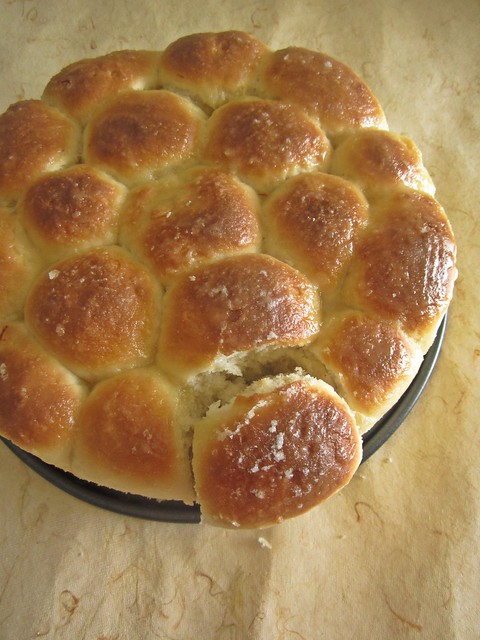
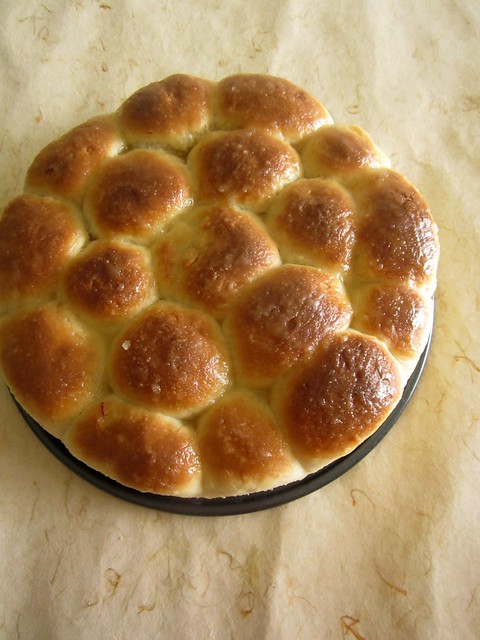
Having missed the last month's bake,I was eager to know what Aparna would challenge us to bake this month.Though the name sounds a bit complicated,the recipe is quite simple.A plain dinner roll kind of buns,filled with a sweet or savoury filling and baked in a round pan which after baking resembles a honeycomb,hence the name.
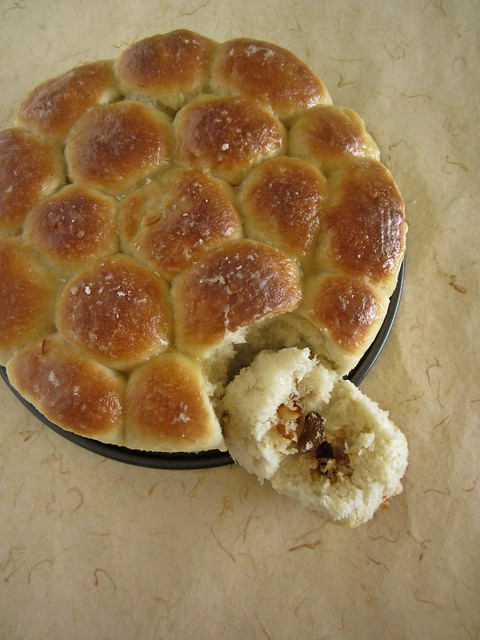
Khaliat Nahal/Honeycomb Buns
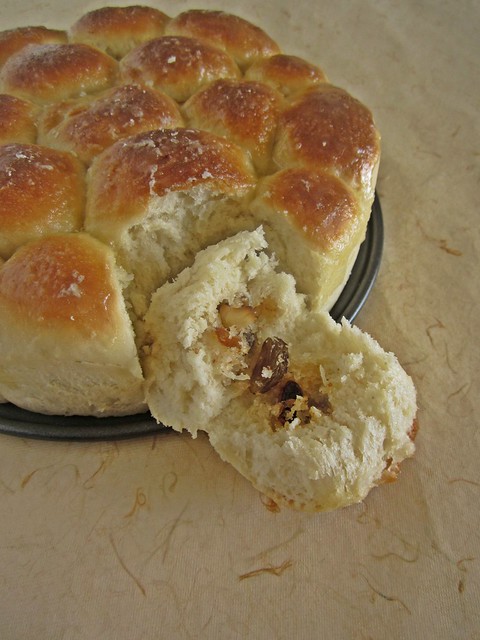
Khaliat Nahal translates as Bee's Hive in Arabic,owing to the appearance of the buns.The buns are baked closed to each other in a round pan where they form a honey comb like pattern.Traditionally,these buns are made sweet with a cream cheese filling and covered with a sugar syrup or glaze after baking,which is typical of many Middle Eastern confectionery.

The recipe makes 18 small sized buns,you could easily halve the recipe to make 9-10 buns and bake in a 6' or 7' round tin.
Khaliat Nahal/Honeycomb Buns
The filling is entirely up to your choice.I was intrigued with the idea of a sweet filling and the pouring of sugar syrup after the buns are baked so went with that.Keeping in mind the middle eastern origin,I used a coconut-nut filling which is a family favorite of ours.Remember Dilkush buns?

The day I decided to bake these buns was incidentally one of the warmest days in a while here,so the only problem I faced was the dough getting risen fast.and I mean real fast.As I was filling the buns one by one and placing in the pan,I could feel the earlier ones already beginning to rise hence you can see my bread has risen in a lopsided manner:)
Khaliat Nahal/Honeycomb Buns
The texture however was absolutely wonderful.Soft,airy and pillowy these buns were finished in a splash.I love buns with sweet fillings and this one has become a favorite now,especially owing to the ease of making the simple dough.Only thing I would do next time is probably refrigerate the dough after the first rise,that'd delay the rise as I finish off with the filling.
Khaliat Nahal/Honeycomb Buns
Khaliat Nahal (Honeycomb Buns or Bee’s Hive Buns)
Recipe source - Aparna
Ingredients
For the dough
1 cup lukewarm milk
1 1/2 tsp instant yeast
1 tsp sugar
2 1/2 cups all-purpose flour
3 tbsp sugar (for sweet bread)
3/4 to 1 tsp salt (for savoury bread) OR 1/4 tsp salt (for sweet bread)
40gm butter, melted
2 tbsp milk for brushing the dough
2 tbsp white sesame seeds for sprinkling on top (optional; only for savoury bread) 

For the filling:

1 cup of filling (approximately) of your choice, either sweet or savoury
Savoury - cream cheese OR crumbled feta cheese OR crumbled paneer/ cottage cheese, flavoured according to your choice. You can also use any other savoury filling that you want. I used a combination of crumbled paneer, herbs, chilli flakes, a little garlic and chopped spring onion.
Sweet - cream cheese (traditional filling), or any other filing of your choice like chocolate,   dried fruit like dates, apricots or raisins, chopped nuts, chopped fruit , sweetened coconut filling, etc. 

Sugar Syrup/ Glaze:

3/4 cup sugar
1/2 cup water
A pinch of saffron
1 tbsp honey
1 tsp lime/ lemon juice
Method:

Khaliat Nahal/Honeycomb Buns 
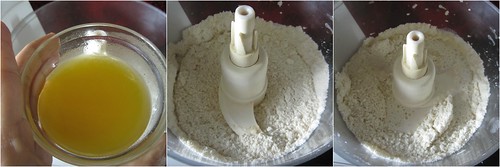
Make sure your melted butter has cooled down a bit before using it. Put 2 cups of the flour, salt, sugar (if making the sweet bread only) and melted butter in the bowl of your processor. Khaliat Nahal/Honeycomb Buns 
Run a couple of times to mix well.
Khaliat Nahal/Honeycomb Buns 
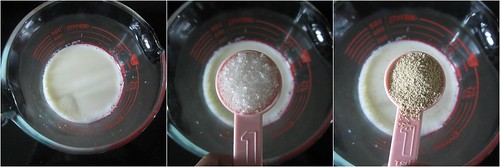
Combine the milk, sugar and yeast in a small bowl and keep for 5 minutes. Add this to the processor bowl and knead until you have a smooth and elastic dough which is not sticky. 
Khaliat Nahal/Honeycomb Buns 
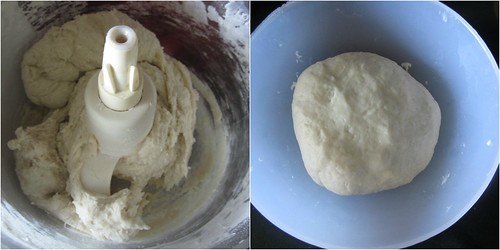
Add as much of the remaining 1/2 cup of flour as you need to get this consistency of bread dough. I used all of 2 1/2 cups of flour for mine.
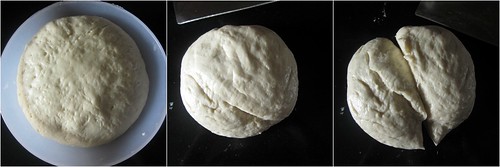
Shape the dough into a ball and place it in a well-oiled bowl, turning it to coat completely with the oil. Cover and let it rise till double in volume, for about an hour.

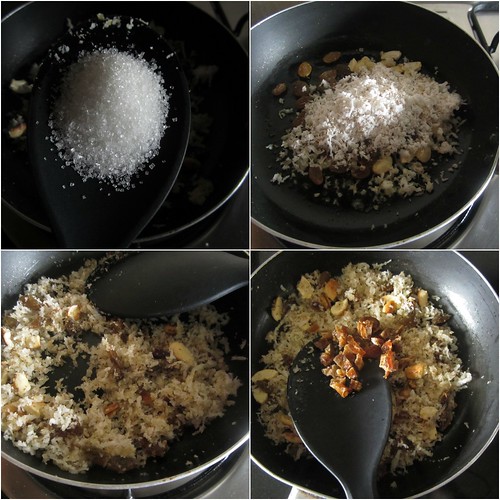
Meanwhile,make the filling.I just went with a free hand with the ingredients,you can add more/less nuts or sugar according to your choice.
Khaliat Nahal/Honeycomb Buns 
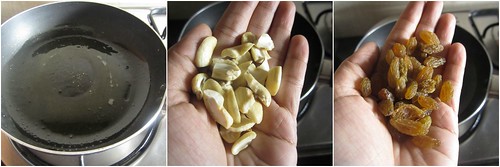
In a pan add about 1 tbsp ghee and saute cashewnuts and raisins(about 2 tbsp full).
Khaliat Nahal/Honeycomb Buns 
Mix in about 2 tbsp sugar and 3 tbsp grated coconut and saute for a minute.Add 2-3 seedless dates chopped fine.Keep aside to cool.
Khaliat Nahal/Honeycomb Buns 
Turn the dough out onto your work surface. You won’t really need to flour it as the dough is quite manageable as it is. Cut it into 2 halves. 
Khaliat Nahal/Honeycomb Buns 
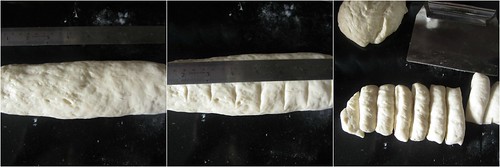
With your palms, roll out each half a “rope” about 9” long. Cut each rope into 1” pieces so you have a total of 18 pieces.
Khaliat Nahal/Honeycomb Buns 
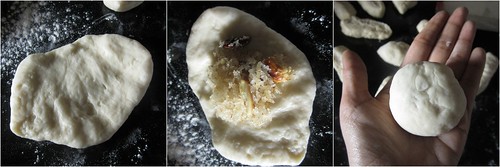
Take each piece and flatten it out a little and place half a teaspoon of filling in the centre. Pull up the sides and wrap the dough around the filling, pinching it closed at the top. Smoothen it into a round ball. 
Khaliat Nahal/Honeycomb Buns 
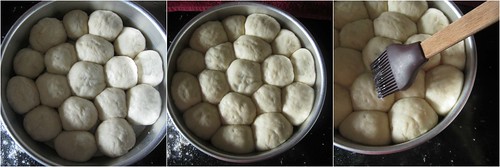
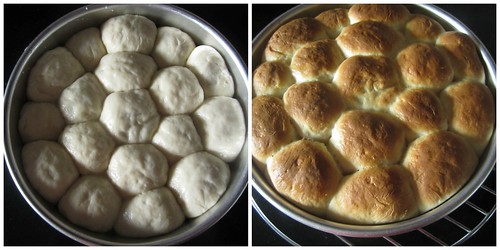
Place this in a well-greased round 9” cake tin. Repeat with the remaining 17 pieces and the filling. Arrange the filled balls of dough in concentric circles, filling the base of the cake tin.
Cover with a kitchen towel and let it rise for about 30 to 40 minutes. Brush the tops with milk and sprinkle the sesame seeds over this. Don’t use the sesame seeds for sweet bread, only for the savoury one. Bake the buns at 180C (350F) for about 25 minutes, until they’re done and a nice golden brown on top.
Khaliat Nahal/Honeycomb Buns 
Let them cool in the tin for about 5 minutes and then on a wire rack.
Khaliat Nahal/Honeycomb Buns 
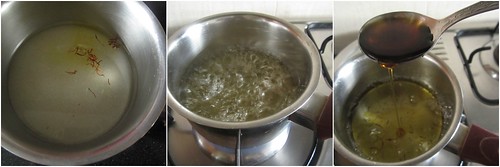
If you’re making the sweet version, make the sugar syrup/ glaze during the first rise of the dough. For this put the sugar, water and saffron in a small pan and bring to a boil. Turn down the heat and let it simmer for a few minutes until it starts thickening a bit. Take it off the heat and add the honey and the lime/ lemon juice. Mix well and let it cool. Keep aside till needed.
Khaliat Nahal/Honeycomb Buns
When the sweet buns come out of the oven, pour the syrup all over the top of the “Honeycomb”.  The bread should be hot and the syrup/ glaze should be cool. If you want your Honeycomb Buns to be less sweet, just brush the syrup/ glaze over the top.
Let it sit for a while for the syrup/ glaze to set a bit. Serve them warm with tea/ coffee.

Thursday, July 25, 2013

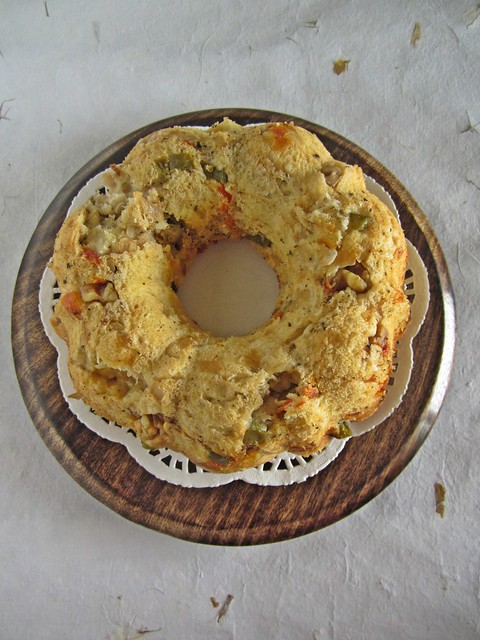
Savoury Kugelhopf Bread ~ We Knead to Bake # 7

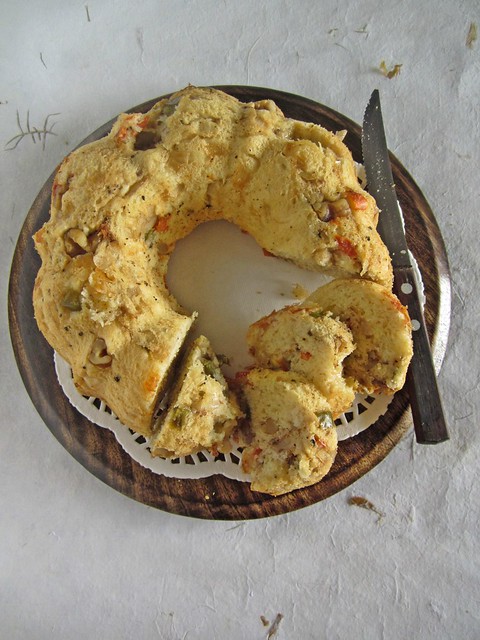
Savoury Kugelhopf Bread
If someone had told me a while back I'd be baking a Kugelhopf bread I'd have asked them how it is pronounced rather than how it is made.That was my first thought when I saw the bread bake of the month in WKtB.I mean,how does Aparna do it,month after month?Choose a unique bread and shake us out of our comfort zones?I should have taken her word literally when she said we'd be baking different breads for each month of the year.

For someone whose baking was limited to sweet bakes,I am taking baby steps in savoury baking as well now.I'd put off baking savoury muffins fearing it wouldn't match my expectations,I think I should rethink about it now.Anyway,to play it safe I halved the recipe,still it made a decent quantity of bread.So,if you are a savoury bread fan go ahead and bake the full recipe.
Savoury Kugelhopf Bread
Kugelhopf (also spelt as Kugelhupf, Gugelhupf, Gougelhof, Kugelhoph, Kugloff Kuelopf, Kouklouf, Köjlhopf, Koejelhopf, Koïlopf, Köjhupf!) is a yeasted sweet cake well known in the Alsace region of France, as well as in Germany, Switzerland, and Austria, and variations of this are also found in some countries of Eastern Europe.

This bread/ cake contains eggs because they are a characteristic part of this bake, but feel free to substitute powdered flax seed for the eggs if you don’t eat them. You may also use sun-dried tomatoes and toasted pine nuts instead of the tomatoes/ bell pepper and walnuts.I used Cheddar cheese as per Aparna's recipe as well,but you can use a cheese of your choice.A sharper cheese would taste better.
Savoury Kugelhopf Bread
This Kugelhopf bakes in an 8” Kugelhopf pan, but you should also be ableto bake it in an 8” Bundt pan, a regular loaf tin (or 2 small ones), smaller Brioche tins or even muffin tins. If you’re baking this in muffin tins you might want to use half the recipe, though I understand that this bread freezes well. 


Savoury Kugelhopf
Recipe source - Aparna
Ingredients

3 to 3 1/2 cups all-purpose flour
2 tsp instant yeast
1 tsp salt (or to taste)
75gm butter, at room temperature
3/4 cup milk
2 eggs, beaten lightly
1 tsp oil
1/3 cup chopped green bell peppers
1/3 cup deseeded, pulp-free and chopped tomatoes
1 cup onions, finely chopped
1/2 cup diced cheddar cheese (preferably sharp)
1/3 cup coarsely chopped walnuts
1 1/2 tsp coarsely crushed black pepper
1 tsp dried thyme
Method:
I used a food processor to knead the dough but this can be done by hand but it will be a bit sticky to handle. 
Savoury Kugelhopf Bread 
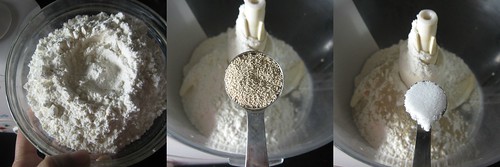
Put 3 cups of flour, yeast, and salt in the bowl of the processor. Pulse a couple of times to mix. 
Savoury Kugelhopf Bread 
Then add the butter, a little at a time, and process till incorporated.

Savoury Kugelhopf Bread 
Add the warm milk and process till mixed. Now add the eggs and process till mixed. You will now have a soft and sticky dough.  Savoury Kugelhopf Bread 
Knead some more, adding more flour, a little at a time and just enough till the dough pulls away from the sides of the bowl. Do not be tempted to add more flour than absolutely necessary.
Your dough will be very soft, elastic and just short of sticky. Transfer the dough to an oiled bowl, cover and let it rise until double in volume. This can take from 1 1/2 hours to 2 1/2 hours!
Savoury Kugelhopf Bread 
In the meanwhile, heat 1/2 a tsp oil in a pan. Add the chopped green bell pepper, the tomato and a pinch of salt and stir-fry till the raw smell disappears but the vegetables are still crisp/ crunchy. Remove and keep aside. To the same pan, add the remaining 1/2 tsp oil and sauté the onions with a pinch of salt till they turn golden brown. Remove and add to the bell peppers and keep aside.
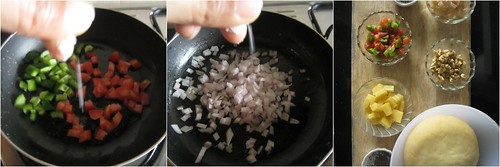
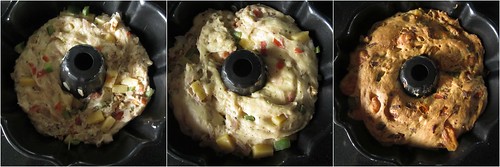
Grease an 8” kugelhopf mould or bundt pan well especially around the centre (or whatever pan/ tin you plan to use). Place some of the chopped walnuts in the bottom of the mould. If you’re using a loaf tin or brioche moulds, then don’t do this. Instead press in the walnuts on top of the dough after the second rise, just before baking.
Savoury Kugelhopf Bread 
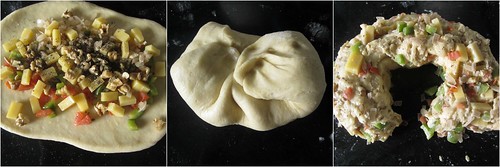
Once the dough has risen, deflate it. Then work the cheese, stir-fried onions, bell pepper and tomato, the remaining walnuts, black pepper and thyme into the dough.
Savoury Kugelhopf Bread 
The best way to do this is to flatten the dough out and spread all this over the surface, fold the dough over and then knead it. This will ensure a more uniform incorporation of the “filling”. The dough will be a bit sticky, so use a scraper to help you with the kneading. Do not add more flour!
Roll the dough into a longish log, long enough to fit into the mould comfortably. Lift the “log” of dough and place it in the mould in a circular fashion and pinch the two ends together to close the “circle” of dough. Cover and let the dough rise for about an hour or so, until it reaches the edge/ rim of the mould.
Savoury Kugelhopf Bread 
Bake the Kugelhopf at 200C (400F) Pre-heat oven to 400 degrees for about 35 to 40 minutes until the top is golden brown and sounds hollow when it is tapped.
Savoury Kugelhopf Bread
Yeastspotted

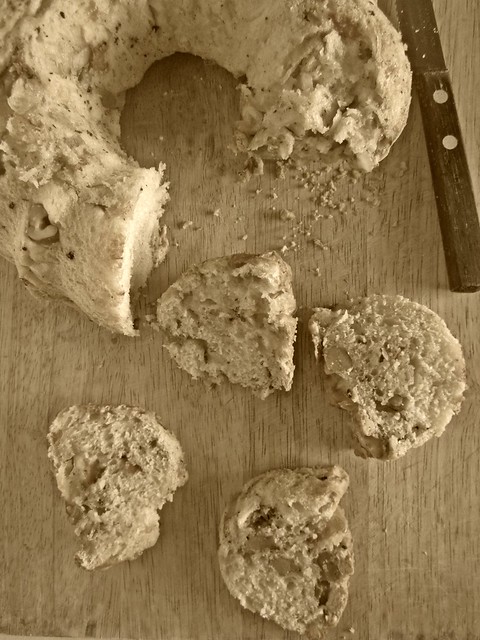
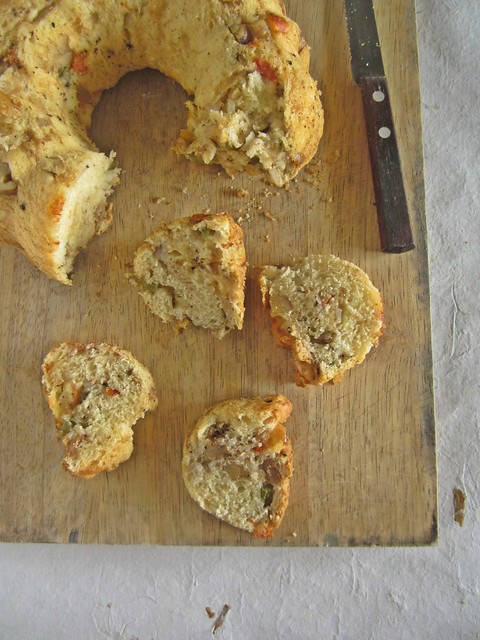
Unmould the Kugelhopf and let it cool on a rack. Slice and serve. This Kugelhopf should serve about 10 people and is also good for breakfast, as a snack or served with a simple soup.

Thursday, July 18, 2013

Eggless Baked Doughnuts ~ We Knead to Bake # 6

I almost thought I'd miss baking this one.Had planned to bake this as soon as we reached back from our holiday since I thought new baking tools and a new mixer might make me very excited when it came to baking something new,especially for WKtB.That was not to be,however.I went into a fortnight-long slumber without baking anything and I even started questioning myself whether I would update my blog anytime soon.
Eggless Baked Doughnuts
I got myself a Breville Stand mixer and was wondering what to bake first to inaugurate it.Finally baked a batch of Vanilla cupcakes and guess what,there's no stopping me ever since.Baked Death by Chocolate and Brownies for a friend's niece and then some Jam rolls for a friend's daughter and then slowly the blog saw new updates,I'm relieved!

Making doughnuts have never been on my list.We are not quite the doughnut loving crowd.I'd avoid it thinking I can accumulate calories in other stuff,why waste those on doughnuts;).But when Aparna sets forth a challenge,it has to be baked.Wait,is it a recipe for doughnuts which do not require frying and eggless,that had me motivated to bake a batch.
Eggless Baked Doughnuts
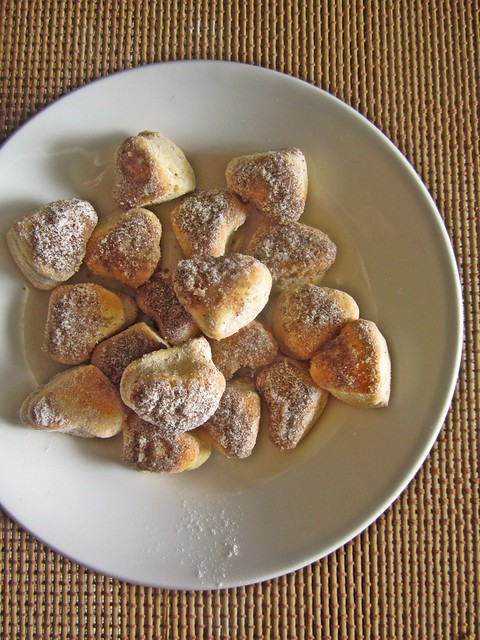
Given a choice,I thought I'd go for the Chocolate dougnuts,but I was mistaken.The Cinnamon sugar ones had me eating one after the another.Thankfully,I'd baked those in small heart shaped sizes,which took care of the guilt part.Those were really delicious and I think would make for a perfect snack.
Eggless Baked Doughnuts
Since I was making these for the first time,I carefully followed the instructions
  • make sure the dough is 1/2' thick before cutting out the doughnuts.
  • make sure the doughnuts do not lose their shape when you transfer them from your work surface to the baking sheet or else you will end up with wonky shaped ones.
  • make sure that whatever you use to cut your doughnuts is sharp so that it makes it easy to lift them off the work space without much difficulty.
  • make sure you do not use a twisting motion while you cut the doughnuts which would not make them rise properly.
Eggless Baked Doughnuts
Eggless Baked Yeasted Doughnuts
Original recipe from Lara Ferroni's Doughnuts

Ingredients:

1/4 cup superfine sugar
1 cup warm milk (45C/115F)
3/4 tbsp instant yeast (or 1 tbsp active dry yeast)
1/2 tsp salt
2 tsp vanilla extract
2 1/2 to 3 1/2 cups cake flour (or all-purpose flour) divided, plus more for kneading
100gm butter, cut into 1 inch cubes 

For the topping:

75 to 100gm butter, melted
1 cup superfine sugar + 2 tablespoons cinnamon (more or less, depending on your taste), mixed together
For the Glaze
1 cup icing sugar
1 tbsp cocoa OR 1 tsp Vanilla 
2 tbsp milk
OR
jam to fill your doughnuts
Method: 
Using a processor to knead helps but you can do this by hand.
Eggless Baked Doughnuts 
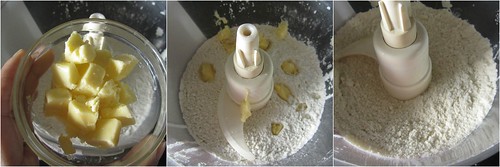
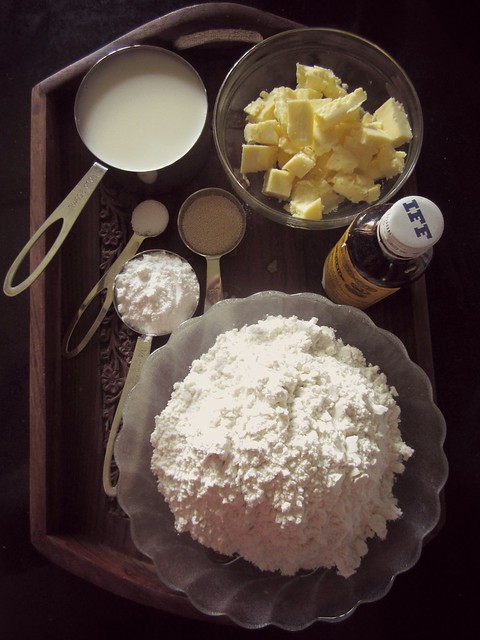
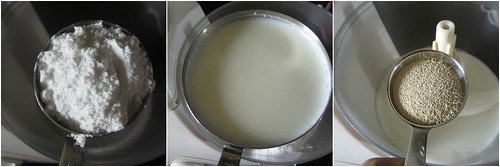
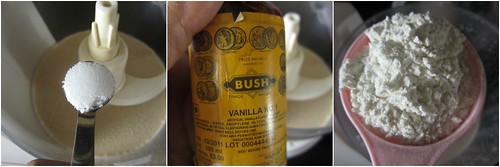
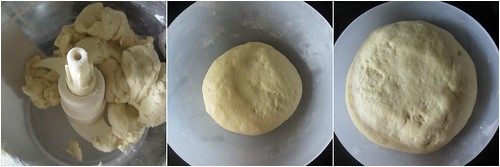
Put the sugar, milk, yeast, salt and vanilla in the processor bowl and pulse to mix well. 
Eggless Baked Doughnuts 
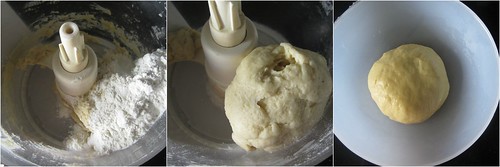
Add the cake flour and 1 cup of all-purpose flour and process, adding a little more of the flour as necessary till the dough is thick and pulls away from the sides of the bowl.
Eggless Baked Doughnuts 
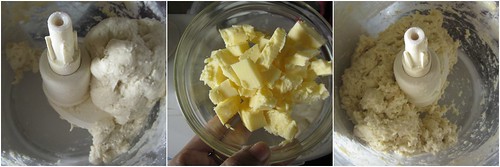
Now add the butter pieces one at a time and process till there no large chunks of butter are left in the bottom of the bowl. Now add a little more flour until your have a soft, pliable and elastic dough that is most but not overly sticky.Eggless Baked Doughnuts 
Turn the dough out onto a floured surface and knead gently until the dough no longer sticks to your hands. Shape the dough into a ball and place in a lightly greased large mixing bowl., turning it to coat well. Cover with a damp towel and let it rise till double in volume. This should take about an hour. 
Eggless Baked Doughnuts 
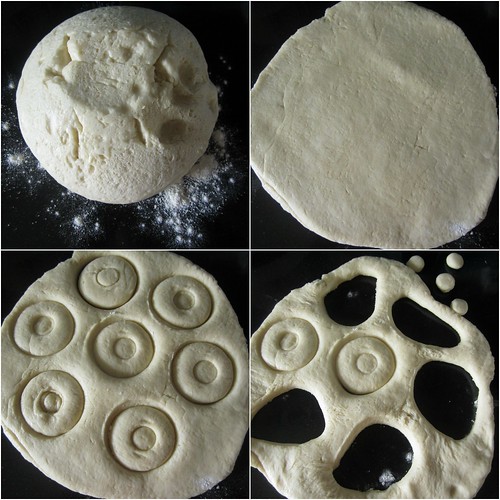
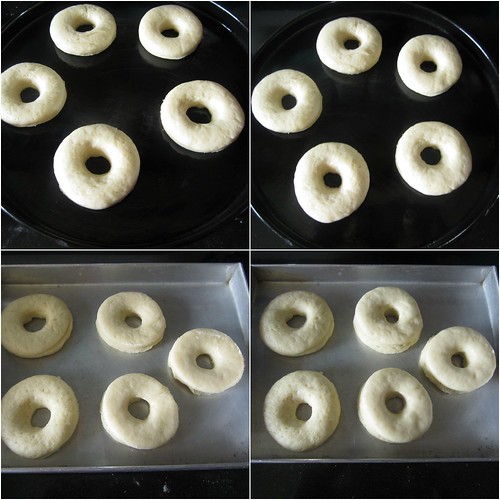
Punch down the dough and roll out to a thickness of 1/2" thickness. Cut out doughnuts using a doughnut cutter or whatever you have on hand to cut out 3” diameter with 1” diameter holes. If you’re making doughnuts to fill with jam, then do not cut out the holes. Place the doughnuts and the holes on parchment lined or lightly greased baking sheets, leaving at least 1” space between them.

I did not bake the 'holes' as such.Re-rolled those and made heart shaped small ones which I later dipped in cinnamon sugar.
Eggless Baked Doughnuts 
Re-roll the scraps and cut out more doughnuts. Eggless Baked Doughnuts 
Let them rise for about 20 minutes or till almost double in size and then bake them at 200C (400F) for about 5 to 10 minutes till they’re done and golden brown. Do not over bake them.
Eggless Baked Doughnuts 
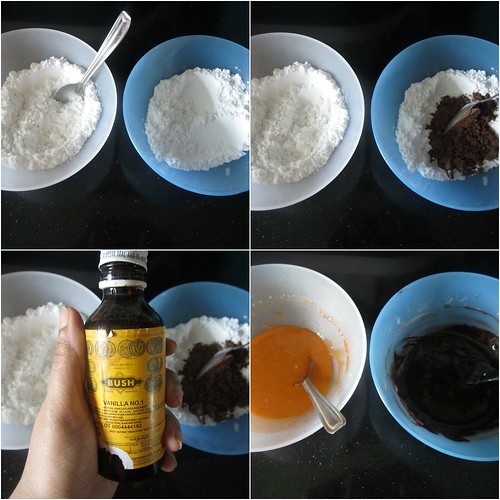
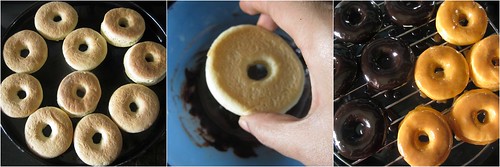
For the glaze,mix together all the ingredients mentioned,choosing your flavor-vanilla or chocolate.I made two batches of each and added a pinch of food colour to the vanilla glaze.

This recipe makes about 12 to 14 doughnuts and holes.

Take them out of the oven and immediately brush them with the melted butter and then dip them into the cinnamon sugar mixture. If filling the doughnuts with jam, let them cool.
Put the jam into a piping bag with a writing nozzle/ tip and press into the doughnut from the side and gently press out the jam into the doughnut till it starts oozing out. Jam doughnuts do not need too much jam to fill them.Eggless Baked Doughnuts 
If glazing your doughnuts, let them cool completely and then dip one side of the doughnut in the glaze of your choice and let it set.


Eggless Baked Doughnuts
Yeastspotted

Related Posts Plugin for WordPress, Blogger...
 
Pin It button on image hover