Friday, August 31, 2012

Pasta..as we like it! | Pasta with Vegetables in White Sauce


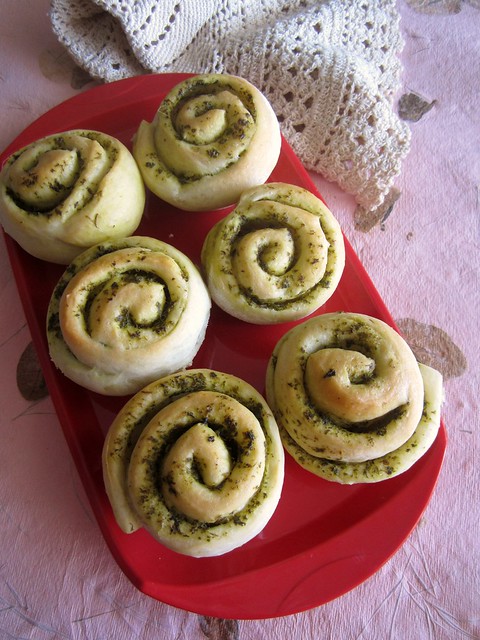
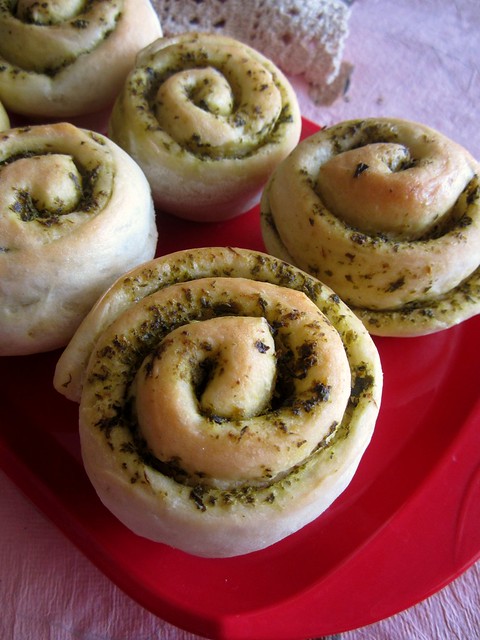
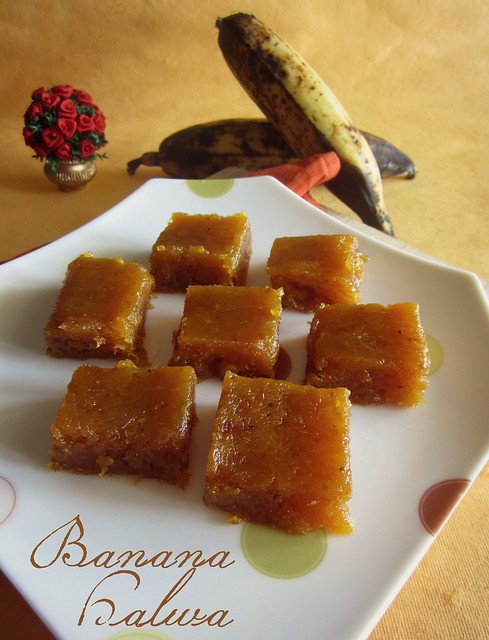
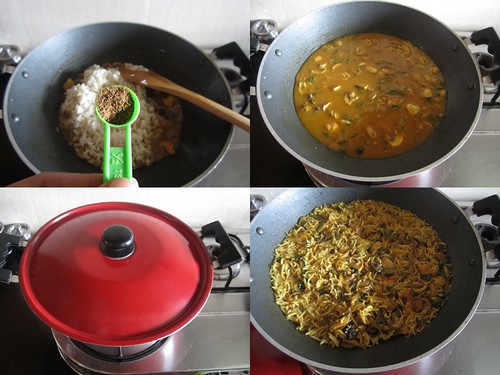
I contemplated for a while before posting this recipe here.Primarily,the pictures are not so blog worthy and more so taken in my kitchen during dinner time and secondly,this is a recipe which works best for us,not so sure about Pasta lovers.But then,what good is a recipe if not shared and posted on the blog anyway!

IMG_1551


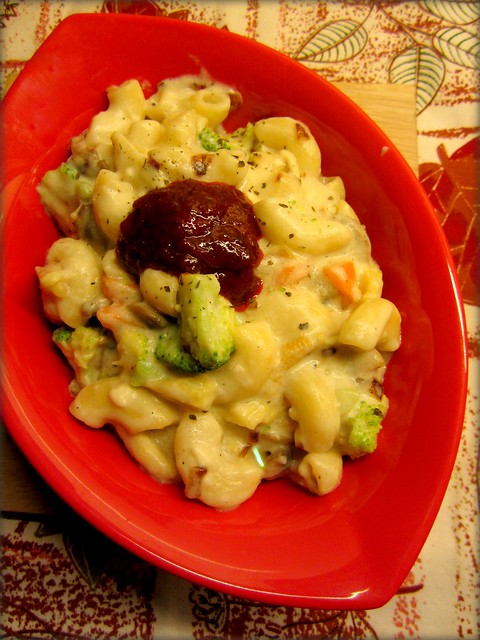
From disliking Pasta in any form to having it at least once a week for dinner,we've come a long way.Since we were not very fond of Pasta served at restaurants,I cook up a recipe specifically for our taste every once in a while.Dunked in white sauce with an array of vegetables and a served with a blob of Pasta sauce(yes!)is more like Pasta made our way.Sometimes,I bake the whole thing and served with some garlic bread on the side,it makes for a delicious gourmet meal:)

We love Penne & Macaroni as it soaks up the sauce and keeps the pasta warm for a while,you can try this with any pasta of your choice.Add vegetables which you like,add more cheese for variety(think cheddar!)and customize it according to your taste.

Pasta with Vegetables in White Sauce-ingredients 
Pasta with Vegetables in White Sauce

Ingredients


Macaroni - 1 cup
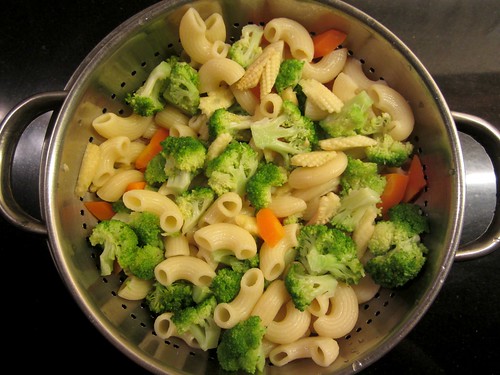
Mixed Vegetables of your choice - I used Broccoli,Mushroom,Carrot & Baby Corn- all together loosely 2 cups,chopped
Onion - 1,chopped finely
Olive Oil - 1 tbsp
Butter - 2 tbsp
Olive oil - 1 tbsp
Flour - 2 tbsp
Milk - 2 1/2 cups
Salt and Pepper to taste
Dried herbs of your choice - 1/2 tsp each (we like Basil and Oregano)
Amul Cheese cube - 1,finely chopped (you can add any cheese of your choice)

Method
Pasta with Vegetables in White Sauce-step1 
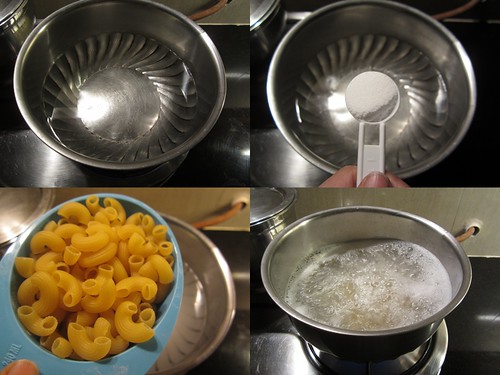
Cook the pasta - In a deep pan add around 10 cups of water to boil.Add a tbsp of salt.When the water comes to a rolling boil,tip in the pasta.Cook for 12-13 minutes or until the pasta is cooked 'al dente'.Immediately drain the pasta to a pan of cold water.Drain again and keep aside.
Pasta with Vegetables in White Sauce-step2 
Cook the vegetables - I usually add the vegetables to the pasta during the last 5 minutes so that the pasta and the vegetables cook together.You can do this separately too.
Pasta with Vegetables in White Sauce-step3 
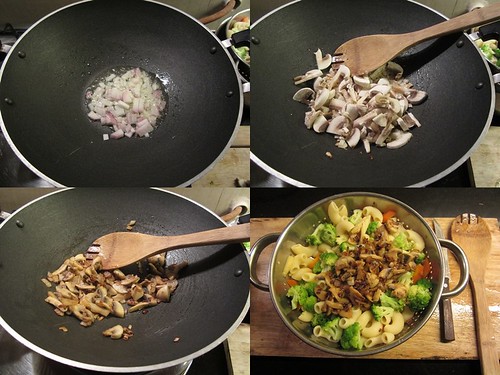
In a kadai/wok add the olive oil and saute onions and mushrooms till soft.Add it to the cooked vegetables and keep aside.
Pasta with Vegetables in White Sauce-step4 
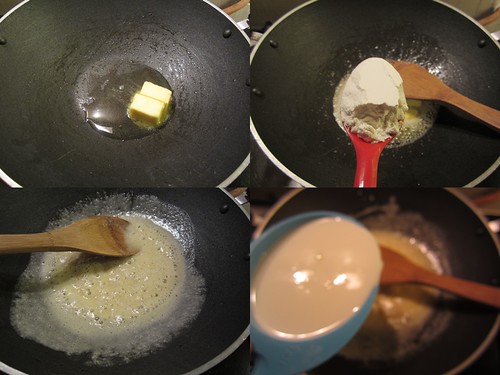
In the same wok,add butter+olive oil.Mix in the flour and saute for 2-3 minutes.Mix in the milk little at a time stirring all the while so that no lumps form.Let it come to a boil-it will look thin in the beginning but with start thickening as it cooks.
Pasta with Vegetables in White Sauce-step5 
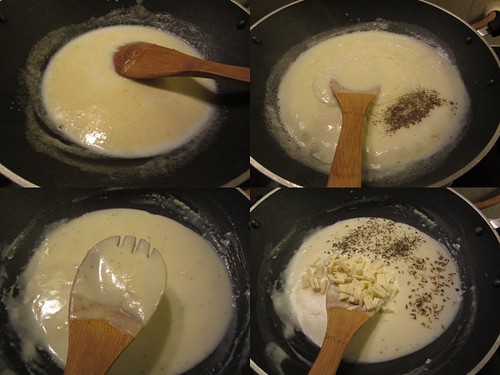
Add salt and pepper to taste.Mix in the dried herbs and the cheese.
Pasta with Vegetables in White Sauce-step6 
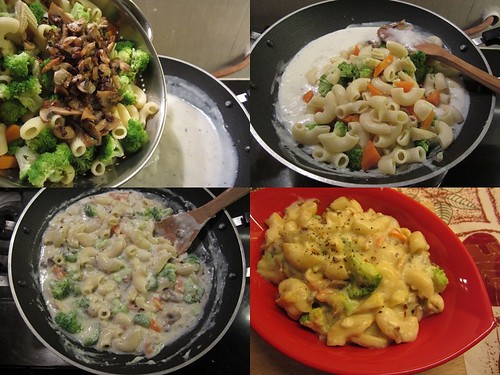
Now add the cooked vegetables along with the sauteed mushrooms and onions to the sauce and cook for 3-5 minutes or until the sauce coats the pasta and vegetables.Check for seasoning.
Serve hot.

Pasta with Vegetables in White Sauce

Notes
  • You can make the pasta plain without vegetables or add more vegetables of your choice like tomato,corn,zucchini etc.I have added vegetables of our choice,I make a plain version with only broccoli too-the possibilities are endless.
  • Follow the directions for cooking pasta as it can go from cooked to overcooked in no time.I cook the pasta for exactly 12 minutes and usually add the carrots/baby corn during the last 6-7 minutes and Broccoli during the last 3 minutes.
  • Do not throw away the water in which you cooked the pasta and vegetables-it contains starch and can be used to thin down the white sauce if it becomes too thick.

Tuesday, August 28, 2012

Paalada Payasam | Onam Special

Paalada Payasam


Onam is synonymous with Sadya and no sadya is complete without a paayasam.In fact,a typical sadya will have 4 payasams,ah how I miss celebrating Onam in Kerala.In Chennai,I feel Onam is all about which restaurant serves the best Sadya and which place is having a pookalam contest.Not being judgemental here,but this years Onam sadya fares have shooted up and I don't think it is worth it,so luckily for us,that means a small but homemade Onam sadya replete with avial,thoran and payasam!

I had grand plans for the blog with regard to Onam recipes,but as you may have guessed,none worked out.Got busy with some stuff and here I am with a last minute Onam recipe.

Paalada Payasam

Paalada payasam/pradhaman is one of the star dishes of a sadya.Deliciously sweet,pink hued paalada is a kicker of a dish difficult to replicate at home.My version is a relatively easier one,made in a small quantity without compromising on the taste and the looks.

A while ago,my friend remarked that her cousin adds a tiny amount of chocolate/cocoa to achieve the pinkish brown hue.That got me thinking and I did a caramel twist to the regular paalada.

Paalada Payasam

Paalada Payasam

Ingredients (serves 4)

Readymade ada - 1/2 cup
Milk - 2 1/2 cups/500ml
Water - 1 1/2 cups
Sugar - 1/2 cup + 1/4 cup

Method

Paalada Payasam-step1 
Soak the ada in boiling water for 15-20 minutes or till the ada becomes soft.
Paalada Payasam-step2 
Boil the milk along with 1/2 cup of water and keep aside.
In a nonstick pan add 1/4 cup of sugar and keep the flame on high.The sugar will start caramelizing,once it reaches a deep golden colour,switch off the flame and add about 1/2 a cup of the boiled milk.
Paalada Payasam-step3 
Gradually add the rest of the milk,stirring all the while.
Now add the soaked ada and let it come to a boil.Simmer and cook for 15 minutes.
Add the sugar and keep stirring.
Once the payasam starts thickening,add rest of the water(you can add milk too).Keep the flame on simmer till you achieve the right consistency-thick but pourable.
Paalada Payasam-step4 
The payasam thickens as it cools down,so keep it relatively thin.
Serve hot.
Paalada Payasam

Notes
  • I have used ready made ada here,you can try a homemade version too.
  • Add condensed milk in place of sugar for a creamier consistency.
  • Do not be tempted to add cardamom or nuts as a paalada tastes great on its own.
Ellavarkkum njangalude Hridayam niranja Onashamsakal!

Thursday, August 23, 2012

Spiral Mint Rolls

Spiral Mint Rolls

When it comes to baking,my style is a bit erratic.There will be days when I bake every single day,even more than once.More often than not,I'll be baking batches of Vanilla Cupcakes and Nankhatais(among those few recipes which I know by heart)and distributing them to friends.And then there are those days my ovens get a cobweb on them(not literally!)

Today,all of a sudden,I had the urge to bake.I almost got everything ready to make a Butter cake when Ajay suggested something savory.When it comes to savory bakes,these Garlic rolls win hands down.I've always had success with the recipe and to an extent,it helped me tame the yeast.As I was prepping,I decided to go with a different filling this time.
Spiral Mint Rolls

Mint was never a favorite herb of mine,somehow it always reminded me of toothpaste,yikes I know that sounds gross!But ever since I set up a miniature herb garden and saw those mint leaves sprouting beautifully,I've developed a new-found love for mint.So mint it was!Made a simple mint filling and crossed fingers for the end product.The rolls,as usual,were soft and fluffy and the mint filling worked wonderfully.

Spiral Mint Rolls
Recipe for the roll adapted from here;filling recipe,my own

Ingredients

Flour/maida - 1 1/2 cups
Warm water - 1/2 cup
Yeast - 1/2 tbsp
Salt - 1/2 tsp
Sugar - 1 tbsp
Olive oil - 2 tbsp


For the mint filling

Mint leaves - 1/4 cup,chopped
Coriander leaves - 1/4 cup,chopped
Green chilly - 1
Lime juice - 1 tsp
Salt to taste
Salted butter - 1 tbsp + more to grease the pan

Method
Garlic Pull-apart Rolls-step1 
Mix together warm water,sugar and yeast in a bowl and let it proof for about 5-7 minutes.It should bubble and froth up within minutes,if not start afresh. 
Garlic Pull-apart Rolls-step2 
Mix together flour,salt and yeast mix till you get a slightly sticky dough.
Add oil and knead for 5-7 minutes till you get a smooth dough.
Garlic Pull-apart Rolls-step3 
Cover the dough with a cling film or a kitchen towel and allow to proof for 40-45 minutes.
Spiral Mint Rolls 
Make the filling-grind together the ingredients for the filling in a mixer jar until you get a smooth paste.
Grease a 9 hole muffin tray-you could use a round tin too.
Spiral Mint Rolls 
Knock down the air in the dough and divide the dough into two equal portions.(I divided the dough into one big and one small portion since I wanted nine rolls)
Roll one half of the dough on a floured surface using a rolling pin to a rough rectangle.
Spread about one third of the mint filling on one side.
Spiral Mint Rolls 
Roll from one end as you would for a swiss roll.
Cut the roll into half and further into two making it four rolls.Repeat with the other half.
Now place the rolls with the cut side up in the greased pan. 
Spiral Mint Rolls 
Cover with a greased wax paper/aluminium foil.Allow to rise for another 20 minutes. 
In the mean time preheat the oven to 180C / 375F.
Bake for 20-25 minutes or till the top has become golden brown.
  • I have used salted butter to slather on the bread before rolling,if you use unsalted butter,increase the quantity of salt added.
  • My rolls didn't brown very well - I usually switch on the broiler mode(in my OTG) after the regular baking cycle but couldn't do so this time as there was the regular hourly power cut.The rolls were perfectly cooked though.
Few of the process shots are from the Garlic-rolls post.

Monday, August 20, 2012

Banana Halwa

Banana Halwa
Any recipe which calls for over ripe fruits is welcome in my kitchen.I always seem to have an excess of ripe fruits at a given time and the best way to use them up is to cook recipes like these.Last week,I had family visiting and as usual,amma got a big batch of Nendrapazham.I had big plans of making payasam,pulisheri,pazham pori etc but sadly,the train journey had mashed up the bananas a bit and they were ripening at a quick pace.

My sis-in-law offered to make halwa and knowing how good she is at making halwas,I quickly accepted the offer.I've made a similar halwa before,but as they say,any new recipe is a welcome change.

Banana Halwa

Ingredients

Over-ripe banana/nendrapazham - 5,chopped
Jaggery,grated - 2 cups
Ghee - 2 tbsp + extra to grease the pan
Sugar - 1/2 cup
Maida - 2 tbsp
Cardamom powder - 1 tsp

Method

Banana Halwa-step1 
Cook the chopped bananas in just enough water(about 1/2 cup)until soft.Using a masher,mash the bananas to a smooth paste.
Banana Halwa-step2 
Add 1/2 a cup of water to the grated jaggery and make a thick syrup.The recipe requires a cup of jaggery syrup,you can refrigerate if there is excess syrup.
Banana Halwa-step3 
In a pan add ghee and mix in the mashed banana.Saute on high flame for about 5-7 minutes or till the banana gets dry and starts leaving the sides of the pan.
At this stage,mix in the jaggery syrup and let the banana and jaggery cook together for 10 minutes on low flame.
Banana Halwa-step4 
When the mix starts getting dry and changes in colour,mix in the sugar.The halwa will again liquefy now,keep on low flame for another 5-7 minutes till the colour starts changing to a golden brown.
Banana Halwa-step5 
Now mix in the maida-this is to absorb any more moisture left in the halwa.
When the halwa starts forming into a single lump of ball and starts leaving the sides of the pan,it is ready.
Banana Halwa-step6 
Grease a pan with some ghee and pat the halwa into an even shape.Let it rest for about 10 minutes and then cut into small squares.
Banana Halwa

Notes
  • If you are using black jaggery,there is no need to add sugar.Just add 1 1/2 cups of jaggery syrup.Sugar is added to make the halwa chewy.
  • You could add chopped nuts or raisins too.
  • If you like chewier halwa,cook the mix for 5-8 minutes longer than mentioned-I like my halwa soft and chewy hence the timings.

Friday, August 17, 2012

Chettinad Mushroom Biryani

I am not a big fan of Mushrooms.Of course there are a few recipes I love which features Mushrooms,but you know,if I did not have it for a long time,I wouldn't miss it as much.But when I saw this recipe over at Arundati's place,it seemed as if it called out to me.The recipe remained in my Bookmarked folders for a long long time.Finally I decided to make it and see if it evoked any mushroom love in me.
IMG_2907

Any recipe which is named Biryani makes me alert.As some say,there can only be Mutton Biryani,everything else is a mixed rice.Though I do not agree to that,it is tough to convince my non-veg loving husband regarding the same.

I was intrigued by the method of preparation.Marinating the mushrooms first and then cooking it along with the rice in an open pan.I've made Biryani in a pressure cooker and a rice cooker but never like this.The resulting dish however,is a cracker.First up,the rice grains look so pretty,retaining the shape and cooked perfectly.The flavor of mushroom is mild and it almost smells like a non-veg biryani-yes!(in a nice way though)Got a thumbs up from Ajay and I do not have to think twice about what I am preparing for the next potluck!
Chettinad Mushroom Biryani

Chettinad Mushroom Biryani
Recipe source - Arundati's Escapades

Ingredients (serves 2-3)

Mushrooms - 150 gms
Onions - 2 big,sliced thinly
Basmati Rice - 1 cup
Coconut Milk - 1/2 cup

For the Marinade

Curd - 1/3 cup
Ginger garlic paste - 1 tsp
Red chilly powder - 1/2 tsp
Coriander powder - 1/2 tsp
Haldi powder - 1/4 tsp
Garam Masala - 1/2 tsp
Salt to taste
Mint and Coriander leaves - 1/4 cup each,chopped

For the seasoning

Oil+Ghee - 2 tbsp
Cinnamon - 1' stick
Cloves - 2-3
Cardamom - 1
Star Anise - 1
Shahjeera - 1/2 tsp
Fennel seeds - 1/2 tsp

Method
Chettinad Mushroom Biryani-step1 
In a thick bottomed kadai add 2 tbsp oil and fry the onions in it till dark brown and crispy.You could also deep fry the same.
Chettinad Mushroom Biryani-ingredient 
Wash and soak the rice in 2 cups of water for 30 minutes.
Chettinad Mushroom Biryani-step2 
Chettinad Mushroom Biryani-step3 
Marinate the mushrooms in ingredients mentioned under marinade along with half of the fried onions.
Chettinad Mushroom Biryani-step4 
Refrigerate for 30 minutes.
Chettinad Mushroom Biryani-step5 
In a kadai add oil+ghee and saute the whole garam masala followed by shahjeera and fennel seeds.
Add the marinated mushrooms along with the marinade and cook for 5-7 minutes or till the mushrooms start shrinking.
Chettinad Mushroom Biryani-step6 
Mix in the coconut milk and let it cook for another 3-4 minutes.
Drain the rice(reserve the water) and mix in carefully trying not to break the grains.Add in salt to taste and 1/2 tsp of garam masala.
Chettinad Mushroom Biryani-step7 
Add the water in which the rice was soaked* and let it boil.Cover with a lid and cook for 15 minutes.The water should be fully absorbed by now.
Switch off the flame and leave it undisturbed for another 15 minutes.
Open the lid and fluff the rice with a fork.Mix in the rest of the fried onions and serve.
Chettinad Mushroom Biryani

Notes
  • *I have used 2 cups of water to cook 1 cup of rice.The rice was perfectly cooked with grains not sticking to each other.I usually follow the same quantity when I cook in the pressure cooker too for one whistle.But it usually depends on the kind of the rice you are using.So follow the method depending on the rice you use.
  • The Biryani tastes delicious on its own,so I served it with some spiced raita flavored with salt and jeera powder.

Monday, August 13, 2012

Adai Dosa | Easy Breakfast Recipes

Getting back home after a holiday is always difficult.Especially when we are driving down.We had one full day of driving from Cochin to Chennai and I wasn't making things easier by sitting with a sulking face:).We had a stop over at Palakkad where we picked our friend and his wife for company.His mom had prepared delicious breakfast for us and we just couldn't wait.
Adai Dosa

Piping hot dosas with two kinds of chutney and a tall mug of chaya(tea) was all it took for me to get back into my own self,chatting and smiling and eating at the same time.The dosas were crisp and spicy and I couldn't guess what it was made of.Having not tasted adai dosas before,I just couldn't stop myself from having at least 3-4 dosas.I'd thought of asking aunty for the recipe but the cutie doggy named 'pepsi' diverted my interest and then it was time to leave.

I asked many people for the recipe and got so many interesting ones at that.The closest one I think was Sharmi's recipe and I tried it with slight changes.Paired with coconut chutney and tomato thokku,this was one delicious breakfast I didn't mind waking up early for!
Adai Dosa-ingredients

Adai Dosa
Recipe slightly adapted from Sharmi's Passions

Ingredients

Raw Rice - 1/2 cup
Idli Rice - 1/2 cup
Urad dal - 1/8 cup
Toor dal - 1/8 cup
Channa dal - 1/8 cup
Moon dal - 1 tbsp
Red chillies - 2
Salt to taste
Turmeric powder - 1/4 tsp
Hing/asafetida - 1/4 tsp
Small onions - 5-6,peeled
Coriander leaves - 1 tbsp,chopped

Method

Adai Dosa-step1 
Soak the rice,dals and red chillies together for 1-2 hours.
Grind to a smooth paste.Mix in the onions,salt,turmeric and hing and grind again.
Adai Dosa-step2 
Add the coriander leaves.
Adai Dosa 
Making the adai 
Heat a dosa tawa and smear some oil.Wipe with a tissue(this ensures the dosas would come out smoothly without sticking to the pan).
Pour one ladelful of adai batter and spread into a thin circle.Drizzle a tsp of oil around the dosa,cover and cook for 10 seconds.
Remove the lid and flip over the dosa and cook for another 15 seconds.
Adai Dosa
Serve hot with coconut chutney.
Notes
  • The best combination for this dosa,I am told is Avial.I've also heard suggestions to try it with jaggery.Love the options.
  • You can add chopped onions and ginger in place of small onions after the batter is ground.
  • The batter does not need fermenting and you can make adais as soon as you grind the batter.The batter can be refrigerated in an airtight container for a day.
Related Posts Plugin for WordPress, Blogger...
 
Pin It button on image hover