Showing posts with label Nutella. Show all posts

Thursday, February 6, 2014

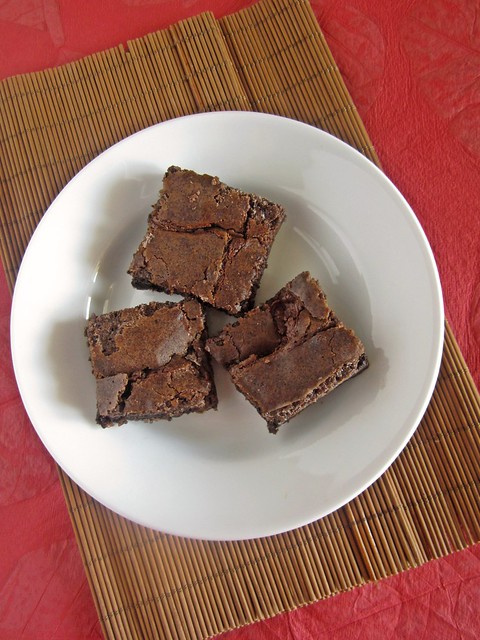
Fudgy Nutella Brownies

Fudgy Nutella Brownies
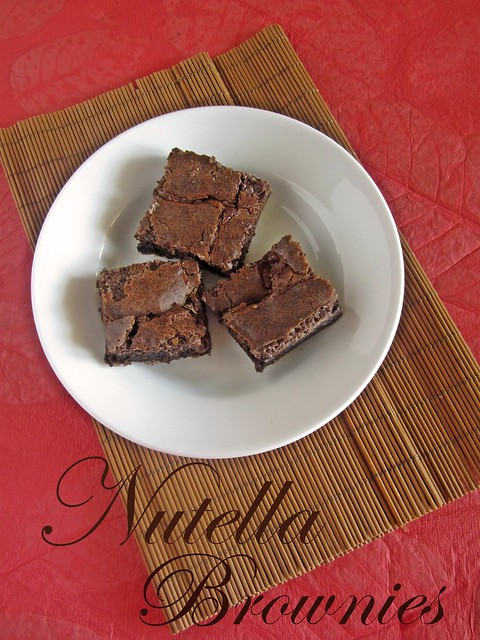
Yesterday was World Nutella day and I had planned to post this to combine my friends' birthday as well as WND.Things got busy and the post got delayed.But better late than never eh?Well,no time is a bad time to post something as delicious,gooey and fudgy as these brownies,I mean do you really need an excuse to whip these up?

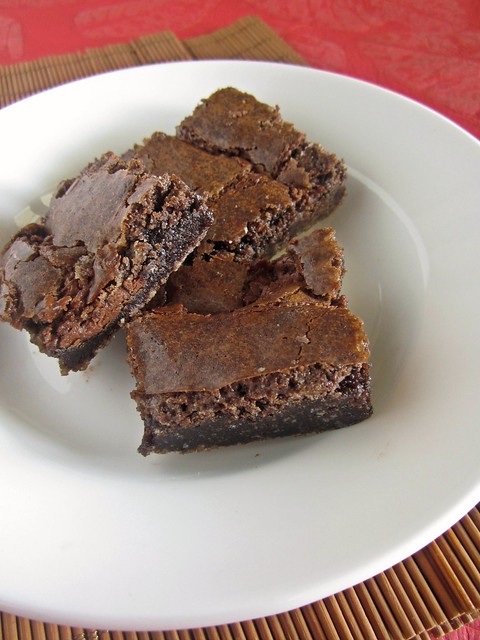
I am not one of those people to enjoy Nutella straight from the jar(Yes I know!)but I love to mix it up in my baked goodies.This cake of course tops the list and these rolls come second.Combining it in a brownie would just make it to the top of my list and it did.Gooey brownies with a swirl of Nutella can never go wrong.These do not score well in the looks department but taste awesome.I contemplated a while before posting these as I wasn't very happy with the pictures,but a good recipe has to be shared,right;)?
Fudgy Nutella Brownies
Only change I would suggest is to use fine granular sugar.The recipe says it's ok if the batter is a bit granular but I felt some of the sugar crystals didn't melt evenly and it was a task getting these buggers out of the pan even though I lined the pan with foil.Maybe one single pulse in your mixer would break the sugar crystals a little,which would work out perfect while mixing.
Fudgy Nutella Brownies
Recipe source - Averie Cooks
Makes 18-24 thinner and small brownies in a 9 by 13 inch pan or 12 generous brownies in a 9 by 9 inch pan

Ingredients

Semi sweet chocolate -6 oz/170 gms
Butter - 150 gms
Instant coffee powder - 1 tbsp
Granulated sugar - 1 1/2 cups
Brown Sugar - 1/2 cup
Eggs - 3
Vanilla - 1 1/2 tsp
All purpose flour/maida - 1 cup
Nutella - 1/2 to 2/3 cup

Method

Preheat oven to 170C.Grease and line a 9 by 9 inch square pan with parchment paper or aluminum foil.
Fudgy Nutella Brownies
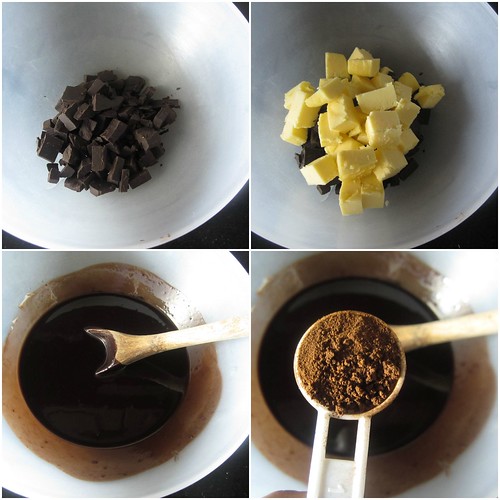
Microwave chocolate and butter in a big bowl for 1 minute on high.The butter would melt completely and the chocolate would still hold its shape.Stir well using a wooden spoon and the chocolate would also melt in the heat.Stir in the coffee powder.
Fudgy Nutella Brownies
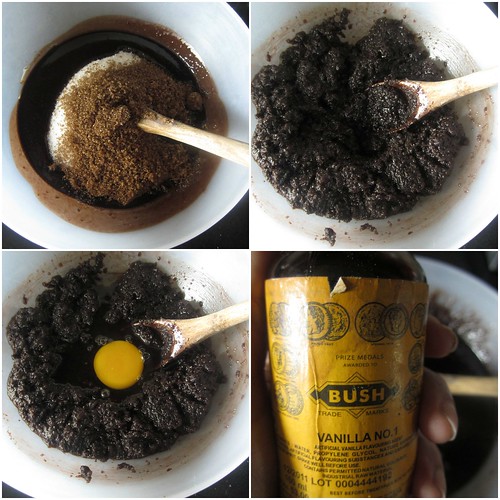
Stir in both sugars,mix well.Add eggs one by one and then the vanilla.
Fudgy Nutella Brownies
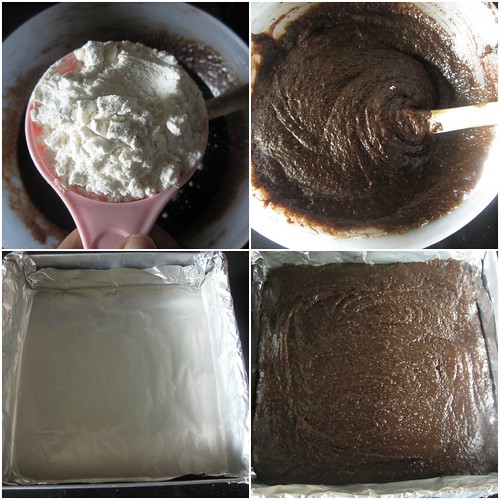
The batter would be a but granular but it's okay.Stir in the flour.Mix only till combined and no specks of flour remain.Pour into the prepared pan.
Fudgy Nutella Brownies
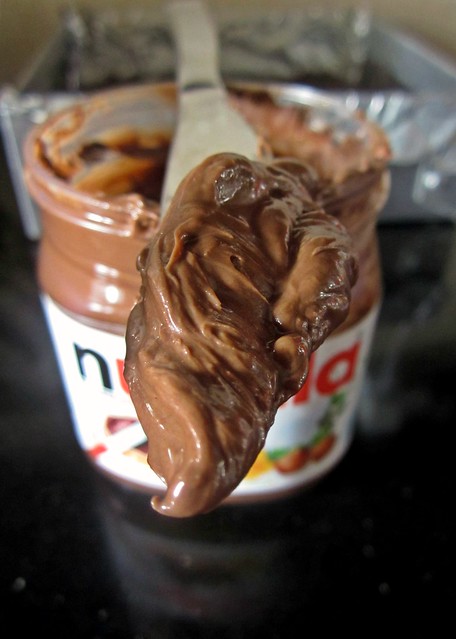
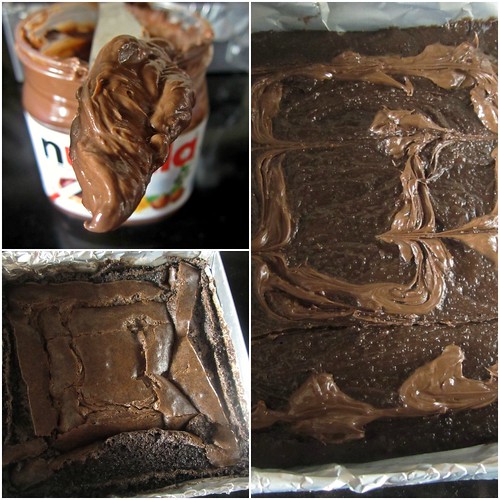
Add Nutella to the top of the mixture and either leave it as it is or do a zig zag pattern on top.
Bake for 25-28 minutes or until edges pull away from the pan and the top and center is just set.Keep these gooey and do not overbake,these will firm up as they cool.
Fudgy Nutella Brownies
Allow to cool completely before slicing and serving.
 

Monday, August 5, 2013

Nutella Pull-apart Rolls | Easy Bread Recipes

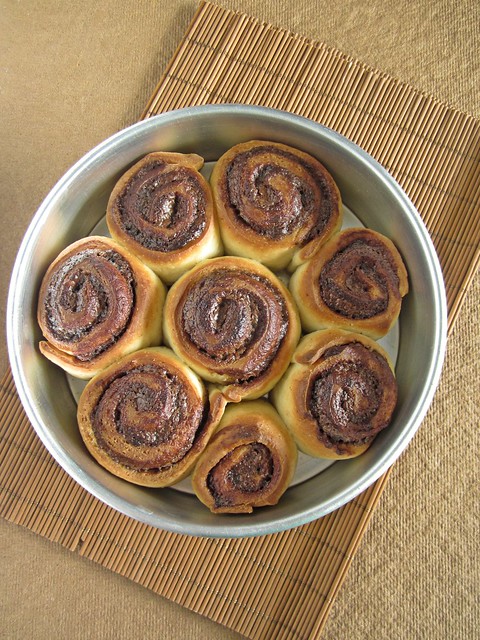
Nutella Pull-apart Rolls
I love Ferrero Rocher chocolates,given that love,you'd think I am crazy about Nutella too,right.But no,I am not a grab-that-bowl-of-nutella person.I love chocolate spreads but not as much to eat on their own.Strange no?Funnily,I don't like to spread nutella on my bread as well.I prefer jam and butter instead.However the way I stock up on Nutella bottles,one would think otherwise.

Maybe it has got to do with changing taste buds or maybe it is the strong chocolate flavor.But Nutella for me is only for mixing into cake batters and frostings.So when I saw this recipe for Nutella Pull-apart bread,I was literally 'pulled' to it.This recipe appeared as part of Homemade Bread recipes in GoodFood magazine a while back and it was developed by Saee of MyJhola.
Nutella Pull-apart Rolls
Two reasons for me to bake these-one being pull-apart bread success for every trial of mine.Be it the Garlic rolls or the Mint ones or the Pesto rolls,even the Cinnamon rolls,all have give me immense satisfaction in baking as well as polishing them off.Two being the recipe creator-Saee has been baking breads for a while now and posting wonderful videos of them and I felt the recipe can never go wrong.

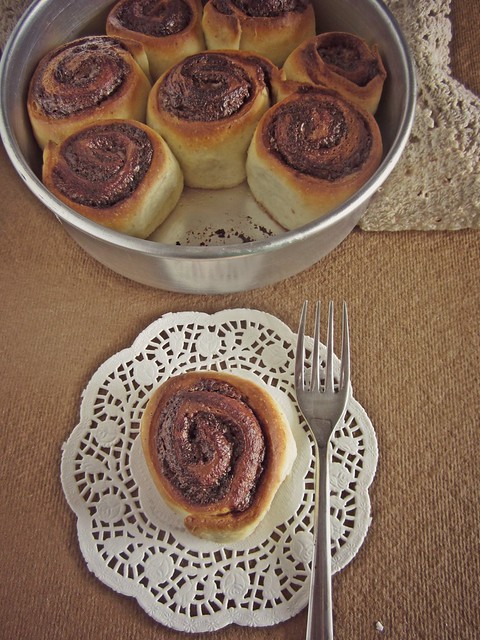
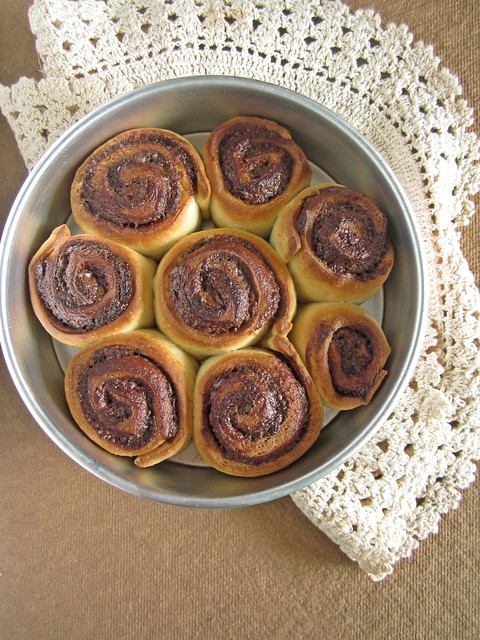
Fresh out of the oven,these tasted heavenly.Soft pillowy bread sandwiched in Nutella,these make for a delicious tea time treat.Next day,I microwaved the rolls for 10 seconds before serving and they tasted as fresh.Planning to try another batch with Orange Marmalade.
Nutella Pull-apart Rolls
So what is your favorite filling?

Nutella Pull-apart Rolls

Ingredients

Maida/All purpose flour - 200 gms
Instant Yeast - 2 tsp,I used Mauripan
Sugar - 1 tbsp
Salt - 1 tsp
Lukewarm milk - 1/2 cup
Butter - 2 tsp + extra for brushing
Nutella - 3 tbsp

Method

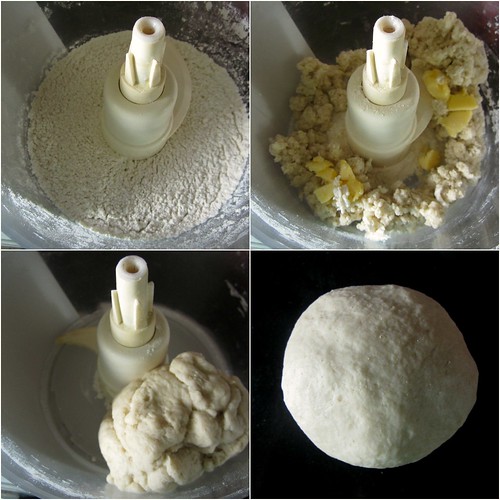
I made the dough in my food processor 
Nutella Pull-apart Rolls 
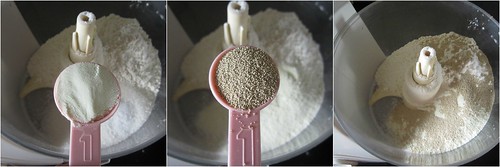
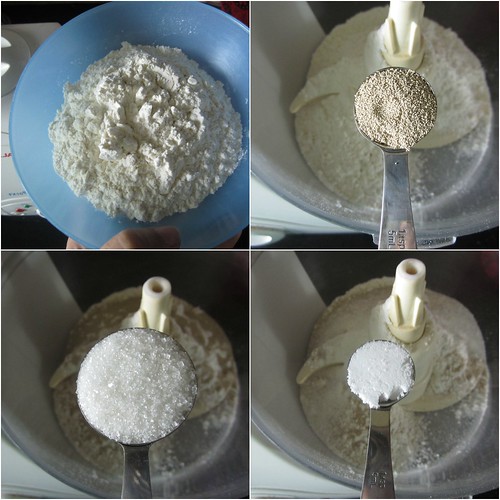
Into the bowl of your food processor,add maida,yeast,sugar and salt.Pulse for 5 seconds.
Nutella Pull-apart Rolls 
Add milk through the feed tube and process till the dough almost comes together.Mix in the butter and process till the dough forms a ball and leaves the sides of the processor bowl.
Nutella Pull-apart Rolls 
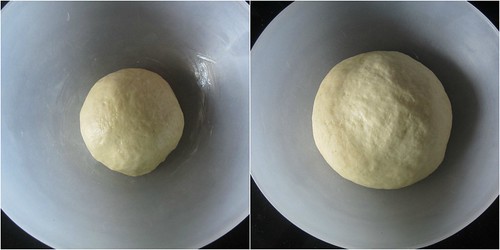
Grease a bowl with some oil and place the dough in it and cover to let it rise,for about 45 minutes or until the dough doubles.
Nutella Pull-apart Rolls 
Punch the dough and knead again.Roll out into a floured surface to about a rough square of 12',about 1/4' thick.
Spread the Nutella and then roll the dough into a spiral log.
Nutella Pull-apart Rolls 
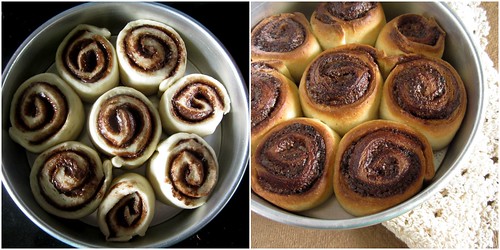
Cut the dough into 2' pieces and place cut side up in a round 9' pan with some space in between for the rolls to rise.
Nutella Pull-apart Rolls 
Leave to double again,this time for about 35-40 minutes.
Bake for about 20 minutes at 200C.The top should be light golden brown.Remove and brush with melted butter immediately.
Nutella Pull-apart Rolls
Yeastspotted  
Cool completely before serving.

Thursday, April 4, 2013

Hokkaido Milk Bread with Tangzhong ~ We Knead to Bake # 3

This post is for all of you who mailed in and asked me why I still haven't baked the WKtB post of the month.I couldn't do it on time but better late than never,eh?
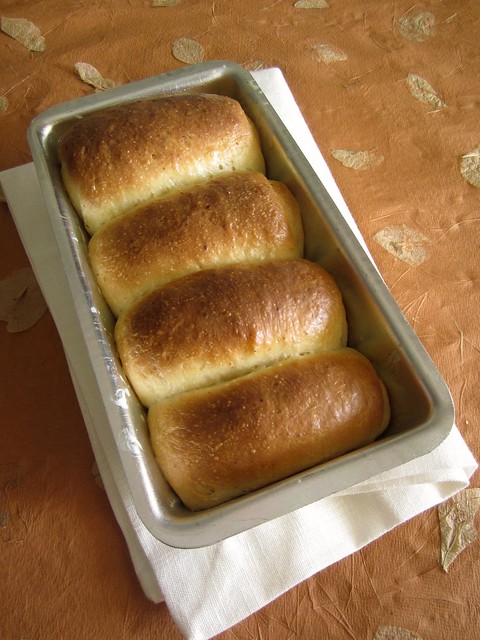
Hokkaido Milk Bread
After the laborious Croissants last time,when Aparna mentioned we were doing a easier bread this time,I was quite relieved.But when I heard the name,I was amused.Hokkaido?Tangzhong?Apparently,it is a very popular bread in South Asian bakeries across the world.It is also known as Asian Sweet Bread and Hong Kong Pai Bo.
The Hokkaido Mild Bread owes its texture and height to the use of an interesting ingredient called Tangzhong. Basically, the Tangzhong method involves cooking 1 part of bread flour with 5 parts of water (by weight) at 65°C (149 °F) to form a roux. At 65°C, the gluten in the bread flour and water mixture would absorb the moisture and create a “leavening” action.  When the Tangzhong is added into other ingredients that go into a bread dough, it produces light, tender and fluffier bread.
Hokkaido Milk Bread
This method of using Tangzhong is often seen in South Asian breads and was created by a Chinese woman, Yvonne Chen, who describes this method in her book which translates to “65 degrees Bread Doctor”.
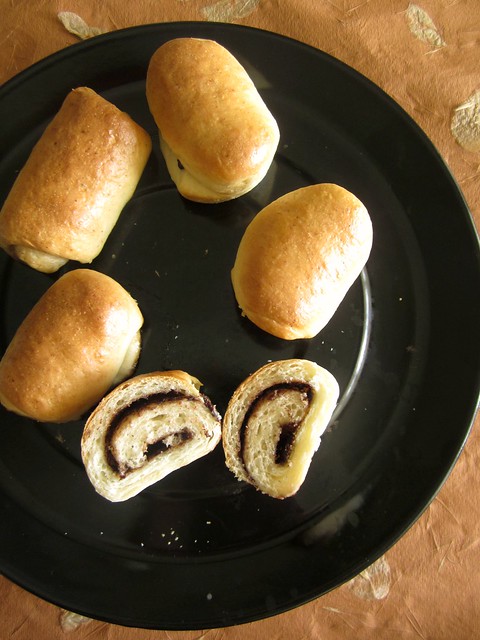
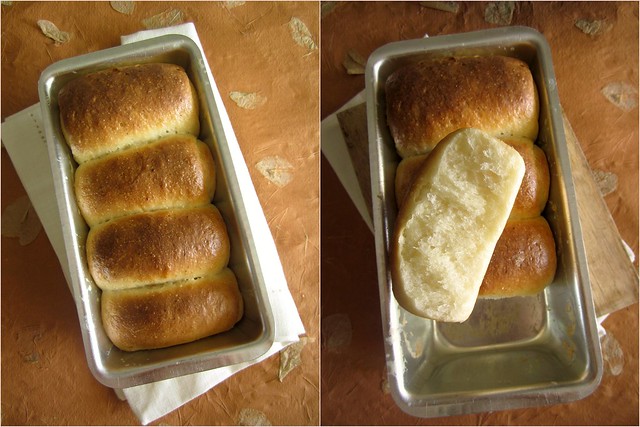
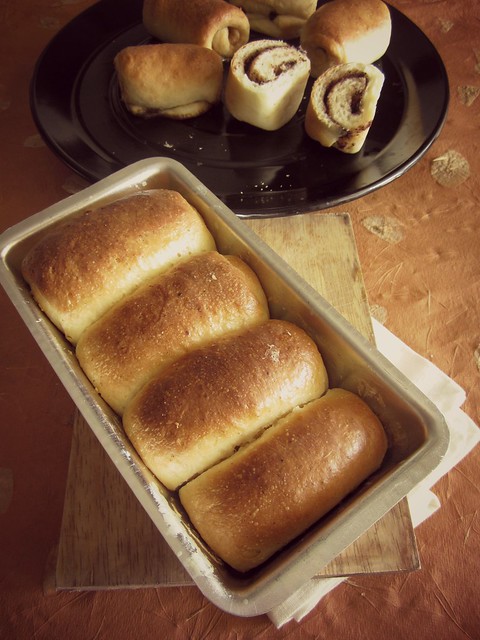
The Hokkaido milk bread is a very easy bread to make.The first step is to make the Tangzhong and second is kneading the bread dough.The dough is a bit sticky so kneading can be a bit hard if you are doing it by hand.The dough is pretty versatile too.You can make plain bread loaves,dinner rolls,Pav for Pav Bhaji,filled bread or animal shapes.My creativity when it comes to shaping animals is nil and I didn't want to embarrass myself by shaping something which might turn into something totally different,so I stuck to baking rolls and loaves:) Hokkaido Milk Bread
Hokkaido Milk Bread With Tangzhong
(Original Recipe from 65 Degrees Tangzhong “65C Bread Doctor” by Yvonne Chen, and adapted from Kirbie’sCravings)
Ingredients: 

For The Tangzhong (Flour-Water Roux)

1/3 cup all-purpose flour
1/2 cup water
1/2 cup milk 
For The Dough:

2 1/2 cups all-purpose flour
3 tbsp sugar
1tsp salt
2 tbsp powdered milk
2 tsp instant dried yeast
1/2 cup milk (and a little more if needed)
1/8 cup cream (25% fat)
1/3 cup tangzhong (use HALF of the tangzhong from above)
25gm unsalted butter (cut into small pieces, softened at room temperature)
1/2 to 3/4 cup mini chocolate chips if making the chocolate chip rolls 
Method: 
The Tangzhong  (Flour-Water Roux):
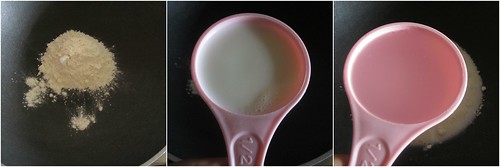

Hokkaido Milk Bread-step1 
Whisk together lightly the flour, water and milk in a saucepan until smooth and there are no lumps. Place the saucepan on the stove, and over medium heat, let the roux cook till it starts thickening. Keep stirring/ whisking constantly so no lumps form and the roux is smooth.
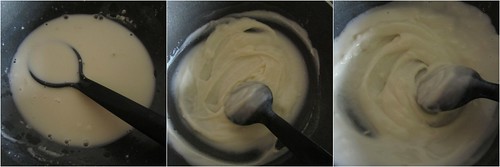
Hokkaido Milk Bread-step2 
If you have a thermometer, cook the roux/ tangzhong till it reaches 65C (150F) and take it off the heat. If like me, you don’t have a thermometer, then watch the roux/ tangzhong until you start seeing “lines” forming in the roux/ tangzhong as you whisk/ stir it. Take the pan off the heat at this point.
Let the roux/ tangzhong cool completely and rest for about 2 to 3 hours at least. It will have the consistency of a soft and creamy crème patisserie. If not using immediately, transfer the roux to a bowl and cover using plastic wrap. It can be stored in the fridge for about a day. Discard the tangzhong after that.  
The Bread Dough:

I made this dough in the food processor. This dough can be made by hand but the dough is a bit sticky and can take some time and effort to knead by hand. If you have some sort of machine which will do the kneading for you, use it. Don’t punish yourself. And do not add more flour to make it less sticky either!
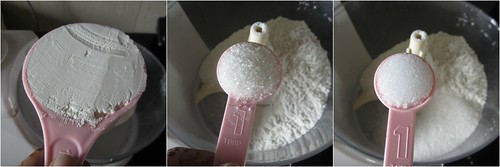
Hokkaido Milk Bread-step3 
Put the flour, salt, sugar, 
Hokkaido Milk Bread-step4 
powdered milk and instant yeast in the processor bowl and pulse a couple of times to mix. 
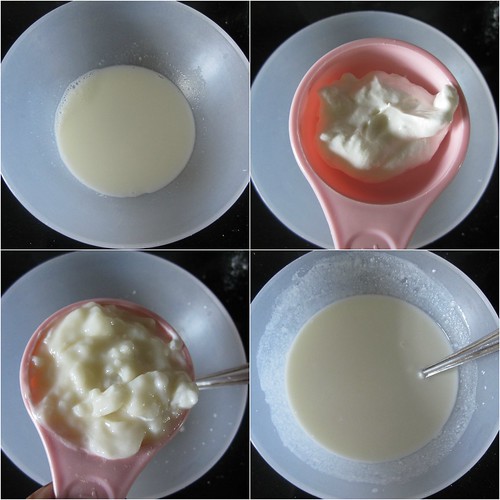
Hokkaido Milk Bread-step5 
In another small bowl mix the milk, cream and Tangzhong till smooth and add to the processor bowl. 
Hokkaido Milk Bread-step6 
Run on slow speed until the dough comes together. Now add the butter and process till you have a smooth and elastic dough which is just short of sticky.
The dough will start out sticky but kneading will make it smooth. If the dough feels firm and not soft to touch, add a couple of tsps of milk till it becomes soft and elastic. When the dough is done, you should be able to stretch the dough without it breaking right away.  When it does break, the break should be form a circle.
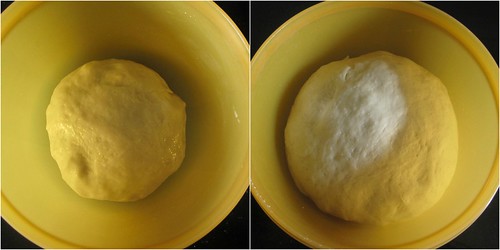
Hokkaido Milk Bread-step7 
Form the dough into a ball and place it in a well-oiled bowl turning it so it is well coated. Cover with a towel, and let the dough rise for about 45 minutes or till almost double in volume.  
Place the dough on your working surface. You don’t need flour to work or shape this dough. This recipe makes enough dough to make one loaf (9” by 5” tin), 2 small loaves (6” by 4” tins) or 1 small loaf (6” by 4”) and 6 small rolls (muffin tins). Depending on what you are making, divide your dough. If you are making 1 loaf, divide your dough in 3 equal pieces. If you are making two smaller loaves, divide your dough into 6 equal pieces.
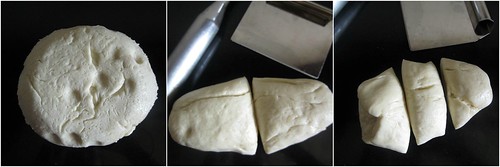
Hokkaido Milk Bread-step8 
I made one small loaf and 5 small rolls. So I first divided my dough into two equal pieces first. Then I divided the first half into four equal pieces to make the loaf. The other half was divided into five equal pieces for five rolls.
The shaping of the portions, whether for the loaf or the rolls, is the same.
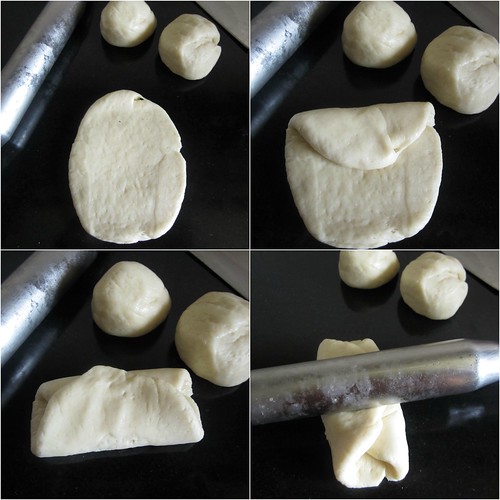
Hokkaido Milk Bread-step9 
Roll out each portion of the dough with a rolling pin into an oval shape, about 1/8” thick. Take one end of the dough from the shorter side of the oval and fold it to the middle of the oval. Take the other end and fold so it slightly overlaps the other fold.
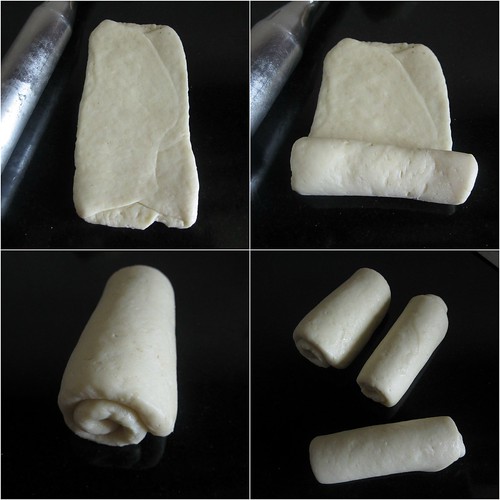
Hokkaido Milk Bread-step10 
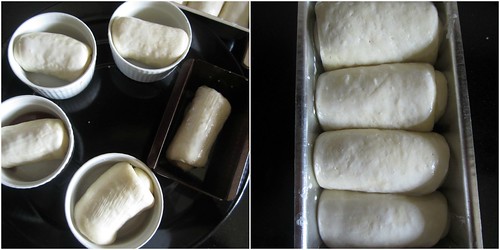
Roll this folded dough with the rolling pin so the unfolded edges are stretched out to form a rectangle. Roll the rectangle from one short edge to the other, pinching the edges to seal well. Do this with each of the three larger pieces and place them, sealed edges down, in a well-oiled loaf tin. Cover with a towel and leave the dough to rise for about 45 minutes.
Hokkaido Milk Bread-step11 
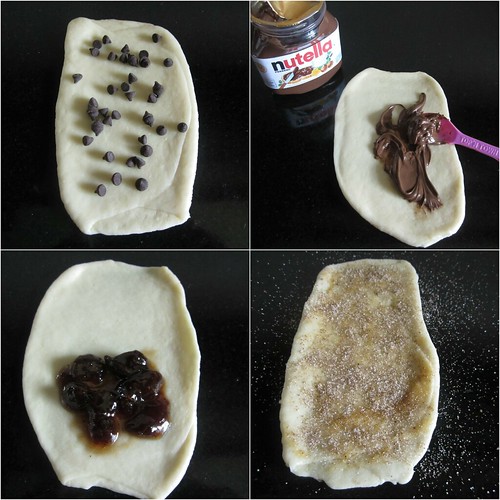
To make the rolls fold them in the same manner described above, but before rolling them up, place some chocolate chip on the dough.I did one chocolate chip roll,two nutella and one with strawberry preserve.Also one small cinnamon-sugar roll. Roll the dough rectangles carefully and pinch to seal the edge. 
Hokkaido Milk Bread-step12 
Place each roll of dough in a well-oiled muffin cup and cover with a towel. Allow to rise for about 45 minutes. 
Hokkaido Milk Bread-step13 
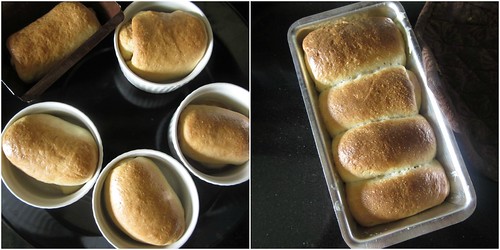
Carefully brush the tops of the rolls and the loaf with milk (or cream) and bake them at 170C (325F) for about 20 to 30 minutes till they are done (if you tap them they’ll sound hollow) and beautifully browned on top. Let them cool in the tins for about 5 minutes and then unmould and transfer to a rack till slightly warm or cool.
Hokkaido Milk Bread
Yeastspotted

Serve or else store in a bread bin. This bread stays soft and delicious even the next day. This recipe makes enough dough to make one loaf (9” by 5” tin), 2 small loaves (6” by 4” tins) or 1 small loaf (6” by 4”) and 6 small rolls (muffin tins).

I'd highly recommend this bread to everyone who think bread baking is not as easy as it seems to be.Many a times,I've been disheartened too-sometimes the yeast was faulty,sometimes the recipe was faulty or sometimes,I might have done something wrong.This recipe is the answer-soft,pillowy and spongy,bread which you thought you only got in bakeries can now be made at home and with an almost fool-proof recipe.

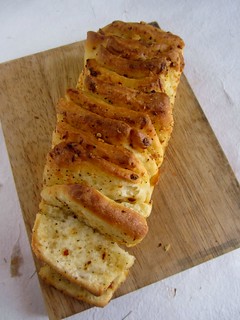
Herb and Cheese Pull-apart Bread{January}
Herb & Cheese Pull-apart Loaf

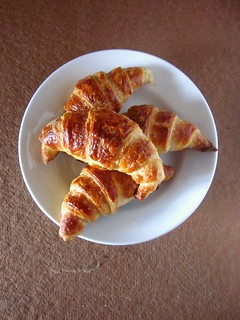
Classic Croissants{February} 
Classic Croissants

Tuesday, March 26, 2013

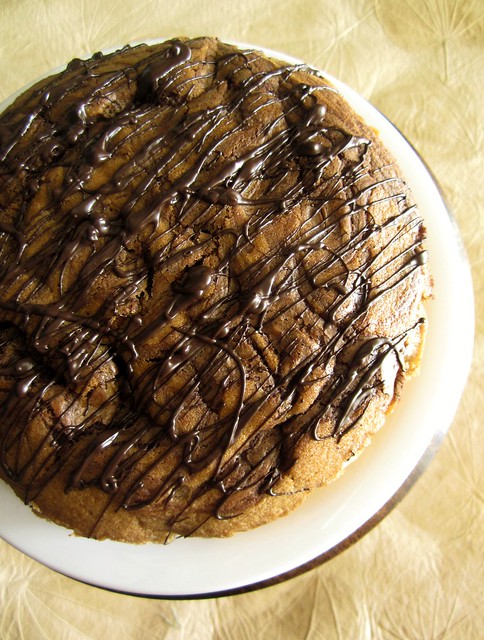
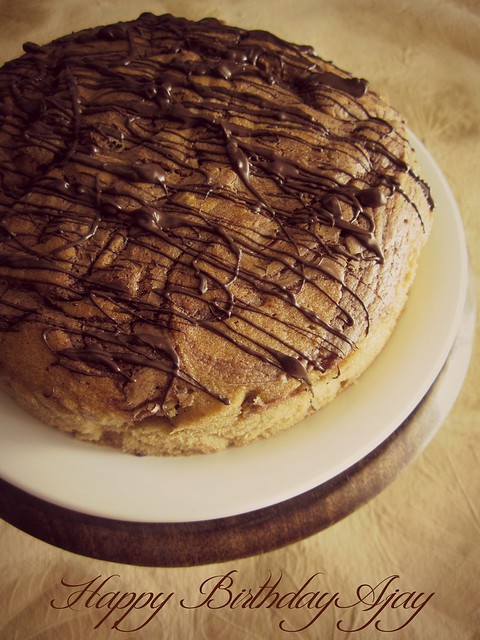
Nutella Birthday Cake

Nutella Birthday Cake
Ajay turned a year older today.As much as I'd have loved to bake him a special cake,he wanted none of it.He wanted a Brownie and didn't want a cake cutting ceremony(hardly a ceremony with two of us!)but what is a birthday without a cake,right?I pestered him for another choice and he said 'ok,bake me "that" Nutella cake'.Oh boy,how could I have forgotten,it is one of his favorite cakes ever.So Nutella cake it was.Simple,delicious and so-birthday like!I couldn't leave it plain so drizzled the top with some melted chocolate.Food blogger happy and the birthday boy too :)
Nutella Birthday Cake

For the recipe and step-by step pictures hop over here - Nutella Butter Cake.
Wednesday, January 16, 2013

Nutella Butter Cake

Simple butter cakes/pound cakes win me over always.Given a choice,I'd love to bake cakes like these all the time.As a matter of fact,it has been a long time since I frosted a cake even though I love piping designs on the cake,they are far from perfect though:)
Nutella Butter Cake
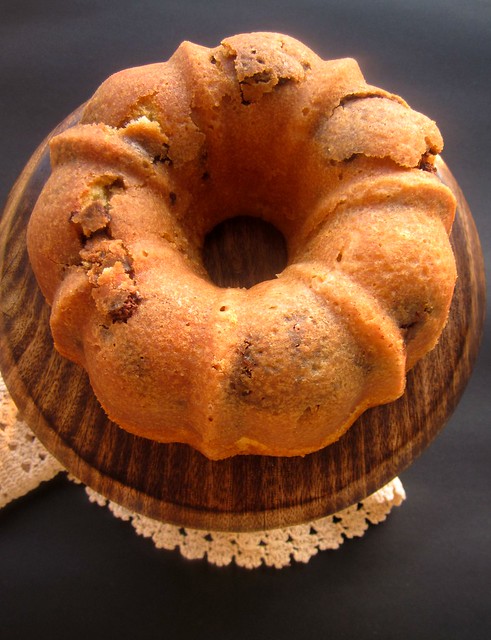
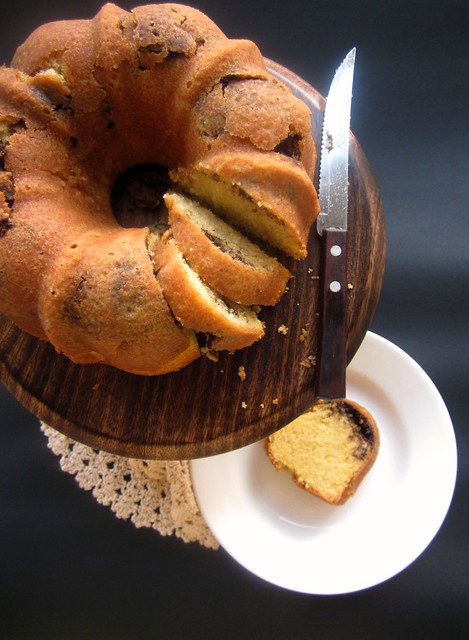
Chocolate and Vanilla is always a winning combination and it scores brownie points with this one too.Thanks to Pinterest,I saw this amazing cake and through it the amazing blog Cook Republic.I baked the cake immediately and at least 3-4 times after that.Every time I took pictures,it lacked something.Then I knew I was trying in vain,Sneh's pictures look just too good and I decided to post my version here,however lame it looks in comparison.
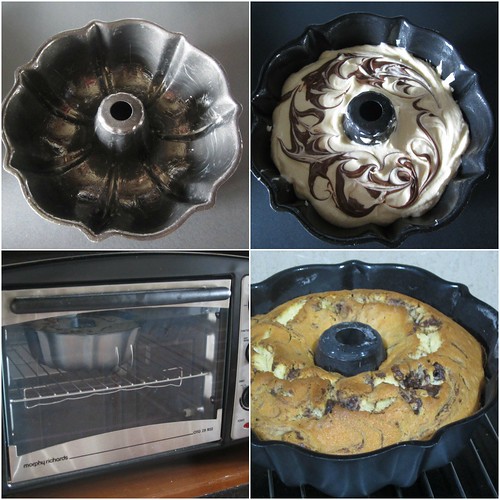
A simple vanilla butter cake swirled with Nutella with a perfect golden crust and tight crumbs.Slices beautifully,it will make a great addition to a High Tea menu,paired with coffee/tea-both work well.I will be baking this cake again,probably with different additions now.How does Cinnamon and Chocolate chips sound?
Nutella Butter Cake
Nutella Butter Cake
Recipe source - Sneh of Cook Republic

Ingredients

Salted Butter - 150gms,I used Amul
Castor Sugar - 1 cup
Eggs - 3
Vanilla extract - 1 tsp
Flour - 1 1/2 cups
Baking powder - 1 tsp
Milk - 1/2 cup
Nutella - 3 tbsp

Method

Preheat oven to 160C.Grease and line a 6 cup Bundt pan or a 9/5 loaf tin.
Nutella Butter Cake-step1 
Nutella Butter Cake-step2 
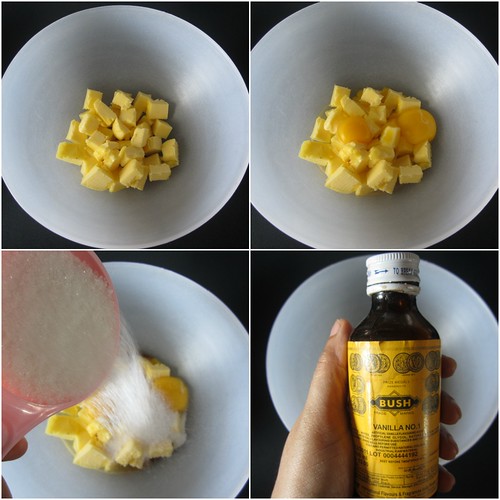
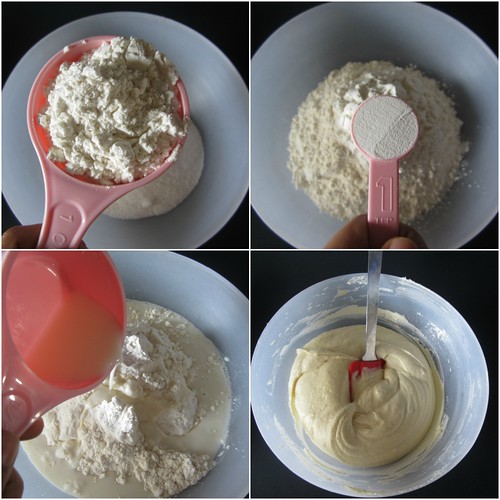
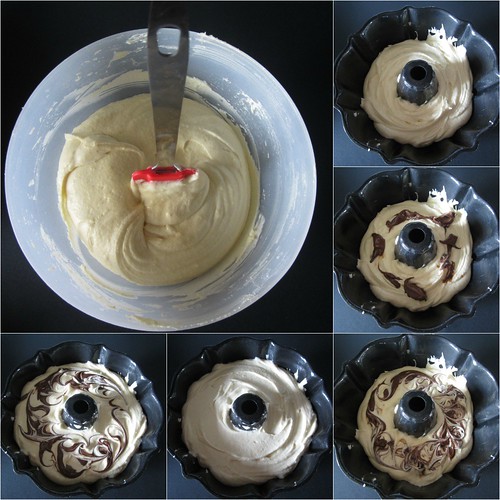
In a mixing bowl combine all the ingredients except nutella and beat well for 2-3 minutes or until everything is combined and you get a smooth batter.
Nutella Butter Cake-step3 
Pour half of the batter into the prepared tin.Add 1 1/2 tbsp nutella and swirl with a knife or a toothpick.
Pour rest of the batter on top and repeat with the remaining nutella.
Nutella Butter Cake-step4 
Bake for 50-60 minutes or until the cake is golden brown on top and a toothpick inserted into the center of the cake comes out clean.
Cool in the tin for 30 minutes and then transfer to a wire rack to cool completely.
Slice and serve.
Nutella Butter Cake
Notes
  • Original recipe calls for churned salted butter and I used regular Amul butter,which worked fine.If you use unsalted butter,add a pinch of salt while mixing the batter to cut down the sweetness of the cake.
  • Wait till the cake is completely cooled down before slicing to get neat even slices.
  • You could add more/less Nutella according to your taste.Mix it well into the batter,mine was not completely mixed and some of it sank to the bottom,doesn't matter when it comes to the taste though:)
Related Posts Plugin for WordPress, Blogger...
 
Pin It button on image hover