Monday, December 29, 2008

Best of 2008!!

I was thinking what to post for the last post for the year 2008.I felt a round-up,a sort of looking back on the year that went past would be a great idea.Even better if I can send it to an event,in this case Best of year 2008 event by Srivalli.

Technically,this December would be my first blog anniversary as I started this blog last December.I was too awed by so many food blogs where I was a regular and decided that I wanted to do that too.I didn’t think much about the name as it was done in a hurry.I wanted to have it named Easycooking-for the blog header as well as the URL.But Easycooking was already taken so divyascookbook came into existence.

I started posting by March and was so excited about it.I felt so good when people started reading my blog and appreciated me.Now,when I look back,I feel it is due to the comments/appreciation that I got that I am able to post regularly.

I wish to take this opportunity to thank all my fellow bloggers and readers.Without your support and encouragement,I couldn’t have come this far.Thank you folks!!

1.Top 5 Recipes of 2008


1.Zebra Cake – I came across the blog world while looking for cake recipes and this is one of the best cakes I baked so far.It looks so spectacular that people might think you struggled to get the stripes right,while its just the easiest thing to do.If you guys haven’t tried it yet take my word and go for it-Surprise your friends and family with this one!!

2.Masala Dosa with Ulli chammanthi – An all time favorite which saved my pride during my first cooking disaster.I make a small onion chutney which goes well with it.It has become a family favorite,one which my bro-in-law demand whenever they are in Chennai!!

3.Eggless Butter Cookies – Another one of my favorites-this recipe gives me the same result all the time.A favorite among my friends and family,I have made this at least a dozen times and everytime I get to hear people say..hmmmmm!!


4.Paneer Butter Masala – One of my ever favorite curry,I almost screamed Eureka the day when it tasted like my favorite restaurant version.It makes me nostalgic when I make this as this was one of those dishes which me and amma tried to recreate at home!!

5.Shevai – The Konkani version of the famous idiyappam.Though the process is quite difficult,the taste will make you forget all the trouble you went through to make it.One of our favorite breakfasts which my ma-in-law makes without fail whenever we land in Bangalore.
2.Best dish of the month
MarchDudhi Alchikeri~Pumpkin curry.I always feel nostalgic whenever I try to recreate the dishes I grew up on.One of my favorite curries served in our temple and I always crave for a second helping!!

AprilBeetroot Salad.I started out with preconceived notions about this one determined to hate it since I was not much a salad person.But this one made me a convert.A healthy salad which features in our menu at least twice a week!!

MayKadala curry Thattukada style.One of my so called masterpiece dishes..I always get compliments whenever I make it with Puttu.To think that I messed up big time making puttu-kadala for the first time..;-)!!

JunePuran poli~Ubbatti.Even though I blogged about it,my contributon to this was just clicking photos!!My ma-in-law and co-sis made this while we were in Bangalore and honestly Puran poli hot from the tawa is just irresistible!!

JulyNo fry Gobi Manchurian.My ma-in-law’s recipe which was perfected by my vanni(co-sis),we were almost licking off the gobi from the bowl,it is that tasty.One could never guess it was a no-fry version!!

AugustChocolate Yogurt Cake.Again,one of my vanni’s masterpiece recipes.I love the chocolatey flavor of this cake and it just doesn’t smell of eggs which I guess is one of its plus points and it is made in the microwave too!!You feel like eating this cake,it is ready in less than 15 minutes!!

SeptemberBread Pizza.Feel like having a pizza and can’t wait??Then this one’s for you!!Gives a satisfied feeling,almost like eating a pizza!!

OctoberGajar ka Halwa.One of the most traditional recipes which is made easy.I love gajar ka halwa but absolutely dislike the fact that it takes up so much of your time.Stirring and stirring..not my kind of a sweet!!An easier version and tasty too.I would prefer this one over the so called ‘traditional gajar halwa’ anyday!!

NovemberPineapple Upside down cake.The Recipe Marathon month where a bunch of bloggers took up the challenge of posting daily and completed the challenge successfully!!It is my birthday month too,so the birthday cake has to take the cake..;-)!!

DecemberPaal payasam.Again,a traditional recipe made easy.I felt so much like having a payasam and couldn’t think of standing next to the gas stove for hours and adding oodles of sugar and milk.I made this one using just a packet of milk and a cup of sugar..sheer pleasure!!

3.Top 5 recipes tried from other blogs


1.Vanilla Cupcakes – Thanks to Deeba,I have stopped buying cupcakes from Bakery,I make my own cupcakes now!!One of my hubby’s favorites-I have to even hide it sometimes to make him stop eating it!!Perfect recipe which yields exactly 18 cupcakes each and everytime!!

2.Cinnamon cookies – A cinnamony twist to my favorite butter cookies.I made this recipe following Lakshmi’s recipe and keep making it whenever I feel like munching on cookies-with a twist!!

3.Pizza – One of our favorite,even though we try to restrict our Pizza outings owing to our diet.I made my first home-made Pizza base using whole wheat flour using Shilpa’s recipe-needless to say,her recipes are always a hit and this one was no different!!

4.Dates Cake – Again one of Shilpa’s classic recipes-this one takes the cake!!My first cake and one the famous and most loved too.I have made it several times and each time I get the same fabulous result which demands “more,more,more” from everyone who has a piece!!

5.Baked vegetables with Crumbs – I developed a love for exotic vegetables when I went on a strict diet.I have tried many dishes with veggies and this one’s the latest.Raaga’s recipes always give me great results and her recipes are keepers,always!!

4.Best meal of the year


Vishu Sadya.Even though we don’t celebrate Vishu,we make a sadya without fail..after all who doesn’t like to gorge on a sadya..??

5.New things discovered in the year

I started baking in the Microwave as I have one where I could cook/bake in the convection mode too.Saved me the trouble of buying an OTG.

6.Best post picture of the Month/Year

To sound clichéd,even though I take horrible pics,I love each and every one of them!!Posts,same as #2.Best dishes for each month.

7.New blogs discovered

I found out so many blogs and cooking sites and have benefited from each one of them.Made so many friends during the Recipe Marathon too,can’t name one in particular as there are so many!!

8. Cooking resolutions for the Year 2009!

Try out new arenas in cooking,in 2008 it was baking and in 2009??don’t know!!

One of my blogging resolutions though,is to post traditional recipes and yes,to post on a regular basis-at least 3 posts in a week!!

I hope you enjoyed reading through my Best of 2008!!

Wishing all of you a very happy and prosperous new Year 2009!!!

Thursday, December 25, 2008

Christmas Cake

Wishing all of you a very Happy Christmas and a prosperous New Year!!!

The holiday season is taking its toll and blogging has taken a backseat.Quite a few dishes were made during the last week and even though I was not able to post them ,I am happy that I have quite a few drafts ready during new year,when I doubt if I'll be cooking anything new!!First things first,its Christmas time and nothing less than a Christmas cake will do for this post,but before that a small intro.

Christmas always meant joy and happiness.I feel its a festival that spreads cheer to one and all.Santa Claus,Christmas Carols and Midnight mass,all synonymous with the Xmas spirit.To us,Xmas always meant Fruit Cakes,or rather Plum cakes as they are known in Kerala.We used to get lots of cakes from our X'tian acquaintaces and friends and those days,I preferred to eat the Royal icing and pretty flowers on the cake not bothering to taste what was beneath it..what I missed all those years!! and again,we loved to have those pastry type cakes than the "hard plum cake" which we used to call it,though it didn't deserve to be called that at all!

Ever since Mishmash posted the Traditional fruit cake recipe last year,I've been drooling over it.I knew that it was something which I could never make,it sounded too complicated and had many,many ingredients.But as I said,what is Xmas without an Xmas cake..??I kept looking at her recipe again and again and finally decided to make it.After the decision was made,I made a mental calculation-I had to have the cake on Xmas day and if I had to wait for four days to cut it,I had to make it on Saturday,it was already Wednesday and I had not even soaked the fruits!!Everything got done in a jiffy and by Thursday night fruits were soaked and the cake was made on Saturday night after two full days of soaking.

The cake was made smoothly without any hurdle,but when I inverted it to cool,it started developing cracks.I have no clue how that happened,but one thing I can say-it tasted excellent.Almost like the readymade fruit cakes.I don't know whether I'll have the patience to make something as elaborate as this again when the whole city is bustling with cake shops selling fruit cakes..;-)!!Anyway,this Xmas,for the first time,we had a fruit cake which is 'homemade' and that makes me feel so good.Thank you Mishmash!!
Christmas cake is off to JZ@Tasty Treats for the Santa's Holiday Challenge
&
Purva's Daawat for the Christmas Feast!!

Once again,Wishing you all a very Merry Christmas!!

Saturday, December 20, 2008

Pan Pathali ~ Ela Ada

After the successful Ponsa patholi,its time for a simple treat-one of the famous “palaharams” that adorn the small glass almirahs in “chayakkadas” aka small time restaurants,the ela ada which is rice flour packets filled with sweet jaggery-coconut mix.Even though it is a sweet treat,it is often had as a tea-time snack.

I had bought a stack of banana leaves and this one was on my to do list for the longest time.I usually make this during Vinayaka Chathurthi instead if Modaks(which is prepared in a similar manner)as I have trouble shaping the Modaks.This can be steamed in an idli plate too,but then the name Ela ada will cease to exist.I strongly believe that it is the banana leaf which lends that special taste to the ada.

There are various methods to make this ada,while some grind the rice to a paste and then spread the batter on the leaf and place the stuffing,I prefer making a dough using rice flour and then keep the stuffing,it is a lot less messy and easy too!!


Pan Pathali~Ela ada

Ingredients

Rice flour - 1 cup

Hot water – 1-1 ½ cups
Salt-a pinch

For the filling

Grated coconut - 1 cup
Grated jaggery - 1 cup
Powdered cardamom - 1 tsp
Ghee - 1 tsp

Method

Mix the flour and hot water(start with 1 cup water) with a spoon and wait till it cools down bit.Knead into a smooth dough,adding more water if required.

Make the filling-
Melt the jaggery in a saucepan over medium heat.Add the grated coconut and keep stirring till everything comes together.Add a tsp of ghee and powdered cardamom and keep aside till it cools down.
Cut the banana leaves into rectangular shapes.
With wet hands,place a small ball of the rice dough and flatten it,keep spreading the dough till it becomes very thin.
Keep the sweet filling on one side and fold the other half sealing the edges firmly.
Steam in an idli cooker,steamer or pressure cooker without weight/whistle for 10-15 minutes. Serve hot!!

Friday, December 19, 2008

Baked Vegetables with Crumbs

Once while we were in Bangalore,Ma-in-law made yummy Tomato soup with Toast.It was yummy[needless to say] and I was done with my dinner.After sometime,she served dinner,with the usual dal and upkari and I was amused.I asked her how I’ll eat when I am so full..;-).She told me a funny thing-once,a colleague gave her the recipe for a soup and she made it that evening itself along with some salad and toast.My Father-in-law and bro-in-law enjoyed the fare and slurped happily.She felt very happy too,that they were satisfied with a changed dinner menu.Funny thing was,they asked her what’s for dinner barely a few minutes later!!;-)She said,on her mission to make dinner healthy,she ended up cooking twice and it proved to be not healthy at all!!

Whenever we lay hands on exotic veggies,I make this stir-fry.The only effort involved in making this is cleaning the cauliflower and broccoli and chopping the vegetables.It gets done in a jiffy and makes a great meal.I am lucky that hubby doesn’t ask for dinner after finishing this meal;-)

This time however,I decided to make it differently and followed Raaga’s recipe of Crumb Tossed veggies.As with all her other recipes that I have tried,this one too was absolutely delicious and hubby has given his thumbs-up.Thank you Raaga!!Click here for her original recipe and scroll down for my version[with a few changes].

Baked Veggies with Crumbs

Ingredients


Broccoli florets – ½ cup
Cauliflower florets – ½ cup
Carrots, diced – ½ cup[I did not add]
Mushrooms – ¼ cup
Baby Corn – ¼ cup
Colored bell peppers – ¼ cup
Bread Crumbs – 2-3 tbsp
Olive Oil – 1 tbsp
Chilli Flakes – 1 tsp
Parsley – ½ tsp[I did not add]
Basil – ½ tsp[I did not add]
Roasted Garlic – ½ tsp
Salt to Taste
I substituted Parsley and Basil with Mixed Herbs and Oregano.


Method

Place all the veggies except bell peppers in a microwave safe bowl,sprinkle few tbsp water and cook covered for 4-5 minutes.
Preheat the oven to 200*C.
In a kadai,heat the olive oil and add the chili flakes, parsley, garlic and basil[I added mixed herbs and oregano].
Add the cooked vegetables and the salt.
Toss well and cook for about two minutes.
Add the bread crumbs and toss again. Transfer this to a lightly greased baking dish and bake for 10 minutes.

I served it with
Mushroom Soup and Mashed Potatoes for a very satisfying meal!!

Wednesday, December 17, 2008

Ponsa Patholi-Chakka Ada-Steamed Jackfruit dumplings!!

Ponsa Patholi[Konkani],Chakka Ada[Malayalam] or Steamed Jackfruit dumplings If you guys are wondering how I made Pansa patholi at this time of the year..relax folks,when Chakka varatti is available,you can make chakka ada all through the year!!

Chakka varatti is basically a kind of jackfruit preserve which is made when jackfruits are in season.Though it is of not much importance during chakka season,it is most wanted during the rest of the year!!Chakka varatti is made using ripe jackfruit,which is cooked first and then ground to a smooth paste and mixed with jaggery and cooked till it becomes a thick consistency,almost like a jam.

I remember making this at my aayi’s[granny] place in Nilambur,Kerala.Usually this process is done by a group of women,it helps when you are making huge quantities of the preserve.One group will cut the fruit into two,another will chop it into palm sized pieces,another group will sit with oiled hands and pluck each jackfruit bulbs and another will deseed it and keep it ready for the process.My contribution to this process was to sneak in and gobble up the Gharo[jackfruit bulbs].

Even though this is a post on Patholi made using chakka varatti,I can’t stop raving about the same..So here goes-Usually patholi is made using ripe jackfruit bulbs ground alongwith coconut,jaggery and rice.I have replaced the jackfruit&jaggery part with the chakka varatti.

Ponsa Patholi using Chakka varatti

Ingredients

Chakka Varatti* - about a cup and a half
Raw rice[soaked for an hour] – 1 cup
Grated coconut – 1 cup
Banana leaves* – 1 or 2

Method

Grind the raw rice without adding water till it resembles super fine rava.
Add the coconut and grind again.
Add the chakka varatti little by little and grind to a smooth paste.
Chop the banana leaves into rectangular pieces and spread the paste over it and seal the edges firmly.
Steam in a steamer or idli cooker for about 20 minutes.
Serve hot.

*I used Saras Chakka varatti which comes in 500gm packets,I used half of it to make this ada which yielded me exactly 6 adas.
*If you don’t have banana leaves,you can steam it in an idli cooker,pouring the chakka paste into idli moulds.

*Usually spices like cardamom,pounded dry ginger etc are added to make the Patholi even more flavorful,but since the chakka varatti had these flavors already,I omitted that.

For a detailed pictorial on how to make Chakka varatti check out Bharathy’s and Annita’s blogs.

Tuesday, December 16, 2008

Atta Nankhatai

Baking is something which I learnt recently..though I still haven’t mastered the art.My baking journey started when I got a Microwave and I was searching forever for Cake recipes..after a few successful attempts,I started looking for more recipes where I could bake bake and bake.That is how Malai Cookies came to be.I had bought a book on Cakes & Cookies and that one was the simplest of the recipes.After the beginners luck,I made Butter cookies and till date that is the best cookie I have baked so far.

I wonder how I never tried making Nankhatai,the famous Indian cookie or biscuit.I remember making this with amma in her cooking range(sometime back,gas burners used to have an oven attachment beneath).I loved those creamy white cookies with a strong Cardamom flavor.I tried making it once using Shilpa’s recipe and it came out excellent but it didn’t have the looks that I desired.Can someone please help me with this??

I am currently in a recipe compiling marathon-the number of magazines(mostly Vanitha) lying around is just taking up a huge space in my shelf.So I am tearing up the recipe pages and planning to bind them all together.I came across a wonderful Atta Nankhatai recipe in one of the old editions and I decided to make it immediately.Again the same thing,even though it tasted great,I still didn’t get the looks I desired..Please help!!

Atta Nankhatai

Ingredients

Whole wheat flour/Atta – 1 ¼ cup
Rava/Semolina – ½ cup
Ghee – ½ cup
Powdered sugar – ½ cup
Crushed cardamom seeds – of 2 cardamom
Baking soda – a pinch

Method

Preheat oven to 150*C.
Sift together atta,rava,cardamom seeds and baking soda.
Cream ghee and powdered sugar with a spoon.
Add the sifted ingredients little by little to make a dough.
Make small balls of the dough and flatten a little.
Arrange on a greased baking tray and bake for 20 minutes or till the nankhatai turns golden in colour.

Monday, December 15, 2008

Ragi Idiyappam

As I have mentioned before,I have had more disasters in my kitchen than successes.Idiyappam has been one of those on/off success/disasters.I have helped amma in making idiyappams before and after marriage I had made it on my own too,I didn’t think it was a big deal,ever.Problem started few years back.Once I was making idiyappam for breakfast and I got white colored water coming out of the idiyappam press.The dough was not getting squeezed and it was a mess.A few attempts later,I declared my good ol’ press defective and asked amma to get me a new one,just like hers(which is a brass one).

I re-opened my idiyappam making attempts and the same saga continued..nothing came out of the press except water.Now I smile thinking about it,but once I even cried over it!!Amma decided to take control and asked me to make it under her guidance to see what mistake I was making.To my utter surprise,the idiyappam came out so easily from the press..all noodle-y shaped..I was very very confused as what could be wrong.

Amma felt I was using the wrong flour and suggested I take back some Idiyappam flour(which is basically roasted rice flour).I did and Voila..I was back to making softy and pretty idiyappams again!!I still don’t know whether it was my mistake or the flour’s!!
After the tremendous success I had,we have idiyappam on our breakfast menu at least once a week.I recently made Ragi idiyappams using a mix of ragi(finger millet) flour and rice flour.We liked the mild flavor of Ragi and I paired it up with Vaagu.

Ragi Idiyappam

Ingredients

Ragi flour – ¾ cup
Rice/Idiyappam flour – ½ cup
Salt to taste
Boiling water to make the dough – about 1- 1½ cups

Method

Mix the two flours and salt together.
Add boiling water little by little using a wooden spoon and mix well till it becomes a big lump. Close with a lid and let it cool down a bit.
When it is cool to touch,knead into a soft and smooth dough.
Slightly oil the idiyappam press and the idli mould.
Make idiyappams and steam in a steamer or pressure cooker(without the weight/whistle) for 15-20 minutes.
Allow it to cool a little bit before taking them off from the idli mould.Serve with Potato Ishtoo/stew or
Vaagu.

Wednesday, December 10, 2008

Peas Pulao

Peas Pulao
Fresh peas are in season now and hubby can’t seem to stop buying it!!Peas based dish features in our menu twice a week..he cites they are quite cheap too hence he can’t stop buying..I just can’t seem to fight with his logic.Only thing I can do is to make peas recipes often and start liking it as much as he does!!

While browsing through my cookbooks,I came across this very easy Peas pulao recipe that looked very appetizing.I planned to make it soon and made it for Sunday lunch along with Paneer Butter Masala.It tasted great and am gonna make it again.It was quite simple too and did not require the usual marination of vegetables and all that.Though the recipe required the use of Jeera rice,I made it with Basmati rice.

I always prefer to cook the rice separately while making Pulao and Biriyani.But sometimes the double work makes me lazy and I resort to the good ol' pressure cooker to do the work for me:)Peas Pulao
Peas Pulao

Ingredients


Fresh/frozen peas – 1/2 cup
Jeera /Basmati rice – 1 cup
Ghee – 1 tbsp

Oil - 1 tbsp
Jeera - 1/2 tsp
Cinnamon – 1’ piece
Clove – 3

Cardamom - 2
Onion – 1,sliced
Ginger garlic paste - 1 tsp

Green chilly - 1,halved
Salt to taste

Water - 2 cups

Method

Peas Pulao-step1 
Measure the rice,wash well under running water for 2-3 times or until the water runs clear.Add the frozen green peas and soak in enough water for 15-20 minutes.
Peas Pulao-step2 

In a pressure cooker,add the ghee and oil and the spices one by one starting with jeera,cinnamon,cloves and cardamom.Saute for a minute or so then add the sliced onions.
Peas Pulao-step3 
Add the slit green chilly and the ginger garlic paste.
Now drain the soaked rice and peas and add it into the cooker.Saute well till everything is mixed.Add enough salt to taste and 2 cups of water.

Let it come to a boil and then close the pressure cooker lid and put on the weight.Cook for exactly one whistle and then switch off the cooker and let it cool down to room temperature.
Open the lid,fluff with a fork and serve.

Tuesday, December 9, 2008

Paneer Butter Masala

Paneer butter masala..the name itself evokes so many memories!!One of our(me&amma) favorite dishes we never get tired of eating.Its always PBM while eating out either with Butter naan or Fried rice[most of the multi-cuisine restaurants serve fried rice which tastes like mixed veg pulao,so it works fine].Ever since we started eating it,we’ve tried making it at home too.Though initially it was nowhere close to the original,we were quite happy with the end product.

Few years back,we got a recipe from Vanitha(a Malayalam magazine),which featured recipes from an authentic Punjabi wedding fare.Not one to miss such chances,amma immediately called me and asked me to check it out.As always,she made it first.She was so happy with the end result that she asked me to try it straightaway.It was simply superb,almost like the restaurant ones and we just couldn’t hold back our excitement!!

Ever since,PBM home-made has been a favorite and amma makes sure she makes it everytime I visit.Since hubby is not too fond of it,I make it rarely.Last Sunday,I made it with some Pulao and it was a great combo.I should say it is one of the sure shot recipes for PBM which gives us the same result everytime!!


Paneer Butter Masala

Ingredients

Paneer – 250 gms[chopped into small cubes]
Onions – 2 big
Ginger-garlic paste – 1 tbsp
Kashmiri chilly powder – 1 tsp
Tomato – 3 big
Cashewnut paste – 3 tbsp
Coriander powder – ½ tsp
Haldi – a pinch
Kasoori methi – ½ tsp
Garam masala – ½ tsp
Butter – 3 tbsp
Fresh cream – 2 tbsp
Salt to taste

Method

Heat 1 tbsp ghee in a kadai and fry paneer cubes till they turn golden brown.
Transfer these cubes to a bowl of hot water and strain after 5 minutes-this is to ensure that the paneer stays soft.
Put onions and tomatoes in boiling water for 10 minutes.
Make a paste of boiled onions,keep aside.
Peel the tomatoes and make a paste,keep aside.
Heat 2 tbsp butter in a kadai and fry onion paste till brown.
Add ginger garlic paste and fry for 2-3 minutes.
Add chilly powder,cashewnut paste,tomato paste,kasoori methi,coriander powder,haldi,garam masala and salt.Fry for 5 minutes on low flame.
Add fried paneer cubes.
Add 1 cup water and simmer for 10 minutes.
When the gravy thickens,add the remaining butter and fresh cream.
Garnish with some coriander leaves/kasoori methi.
Serve hot!!

Monday, December 8, 2008

Paal payasam

There are so many things I miss of Amma’s cooking and this one is no different.I have this sudden temptations to have a particular dish and I immediately call up amma and ask for the recipe.Its been a long time since I had amma’s homemade payasam and I badly wanted to have it.Usually I prepare payasam during birthdays and anniversaries but ever since the baking bug hit me,I’ve been avoiding making Indian sweets,I surely don’t want to have a double dose!!


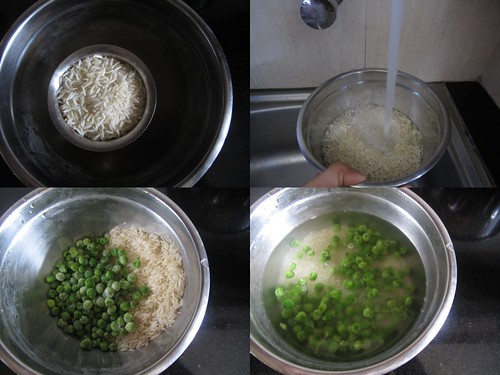
One of the things I got from Ekm during my last trip was a special type of rice called Payasam rice(I think its called Nurukkal ari in Malayalam).I looked for many recipes of payasam,but didn’t want to load it with milkmaid and tons of sugar.I called up amma and asked her to give me a recipe using one packet of milk(500ml) and a small cup of sugar.She gave me a simple recipe and I followed it to the T.By the time the payasam was boiling,the house was filled with the lovely aroma!!I simply loved it and it was perfect for us.This recipe yields exactly four small bowls of payasam,perfect for two meals for two people!!

Paal payasam

Ingredients


Payasam rice – 1 handful
Milk – 500 ml
Water – 300 ml
Sugar – 1 cup
Cashewnuts& Raisins – ¼ cup
Crushed cardamom – 2-3 pods

Method

In a pressure pan,add the milk,water,nuts and payasam rice(thoroughly washed).
Cook for 4-5 whistles,lower the flame after the first whistle.
Open the pan and add sugar.
Mix well and keep the pan on low flame.
Keep stirring occasionally till the payasam becomes thick.
Add the crushed cardamom and switch off the flame.
Serve hot or cold!!

Have you seen the lovely trophy that DK has designed for us..??Here it is!!
Update-Sending this bowl of payasam to FIC-White hosted by Kitchen Flavors-an event concept by Tongue ticklers!!Thank you Priya,for the reminder!!

Friday, December 5, 2008

Eggs in Bread!!


I don’t know whether I have got as excited about a dish which I don’t eat as with this one.The moment I saw it on Deeba’s blog,I wanted to make it.Hubby usually prefers Egg white Omelet and I had to convince him that once in a while it is fine to have egg yolk,only because of my selfish reasons ie,I wanted to make this!!Whenever he asks for a snack,I offered this and finally he succumbed yesterday..glad that he did!!

I was as excited as a small kid while making this.All through the process(which is a very simple one) I was smiling to myself.When I served it to hubby,I had the usual naughty grin expecting him to say something.He said he felt like a kid eating this..;-)So folks..if you wanna feel kiddish..go ahead and make this Eggs in a hole,as DK says and delight yourselves!!

There is no recipe as such.Just make a small hole in the bread and make an omelet in that hole!!If that doesn’t sound simple,I don’t know what will!!
Method
Cut a hole in the bread using a round shaped mould(I used the cap of a pet jar)

Place the cut bread on a greased tawa.

Crack an egg in the hole in the bread.Add salt and pepper to taste.


Flip over and cook the other side too..and serve hot..with the round bread!!

Thursday, December 4, 2008

Green Peas Masala

Fresh peas are in season now and hubby makes sure he buys it in bulk.The mound of peas is so huge that I bet you wont be able to see me sitting behind it.I am not kidding..by the end of peeling every peas pod,I am ready for a relaxing massage;-).I like to add peas to the curries I make for rotis,but hubby feels I am ‘wasting’ it when I can make Peas ambat(his fave).I gently remind him that ambat uses a ground coconut masala as the base,which we avoid these days,then he lets me do my own thing!!

Few times I’ve ordered Peas masala in restaurants is out of necessity.Some pure non-veg restaurants in the city have lesser/very few options for vegetarians.I always end up ordering Mix veg curry or Peas masala with Appam/Idiyappam.I never tried to recreate it at home coz as I said,I always make Peas ambat whenever we lay hands on fresh peas.The last batch of peas we bought went wholly into Paneer matar.This curry came into picture at the eleventh hour.It was dinner time and I had finished making rotis,I did not make any side dish “thinking” there was some leftover curry left in the fridge.To my horror,there was only a spoonful left which wouldn’t suffice for both of us.I needed a jhatpat curry and peas came to rescue. I followed the same recipe as my Easy-Chole replacing Channa by Peas.


Green Peas Masala

Ingredients

Green peas-fresh or frozen – 1 cup
Salt to taste
[Microwave the peas with a cup of water for 5 minutes]
Onions - 2 medium,finely chopped
Tomatoes - 2 medium,finely chopped
[Fry onions in a little oil till brown,add the tomatoes and fry till mushy.Let it cool,grind to a smooth paste]
Green chilly - 1,finely chopped
Ginger chopped - 1 tbsp
Red chilly powder - 1 tsp
Coriander powder - 1 tsp
Everest Chole masala - 2 tbsp
Coriander leaves - 3 tbsp,finely chopped
Kasuri methi - 1 tbsp
Chat masala,garam masala - 1 tsp each[optional]
Oil - 2 tsp

Method

In a kadai pour oil and fry the onion-tomato paste for 2 minutes.
Add the green chilly and ginger,fry for a minute.
Add red chilly powder,coriander powder and chole masala and fry for 2 minutes.
When everything gets mixed well,add the cooked &drained peas and mix well.
Let it boil,check the salt.
Add coriander leaves and kasuri methi and let it simmer for 10 minutes.
Just before switching off,add the garam masala and chat masala[if adding] and let it boil.
Serve hot with chapathi.

Wednesday, December 3, 2008

Onion Uthappam - Step by Step recipe

I have mentioned about how confusing it can get while ordering food from restaurant here.I can't believe so many of you agreed with me too!!I have a similar experience to share today.Once we were out for breakfast and before I could order,I saw someone ordering Onion Uthappam.I decided I want that too.While hubby tried to dissuade me saying that Sour dosa batter is used for making Uthappam and all that(!!!),I didn’t fall for it and continued waiting for the waiter to arrive with my piping hot uthappam.

Somehow,when the plate was coming to me I felt a sense of alarm..and I was right.It was nothing I expected an Uthappam to be and I didn’t feel like eating it at all.For starters,it was as big as the normal dosa and raw onions were used* as topping and I felt it was not cooked properly at the centre.Well,I ordered something else that day and swore never to order Uthappam from outside.

*I always prefer Mini-Uthappams and I like the onions to be stir fried for a while so that the raw taste doesn’t dominate.

Onion Uthappam

Ingredients


Dosa batter – as required
Onion – 1
Green chilly – 1
Oil as required

Method


Finely chop the onions and green chilly.
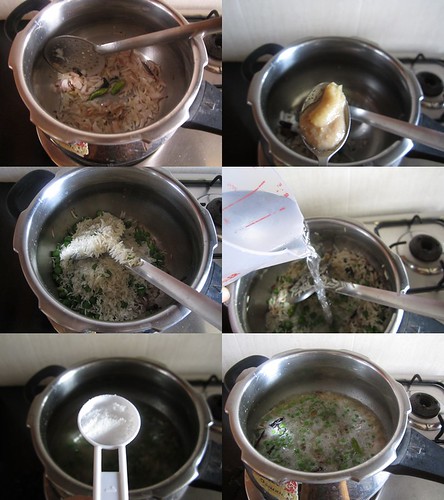
In a kadai,stir fry the onions and chilly together till they turn translucent. Heat a dosa tawa and pour the batter to make mini-dosas.
Spoon the onion-chilly mix on top of each dosa to cover it. Pour oil/ghee around the dosas.
Cover with a lid and simmer for a minute.
Flip the dosa carefully without spilling the onion mix. Let it cook on the other side and remove.
Serve hot!!
Any topping can be used for Uthappams.Usually Onion,Tomato,Carrot,Paneer etc are used for making the toppings.You can use either of the toppings or mix it all up for a Mix-veg Uthappam.Leftover dosa-batter works fine for this dosa!!

Tuesday, December 2, 2008

Surna Adgai~Yam pickle - Step by Step Recipe

One of my brothers’ favorite pickle and I remember how we tried making it at home[my brother stayed with me for a year when he was working here].Both of us loved the way amma made it and after a few frantic calls,we were ready.Everything was going right,we cut the yam into thin pieces,fried it,it was only while grinding the chillies that disaster struck.The chillies had to be ground first to a powder and then water added for required consistency.I had no clue about that and I poured enough water for the chillies to grind and pulsed the mixie.

I was expecting to see a creamy-consistency masol[masala] and what I was looking into was something far far from that.Some of the chillies were ground,some stubborn ones remained whole and there was enough water to grind some more chillies..sigh.Anyway,both of us had it with a sad face,not willing to take responsibility of who spoiled it!!It was more like a curry,than a pickle!!

I have made the pickle many times after that and each time I grind the chillies I am reminded of this funny incident.One of the best compliments I received was from my brother saying..’it almost tastes like amma’s’..Yaaayyy!!!


Surna Adgai – Yam pickle

Ingredients


Surnu/Yam – 250 gms
Red chillies – about 2 handful(mix of byadgi chillies and normal red chillies)-reduce the amount of chillies if you don't want it too hot!!
Tamarind – 1 small piece
Salt to taste
Oil for frying

For the seasoning

Oil – 1 tsp
Mustard seeds – ½ tsp
Curry leaves – a few

Method
Cut the yam into longish thin pieces(similar to French fries).
Deep fry them in oil till golden brown and crisp.In the same oil,fry the chillies.In a deft motion,put the chillies inside the oil and take it out immediately. Grind the chillies in a mixer till they become powdery. Add tamarind and salt and a little water to make it into a smooth paste. Keep adding water till you get the required consistency. In a kadai,prepare the seasoning.
Add oil,splutter mustard seeds and curry leaves.
Add the ground paste and fried yam pieces.
Mix well,check for salt.
The pickle just needs to heat up,switch off before it starts boiling. Keep it overnight for the yam to absorb the flavors and devour it with Idli-Dosa,Appo or with rice.
Lasts long if kept refrigerated in air-tight bottles.
Related Posts Plugin for WordPress, Blogger...
 
Pin It button on image hover