Monday, January 31, 2011

Methi Pulao


Methi Pulao


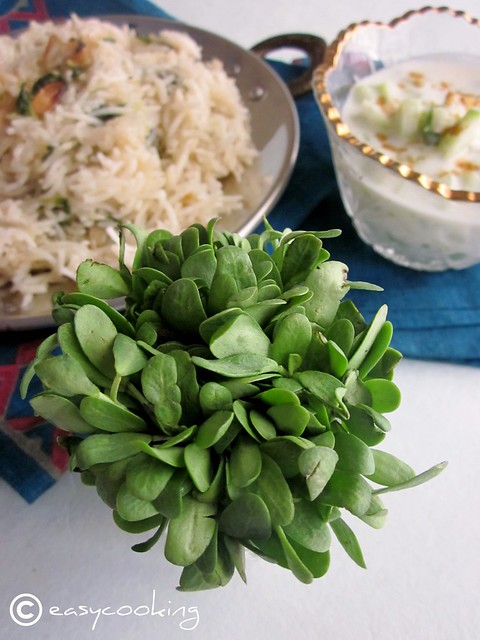
Methi/Fenugreek leaves is something I am almost obsessed about these days.I seem to add it to Chapathi,Bhakri,Upma and even my North Indian curries[far cry from someone who detested the sight of greens!!].I prefer the mini-methi leaves which are so abundantly available here,perfect for a meal-rather than those huge bunches which give me a headache when it comes to cleaning!!


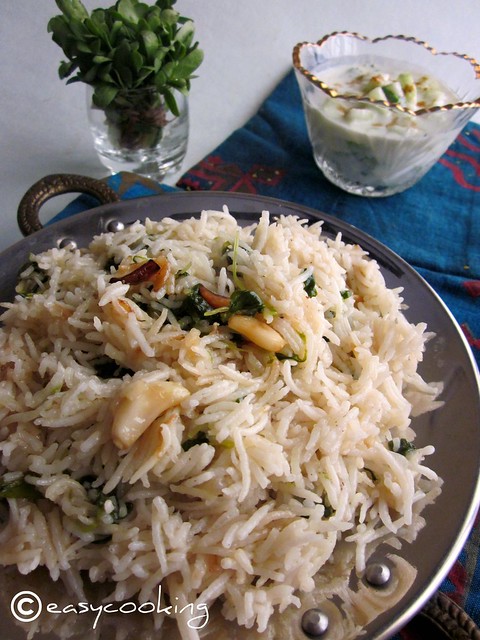
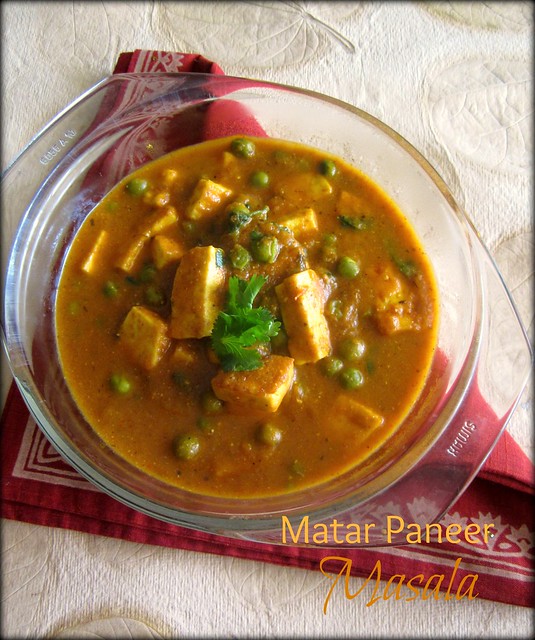
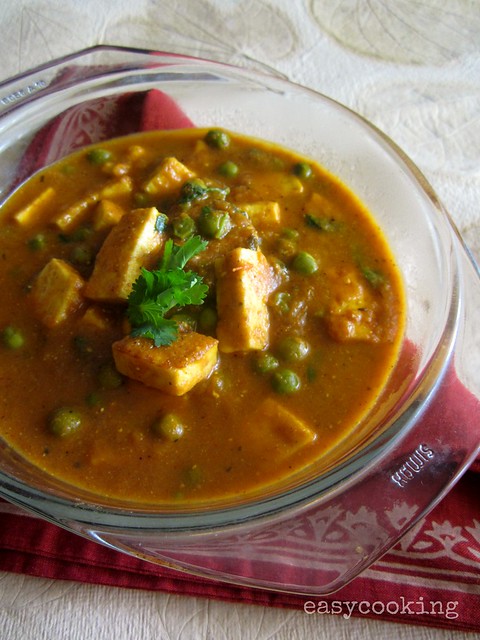
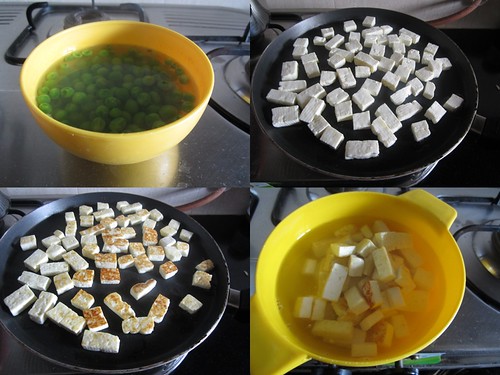
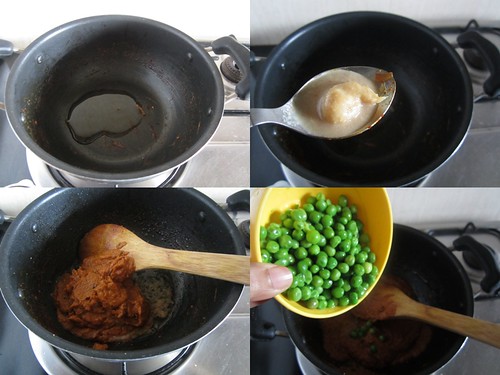
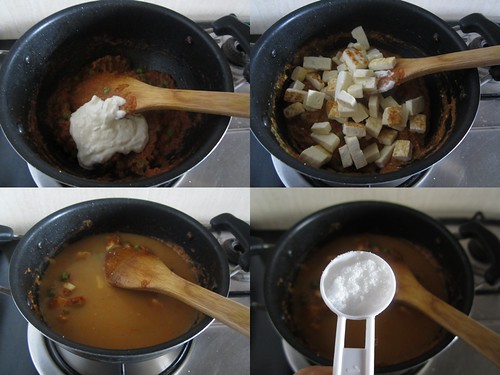
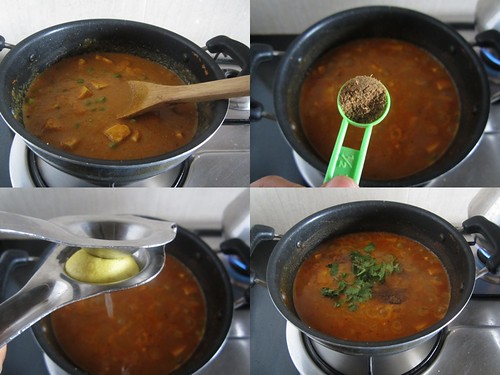
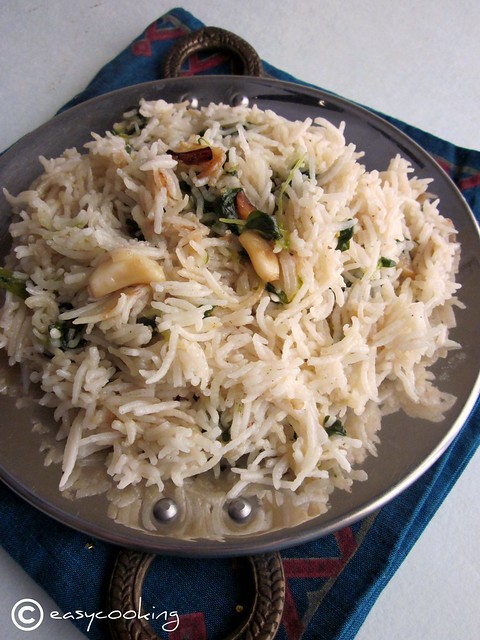
I've been hearing a lot about this pulao from my ma-in-law,who became an instant fan of it when my vanni[co-sis]made it once when they came down.She doesn't usually prefer any mixed rices because of the strong taste of garam masala,but in this pulao,the methi flavor is so good that there is no need to add any garam masala!I made it few days back to pair with Matar Paneer Masala[one more dish which I am obsessed about now] and I should say it made a great combination.The mild,subtle flavor of the rice along with the burst of many flavors in the curry made for a delicious lunch.

Methi Pulao


Methi Pulao

Recipe source - Lakshmi Kudua


Ingredients


Rice - 1 cup[I used Basmati,but any long grained rice,or raw rice can be used]
Methi leaves - 2 small bunches,washed[no need to chop the leaves as they tend to make the rice bitter]
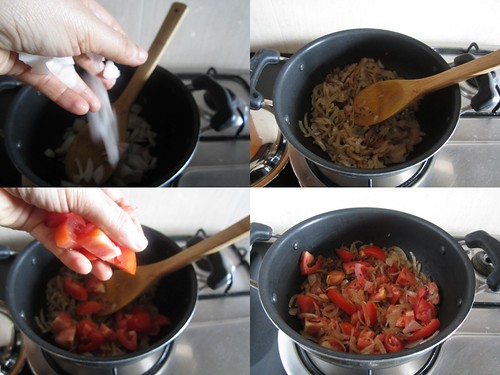
Onion - 1 large,finely chopped
Green chilly - 1,finely chopped
Garlic cloves - 5-7 peeled
Coriander leaves - 2-3 tbsps,finely chopped
Water - 2 cups
Ghee - 1 tbsp
Salt to taste


Method


Wash and soak the rice for 10-15 minutes and drain.
In a pressure cooker,add ghee and saute onion,garlic cloves and green chilly for 3-5 minutes.
Add the methi and coriander leaves and saute for a minute or two.
Mix in the drained rice and stir well.
Add water and salt to taste and let it boil.
Close the pressure cooker and put on the cooker weight.
Let it cook for about 5 minutes or 1-2 whistles.
Switch off the flame and let the cooker come to room temperature.
Open the lid and fluff with a fork.
Serve hot.

Methi Pulao


Friday, January 28, 2011

Kumbalanga Cherupayar Parippu Curry~Ash Gourd and Moong dal Curry

Kumbalanga Parippu Curry


Here's another dish from Bharathy's blog as promised.I was so drawn towards this curry because Kumbalanga/ash gourd is one of our favorite vegetables and I really do not play around much with what I make with it.It is usually a Pulishery[Kerala style] or a Huli[Konkani style]and then of course it goes into the all absorbing Sambhar.The recipe sounded very similar to the pulishery,with moong dal and without the curd.


I very much identify with Bharathy's cooking style too,being in Kerala for a long time,our cooking has been much inspired by God's Own's country's hit recipes[only vegetarian,though!].Many a times we do not even distinguish between the two and end up combining recipes there by adapting a Kerala recipe into Konkani cuisine!!


I followed the recipe almost completely,but skipped adding onions.Loved the slightly thickish curry which tasted great with rice as well as rotis.I can see this one becoming a regular staple,thanks Bharathy!!


Kumbalanga Parippu Curry

Kumbalanga Cherupayar Parippu Curry

Recipe minimally adapted from Bharathy

Ingredients


Ash gourd- diced- 1 large cup
Moong dal - dry roasted - 1/4 cup
Small onions- finely chopped- 1 tsp[I skipped this]

To Grind:
Freshly grated coconut- 1 1/2 tbsps
Garlic- 1 clove[I skipped this]
Jeera powder-1/4 tsp[I used whole Jeera]
Turmeric powder-1/4 tsp scant
Green chilly-1- sliced lengthwise

To season:
Coconut oil- 2 tsps
Mustard seeds- 1/4 tsp
Small onions- minced- 2 tsps[I skipped this]
Red chilly-1- broken into 3 pcs(optional)
Curry leaves- a sprig

Method

Transfer the lightly dry roasted moong dal to the cooker, give it a quick rinse, add 1/2 cup of water and bring to a boil. Lower the flame to simmer and cook in open without the lid on) for 2-3 minutes keeping an eye not to let it boil over.

In the meanwhile grind coconut, garlic[if using], jeera,green chilly and turmeric powders to a smooth paste adding a little water.Stir in to the cooking dal along with the ash gourd pieces and 1 tsp of finely cut onions[if using]. Add salt and mix well. The liquid part should NOT be more than 1/2- 3/4 cup at this stage as ash gourd lets out water while cooking. Close the lid and cook till 2-3 whistles.

Open, after the steam vents off. If the curry seems to be a little watery, add a tsp of rice powder or corn starch and bring to a gentle boil. Even otherwise the curry tends to thicken after cooling down a bit!
For the seasoning, heat oil in a kadai, splutter the mustard seeds and next the minced onions. Let the onions get fried to a brown hue and impart the aroma. Throw in the red chilly bits followed by the curry leaves. Pour the seasoning over the curry.
Serve warm with phulkas or steamed rice.


Sending this to Kerala Kitchen,an event organised by Magpie and Ria.


Wednesday, January 26, 2011

Apple-Nut Muffin Cake


When it rains,it pours.Sounds very true if you count the cookbooks I've garnered in the last few months or rather even,last week!!I remember salivating over every post of Tuesdays with Dorie,sighing all the while thinking when would I be able to lay my hands on this baking encyclopedia,as termed by almost all who owned this book.My dream came true during my birthday when Ajay gifted me this book.I was[still am] so fascinated by it that I am really scared when it comes to baking from the book fearing if I would live up to the expectations!!


I have baked a few bakes already and am gearing up for more.The recipes are so simple and clearly explained that you just need to pull up your socks and bake!!

I won Suma's Bake-o-mania giveaway
-Rose Levy Beranbaum's famed cookbook-The Cake Bible.Even before I could go through it,came another book from the giveaway I won at Ann's-A Passion for Baking by Marcy Goldman.I am totally kicked and can't find any reason to buy 'another baking book'!!!


Here's a simple Muffin-cake recipe from BFMHTY,which can be made in a jiffy and tastes like the perfect tea cake with the goodness of Apples and the crunch of nuts.

Apple Nut Muffin Cake
Recipe source - Baking From My Home to Yours

Ingredients


Milk - ½ cup
Apple Cider - ½ cup OR milk[I used Appy]
Egg - 1,large
Vanilla extract - 1 tsp
Almond extract - ½ tsp
Butter - 1 stick/8 tbsp/½ cup/100gms,melted and cooled*
Flour - 1 ¾ cups
Sugar - ½ cup
Baking powder - 1 tbsp
Baking soda - ½ tsp
Ground cinnamon - ½ tsp
Salt - ¼ tsp
Light brown sugar/Demerara sugar - ¼ cup,packed
Old-fashioned oats - ¾ cup
Apple - 1 medium,peeled cored and diced
Walnuts - ½ cup,chopped
Raisins - 1/3 cup.moist and plump


Method


Center a rack in the oven and preheat to 400 degrees F/200 degrees C. Use an 8-inch square pan, buttered and floured.[I used an 8 ½’ square pan].

Whisk together milk, cider, egg, vanilla and almond extracts and butter in small bowl.
In a large bowl, whisk together flour, sugar, baking powder and soda, cinnamon, and salt to combine thoroughly.
Toss in the brown sugar, making sure there aren't any lumps by running it through your fingers, then add the oats and whisk the dry ingredients a few more times to mix.
Switch to a large rubber spatula and stir in the liquid ingredients, stirring just until everything is moistened--as with muffins, less mixing is better than more. Gently stir in the apple, nuts and raisins, and scrape the batter into the prepared pan.
Bake for 30 to 35 minutes, or until the cake is golden brown and a thin knife inserted into the center of the cake comes out clean. Transfer the pan to a rack and cool for a couple of minutes before running a knife around the sides of the pan and unmolding the cake; invert and cool until warm or to room temperature.
Dust with powdered sugar and serve.

*I was out of my mind and forgot overlooked the part which says,butter-melted and cooled.I used softened butter and I don't know if it made a change coz the cake was soft and melt in the mouth!!


Sending this to Ally's event Delicious Desserts!!


On another note,my blog got its first press mention on Economic Times[!!].It would have gone unknown if Jayasree had not sent me the link,thanks Jayasree!!Here's the link which made my day -Article on Economic Times.


Monday, January 24, 2011

Matar Paneer Masala

Matar Paneer Masala
I never get tired of eating Paneer Butter Masala,but sometimes we need a change,not a big one but a change nevertheless.Matar Paneer masala is the answer,tastes almost like PBM with the crunch and sweetness of green peas throughout.I had bookmarked this recipe from Raks kitchen a while back and got around making it last weekend.All the while I was making the curry I was thinking how similar it is to PBM and couldn't wait to taste it,it was smelling so good!!


The recipe might seem a bit long,but it follows the regular North Indian curry route.If you have everything ready,this could be done in less than 15 minutes.And it has got a great wow factor attached to it,we had some friends over for lunch and the best compliment I received was their query as to from where we ordered the food!!Such sweet words,harmony to my ears!!


I served it with Methi pulao and Cucumber raita,but would love to try it with some Butter Naan or Tandoori roti.Or I could even plop myself on the bean bag and have this by itself[is it obvious that I am totally kicked about this one??Thank you Raks!]Matar Paneer Masala
Matar Paneer Masala
Recipe minimally adapted from Raks Kitchen


Ingredients


Paneer - 1 cup,I used a 200gm block
Green peas-Fresh or frozen - 1 cup
Curd - 1/4 cup
Green chillies - 3,I skipped this
Ginger garlic paste - 1 tsp
Red chilly powder - 3/4 tsp
Coriander powder - 1 tsp
Haldi powder - 1/4 tsp
Garam masala powder - 1/2 tsp
Coriander leaves - for garnishing
Lemon juice - 1 tsp
Oil/Ghee - 2 tsp
Salt to taste


To roast and then grind into a paste


Onion - 2,sliced
Tomato -2,sliced
Cardamom - 1
Clove - 1
Cinnamon - 1 ' piece
Jeera - 1 tsp
Pepper - 5
Oil - 1 tsp


Method


MPM-step1 
In a thick bottomed kadai add oil and splutter the whole garam masalas-cardamom,clove,cinnamon and then jeera and pepper.
MPM-step2 
Mix in the onions and roast till it starts turning golden brown,add the tomatoes at this stage and roast till the whole mix starts turning pulpy.
MPM-step3 
Add the masala powders-chilly,coriander and haldi powders.
Roast well till the masalas blend into the mixture and till the raw smell of the masala subsides.
MPM-step4 
Switch off the flame and let it cool,then grind into a smooth paste adding very little water.
MPM-step 
Microwave the peas for 2-3 minutes in high in a microwave safe bowl. Stir in between for even cooking. Set aside.
Shallow fry the paneer cubes in a kadai with a tsp of oil till the paneer starts to brown.Immerse the shallow fried paneer cubes in boiling water and keep it closed until required.[You could skip this step and immerse the fresh paneer in hot water without frying].
MPM-step 
In a kadai,heat oil and add the minced green chilly[if using] and the ginger garlic paste and roast for a minute.
Add in the pureed masala and give a good stir.
MPM-step 
Add the cooked peas,well beaten curd and salt to taste and stir well.
Mix in the paneer[squeezed well] and about 1/2 a cup of water and simmer for 5-7 minutes,by which time the gravy would thicken.
MPM-step 
Add the garam masala,lemon juice and fresh coriander leaves.
Give a good mix and serve hot.
Tastes great with pulao or even a simple roti.

Saturday, January 22, 2011

Vazhakkai Vathakkal ~ Roasted Raw Bananas & An Update on the Giveaway!


Cooking for lunch is sometimes the most difficult thing to do.Actually,to think of it,I just need to make a curry and a stir-fry to go along with rice,curds and pappad.But the effort involved in deciding the menu itself takes away much of my time.Sometimes,before sleeping I try to make a menu for the next day--sometimes I succeed and sometimes I don't.Remember,it was my last years resolution to stick to a menu plan?I've strictly enforced a menu plan routine now and believe me,it certainly helps.

I've been stalking Bharathy's blog for a while now and been cooking from Spicy Chilly with great success.I like her variety of recipes in so many cuisines.She has been a great help to me ever since the day I started blogging.From being one of the first few who commented on my blog to someone who helped me out whenever I needed help--technical aspects of the blog and general stuff,she has been one special lady.I finally met up with her during last years blogger meet and she is so much fun to be with[almost squeezing my neck for not picking up her call!!-in jest of course].Stay tuned for more recipes from her blog!!


Vazhakkai Vathakkal ~ Roasted Raw Bananas
Recipe source - Bharathy of Spicy Chilly

Ingredients

Vazhakkai/Raw banana- 2
Turmeric powder- 1/4 tsp
Salt- to taste
Sambhar powder(better option) or red chilly powder - 1tsp

To temper-

Oil- 1-2 tbsps
Mustard seeds- 1/4 tsp
Urad dhal-1/2 tsp
Curry leaves- a sprig


Method

Peel the green skin of the raw bananas and immerse in a pan of water.[this is to prevent the brown coloration of the peeled veggie]
Slice them into thin rounds (not too thin: say, slightly less than half cm each).
Simultaneously boil a wide pan of water( 2 cups more or less, to immerse the slices comfortably) along with salt and turmeric powder. 
Throw in the slices as soon as you are done, boil for a few seconds and drain the slices from the hot water using a colander.
Be careful not to over cook the pieces and see to it they are firm and half cooked. Be careful with the boiling water while you drain too :)

Heat oil in a wide non stick kadai.
Splutter mustard seeds, brown the urad dal, throw in the curry leaves and finally the pre cooked slices.Add the chilly/sambhar powder.Toss the slices. 
Check salt and toss once a minute.
Let them get fried for 10-15 minutes in low flame until roasted and browned on both sides.
Remove from fire and serve hot with rice and curry.

---

As I mentioned in this post,I haven't heard from HS yet and I do not have any e-mail id to contact her[or him?] so I am choosing another winner.Hard luck HS!!


Comment # 29 - Rekha's Kitchen 

Congrats Rekha--Please send me your shipping address and your book will be on its way!!


Thursday, January 20, 2011

The Most Fabulous Banana Cake


I love baking with bananas.It gives such a unique taste to the baked goods that even people who detest banana do not seem to mind the hint of it in the cakes/muffins.One of my first baking recipes was this Eggless Banana Nut Muffin.I would highly recommend it to beginner bakers as it gives such perfect and tasty result each and every time.


Bananas are great egg substitutes and usually mashed bananas are used in place of eggs in cakes/cupcakes.I somehow wanted to stick to the original recipe as Nags felt this was the Best Banana Cake.


Only change I did was to add salted butter,as I use that in every bake of mine and accidentally added the salt too.So there was a slight salty overtone[which only I could detect,btw]but otherwise,the cake's a winner.I skipped the frosting too and made the cake using my good ol' electric hand beater.I am planning to go eggless next time by adding an extra banana or by adding yogurt in place of the egg.


Is it the most fabulous Banana Cake??I would have to try this again with unsalted butter to confirm as I felt this lacked the Banana-ey punch.I would go back to my trusted recipe as my go-to Banana Cake.


The Most Fabulous Banana Cake
Recipe source - Belinda Jaffrey's Mix and Bake,adapted from Nags' Best Banana Cake


Ingredients


Flour/Maida - 3/4 cup / 110 grams
Baking powder - 1 1/2 tsp
Baking soda - 1/4 tsp
Salt - 1/2 tsp[skip if using salted butter]
Banana - 1 large,very ripe
Sugar - 3/4 cup
Egg - 1,room temperature
Butter - 1/4 cup/50 grams
Buttermilk - 50 ml [Make buttermilk by adding 50ml minus 1 tsp milk to a bowl.Add 1 tsp vinegar and let it sit for 10 minutes,buttermilk is ready]
Vanilla extract - 1 tsp


Method


Preheat oven to 350F / 180C. 
Grease a 9" cake pan or a Bundt pan,like I used.
Put the flour, baking powder, salt, and soda into a bowl and whisk together with a fork or a balloon whisk.
Chop the bananas and mash with a fork.Make sure the banana is really really ripe.
Add the sugar and egg to the mashed banana and beat well. Then add the butter and beatfor another minute until the mixture is thick and creamy.
Next, add the buttermilk and vanilla extract and beat until just blended.
Add the dry ingredients to the wet ones and fold until just blended. Don't overdo the mixing part.
Scoop into greased pan and smooth out the top layer evenly.
Bake for about 40 mins or until the top turns golden brown and the cake passes the skewer test. Remove and let cool completely.


Remember I baked a Bundt Cake on November 15th,International Bundt Day??Mary-The Food Librarian sent me the "I Like Big Bundts" button which I am so proudly showing off here!!


Sending this to Ally's event Delicious Desserts!!


Tuesday, January 18, 2011

How to store [freeze] Fresh Green Peas

At a time when vegetables are so darn expensive,it makes sense to use and save lesser costing and in season vegetables for future use.Fresh green peas in pods come very cheap these days,perfect for freezing-better than the ready-to-use frozen packets of peas.Let me show you a simple method to freeze fresh green peas.


Ingredients needed - Fresh Peas


Peel the green peas from the pods [the only hard work involved in this process]-I used about 2 kg of peas.


Wash well and rinse in cold water.


In a big pan,add water and let it boil.


Add the green peas to the boiling water.


Boil the peas for a couple of minutes-2 minutes to be precise,by which time the peas would have risen to the top.


Strain immediately and pour cool water on top so that the cooking process would stop.


Let it cool to room temperature and then pat dry using a kitchen towel.


Store the green peas in a ziplock bag,seal and freeze[you can see steam formed inside the bag as it was still warm when I put it in,I kept the bag open for a while and when it cooled down completely,sealed the bag and froze it].


When required just take the amount of peas you would need,thaw it and use it as you would use fresh green peas.Stay tuned for some Peas dishes coming up on Easycooking!!

Update - Many of you asked why blanch the peas before freezing.I've been following this method of freezing for about 4-5 years now and every time I use the peas,it is almost as good as fresh.Also refer to this article as to why blanching is necessary before freezing vegetables.


Friday, January 14, 2011

Sakkarai Pongal & The Giveaway Winner

Wishing all of you who celebrate,a very Happy Pongal/Sankranthi.


As it is,we do not celebrate Pongal.Just like people stared at us when we said we do not celebrate Onam/Vishu in Kerala,I am met with similar glances if I do not put a Kolam and sugarcane in front of our corridor.So I've been doing all the pre-requisites for Pongal since last few years so no more discussions on "why" we do not celebrate the harvest festival.I have to admit it is fun though,after all festivals are fun and celebrated to spread joy and happiness around!!


The best part of Pongal is,undoubtedly the food.I mean,there are so many variations of Pongal that it is really difficult to chose which one to eat first.To know more about Pongal,read this post by Shanthi Krishnakumar.Also Check out Bharathy's detailed Pongal post replete with stunning pictures.


Last year during Pongal,I made Ven Pongal and Sakkarai Pongal for breakfast,but the recipe  was not featured here.I thought this year I am not going to miss posting it at any cost since it is so good.


Sakkarai Pongal
Recipe adapted from DK of Chefinyou


Ingredients


Raw rice - 1/2 cup
Moong Dal - 3 tbsp
Milk - 1 cup
Water - 1 cup
Jaggery - 3/4 cup,grated
Saffron - a few strands
Cardamom powder - 1 tsp
Nutmeg grated - a pinch
Ghee - 2 tbsp
Cashews - a handful


Method


Wash well and cook rice and moong dal along with milk and water in a pressure cooker for 10-15 minutes or till 4-5 whistles.
Once the rice-dal is cooked well,add grated jaggery to it and mix well[at this point,if the mix is very dry,you could add a few tbsp milk or warm water].
In a kadai,add ghee and roast the cashews till golden brown.
Add cardamom powder,nutmeg and saffron strands to it and give a good mix.
Serve hot.

---


Now the winner of my giveaway.I chose the winner through random.org.


Comment # 6 - HS - Hi Divya. I have been silently following your blog and trying recipes. I dont have a blog of my own as yet but would love to some day. 
And, on weight loss, i am also someone who is eternally on a diet. I read Rijuta's first book - Dont lose you mind, lose your weight. That was good. Would love to lay my hands on this book. Please pick my name!


Congrats HS,please send me your address to divyakudua@gmail.com[If I don't hear from you for 5 days,I will choose another winner] [I have chosen another winner since I didn't hear from HS]and thank you to each and every one of you who commented with great weight loss tips.I wish I could send the book to every one of you..but,you know!!No worries,I have some more exciting stuff coming up for giveaways,so keep watching this space!!


Wednesday, January 12, 2011

Panchphoran Aloo ~ Arusuvai Season II


I was taking baby steps in blogging when I came across this unique concept of sending a secret ingredient through a chain of people,aptly named Arusuvai.It was initiated By Latha Narasimhan of The Yum blog.But sadly,by the time I showed interest in it,Srivalli and Bharathy,the master planners behind Arusuvai,were wrapping up the first edition.I felt sad,but hey not anymore.When Sayantani blogged about reviving the chain from where it ended,I got curious.Now that would be fun.


The Inside Story

Arusuvai Friendship chain is an online effort to touch the hearts of food bloggers across the world with a mystery ingredient and a promise of friendship. this was started in 2007 by Mrs. Latha Narasimhan of the 'Yum blog'.it was inspired by the Amish Friendship chain in the US which led her to think to start something similar to identify and unite Indian food bloggers too. in the beginning it worked as a chain by sending along a surprise ingredient to a friend to prepare something tasty with it, share the recipe and then passing on another mystery element to more people to continue the chain.She aptly named it Arusuvai which means " six tastes (aru=six, suvai=taste) in Tamizh and is used to refer for Tasty preparation with six tastes – inippu/ thithippu (sweet), orappu/ karam (hot), kassappu (bitter) , pulippu (sour), uppu(salt), tuvarpu (tastes that one gets in raw leaves). Her talented daughter Lakshmi came up with these beautiful logos for the event.


I got a package from Sayantani some time back and it was the first time I was getting something through mail[which was blog related].I got excited and when I opened it,my excitement doubled as Sayantani had sent,along with the secret ingredient some lovely home-made goodies and some cute knick-knacks as well.The moment I saw the box which had the secret ingredient,I knew it was Panchphoran,but still,I googled and made sure I was right.


I remembered so well because,sometime back I had written down a Bengali Tomato Chutney and backed out only because it required Panchphoran.I know,I know it is very simple to make and assemble this spice mix,but I was too lazy for that.Now that I had this,I can't seem to find the chutney recipe,what an irony!!But no worries,I chose this super-simple Aloo panchphoran which is a medley of vegetables with the unique flavor of panchphoran.


Panch phoron is a colourful blend of flavourful seeds: the green of fennel seed, black mustard and nigella seeds, golden fenugreek and buff-coloured cumin seeds. Some variations may substitute anise for the fennel seeds or wild mustard for cumin, radhuni seed for mustard, and possibly black cumin for nigella. Generally the ingredients are added in equal proportions, though this can vary according to taste.
Panch phoron is usually fried in oil or ghee before adding anything else to the pot, flavouring the oil and releasing the aroma of the oils in the seeds and causing them to pop in the pan. Other ingredients are added at this point, the mixture adding sweetness and bringing forward the flavours of vegetables, beef, fish or lentils.Source


Panchphoran Aloo
Recipe adapted from Bong-Mom


Ingredients


Potato - 1,cubed
Green peas - 1/4 cup
Panchphoran - 1/2 tsp
Oil - 1 tsp
Green chilly - 1,finely chopped
Haldi powder - 1/4 tsp
Salt to taste


Method


Cook the potatoes and green peas till soft.
In a kadai add oil and splutter the panchphoran for a few seconds,stirring all the while.
Add haldi and green chillies and give a good mix.
Mix in the cooked potato and green peas,add salt to taste.
Cook on simmer for about five minutes or till the vegetables are well coated with the masala.
Serve hot with rice/roti.


My Arusuvai package has gone to Gayathri and Megha,I am anxious to see what they come up with!!

Related Posts Plugin for WordPress, Blogger...
 
Pin It button on image hover