Wednesday, November 30, 2011

Maggi Bhuna Masala-Product review

Most of the times,when required to make a North Indian gravy one thing which puts me off is the whole onion-tomato slicing-sauteing and the grinding part.Of course,when I feel like eating something badly,nothing looks like an effort.But for those lazy times,Maggi Bhuna masala is the perfect answer.
There are two varieties available.One with ginger-garlic and one without.They say the onions and tomatoes are sauteed using just 1 spoon of oil,a relief for us who think a lot about the fat content in packaged foods.Maggi is a trusted brand in India,so this one was on my must-try list.I got around 5-6 packets and decided to explore the possibilities,fueled by the ads.
I made Dal Tadka using the Bhuna masala for Vegetables/Dal and was pleasantly surprised.I haven't tried making anything else with dal other than the usual yellow dal or dal tadka.This one had a typical dhaba kind of taste to it.I don't know if I'd try it again using homemade ground masala,but it tasted good with rotis and I guess that's what counts.
Speaking of rotis,how can a tomato fry with vegetables fall behind?I resort to good ol' tomato fry whenever there's a dearth of vegetables or I am too lazy to try something elaborate.Using the bhuna masala for vegetables,I added tomatoes,green peas and capsicum and gave a li'l twist to our regular tomato fry.It was a bit too tangy for Ajay but perfect for me to mop up those rotis.
Next recipe I tried was Rajma masala.We both love Rajma masala and I had high hopes from the same dish made with bhuna masala for gravies.I loved the final dish but felt the masala was not enough for the Rajma dish if it was to be served for a family of four.It was just sufficient for us.Ok,I could just go ahead and add two packets and more Rajma,but just saying.
Mention north Indian and how can we forget Paneer.I wanted to try out Paneer butter masala but the Paneer matar they showed in ads was too tempting and I decided to try just that.I am amazed by the ease in which we can make this delicious dish in just 15 minutes or less if you have Paneer and frozen green peas ready in the fridge.(sorry for the straight out of the pan pic!)


Check out their site for more recipe ideas and more info about the product.


This is not a paid review.I used and liked this product and just thought of sharing it with my readers.


--------


For my readers who love their cup of coffee,Times deal have an amazing offer of ‘Buy any beverage and Get another one absolutely Free @ Barista Lavazza’. This deal is available Pan India.


Friday, November 25, 2011

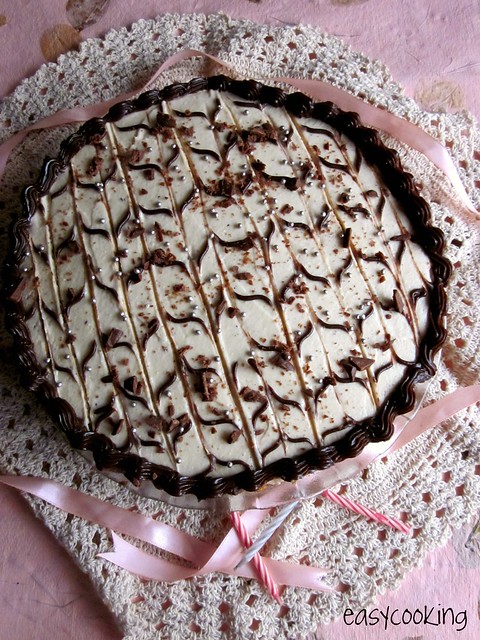
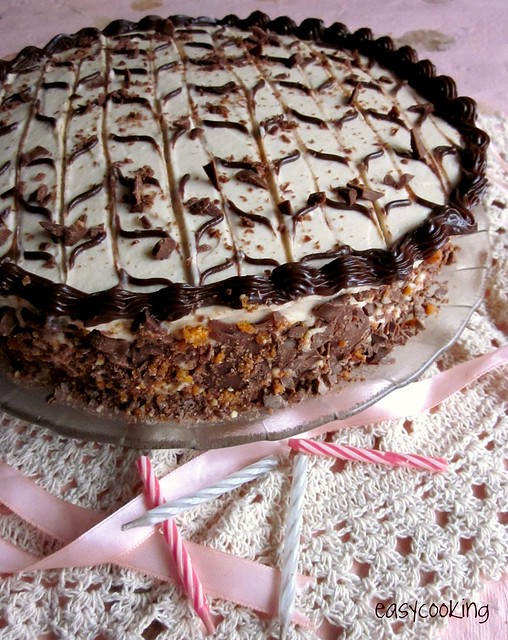
Eggless Tiramisu Cake

Tiramisu,the name itself evokes a sense of wanting doesn't it?After a long long wait,I finally tasted my first Tiramisu a couple of days back.I have come across the name on many different menus across restaurants in Chennai but was apprehensive to try.I didn't want the first impression to be a damp squib.After hearing quite a number of good reviews,I had mine at The Pasta Bar Veneto and fell in love with it.
IMG_6886_picnik
Remember the Tiramisu Cake we baked a while back?I wanted to try it again coz I am yet to muster up courage to make the real deal.Making Mascarpone cheese at home is such an easy task that you tend to forgive the gourmet stores who do not stock up on it:).I decided to go eggless this time.So an Eggless Tiramisu cake it is,even though it sounds like an Oxymoron for sure:)

The first part is making the sponge cakes.I made the never-fail eggless sponge cake recipe which I've tried here.Of course,making Mascarpone cheese on your own is only for us deprived souls who do not get to buy it off the shelves.But let me tell you,it is so worth it!
IMG_6872
 Eggless Tiramisu Cake Recipe
(Original recipe from Baking From My Home To Yours)

Ingredients

For the Cake(Double the recipe or bake two cakes.I made one plain cake and one with Coffee flavor)

All purpose flour – 1¼ cups
Cornflour - ¼ cup
Thick curd – 1 cup
Sugar – ¾ cup
Refined oil – ½ cup
Baking powder – 1 tsp
Baking soda – ½ tsp
Vanilla essence – 1 tsp


Preheat oven to 180C.


Grease an 9’ round cake tin.
Beat together sugar and curds well.
Add baking powder and baking soda,mix well and keep aside for 2-3 minutes.
Bubbles will start appearing on top-add oil and vanilla essence and beat well.
Mix in the flour 1 tbsp at a time and make a smooth batter.
I added a tsp of cocoa powder to 1/3 of the batter and then swirled it together with the yellow batter for a marbled effect.
Bake for 30-35 minutes or until a toothpick inserted comes out clean.

For the espresso extract:


2 tablespoons instant espresso powder
2 tablespoons boiling water
Stir the espresso powder and boiling water together in a small cup until blended. Set aside

For the espresso syrup:

½ cup water
1/3 cup sugar
1 tablespoon amaretto, Kahlua, or brandy[I skipped this,added a tsp of Vanilla essence instead]

Stir the water and sugar together in a small saucepan and bring just to a boil. Pour the syrup into a small heatproof bowl and stir in 1 tablespoon of the espresso extract and the liqueur or brandy; set aside.

For the filling and frosting:

1 8-ounce container mascarpone (store-bought or homemade)
½ cup confectioners’ sugar, sifted
1
½ teaspoons pure vanilla extract
1 tablespoon amaretto, Kahlua, or brandy[I skipped this]
1 cup cold heavy cream
2 
½ ounces bittersweet or semisweet chocolate, finely chopped, or about ½ cup store-bought mini chocolate chips[I used chopped chocolate]

Put the mascarpone, sugar, vanilla, and liqueur in a large bowl and whisk just until blended and smooth.
Working with the stand mixer with the whisk attachment or with a hand mixer, whip the heavy cream until it holds firm peaks. Switch to a rubber spatula and stir about one quarter of the whipped cream into the mascarpone. Fold in the rest of the whipped cream with a light touch.

To assemble the cake:

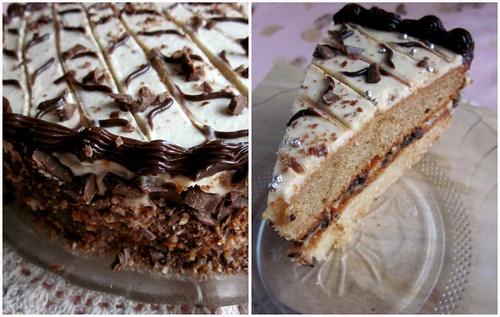
If the tops of the cake layers have crowned, use a long serrated knife and a gentle sawing motion to even them. Place one layer right-side up on a cardboard round or a cake plate protected with strips of wax or parchment paper. Using a pastry brush or a small spoon, soak the layer with about one third of the espresso syrup. Smooth some of the mascarpone cream over the layer – user about 1 1/4 cups – and gently press the chopped chocolate into the filling. Put the second cake layer on the counter and soak the top of it with half the remaining espresso syrup, then turn the layer over and position it, soaked side down, over the filling. Soak the top of the cake with the remaining syrup.

For the frosting, whisk 1 to 1 1/2 tablespoons of the remaining espresso extract into the remaining mascarpone filling. Taste the frosting as you go to decide how much extract you want to add. If the frosting looks as if it might be a little too soft to spread over the cake, press a piece of plastic wrap against its surface and refrigerate it for 15 minutes or so. Refrigerate the cake too.

With a long metal icing spatula, smooth the frosting around the sides of the cake and over the top.Stick chopped chocolate pieces on the sides and do a doodle design on top if desired.I piped some swirls with some chocolate ganache.
Picnik collage 

Refrigerate the cake for at least 3 hours (or for up to 1 day) before serving – the elements need time to meld.

I know the recipe can fill up pages,but if you attempt each element on its own,it is not so difficult.Only a matter of making a sponge and the filling,that's it,easy isn't it?Hope you try this piece of heaven,it truly is!

Saturday, November 19, 2011

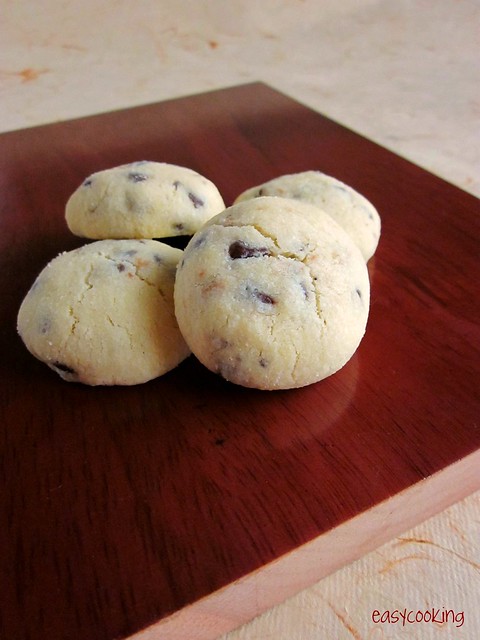
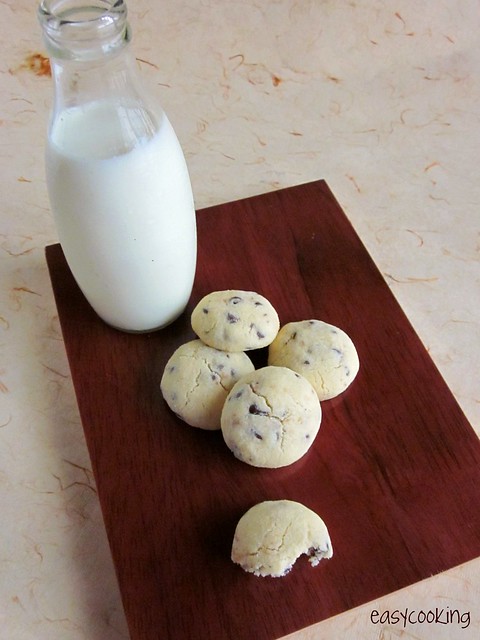
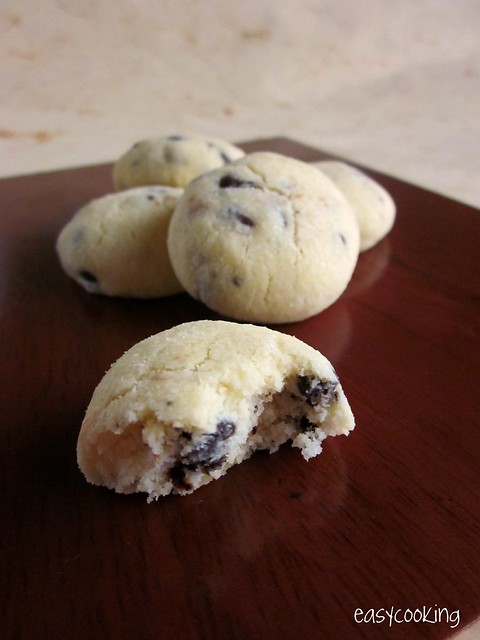
Eggless Chocolate Chip Cookies

IMG_6851_picnik
Disclaimer - This is not the authentic recipe for chocolate chip cookie.I have put forth my version here which is just a basic butter cookie adorned with chocolate chips.

I have not tasted the so-called 'authentic' chocolate chip cookie.From what I've heard,it is a chewy cookie full of chocolate chips and is out of the world.The closest I've come to taste these are in the form of Hide and seek biscuits or Good Day chocolate chip biscuits.
IMG_6861 
I used to bake and try a new cookie recipe at least once in a week during my initial baking days.But as they say,once you hit bulls eye then whenever you are required to bake it,you tend to go back to the trusted recipe.Absolutely no harm in that but I feel it makes you biased towards new recipes.What I am saying is that,though I've always wanted to try out an authentic version of the same,the ease of this recipe and the taste stops me from trying it.


Eggless Chocolate Chip Cookies Recipe

Ingredients(makes 24-26 cookies)

Butter(softened) - 1/2 cup/100gms
Powdered sugar - 1/2 cup(Cinnamon sugar or Vanilla sugar can also be used for great results)
Flour - 1 cup
Cornflour - 1/2 cup
Chocolate chips - 1/2 cup

Method

Cream together butter and sugar with a fork or wooden spoon till it becomes creamy.

Mix in flour,cornflour and chocolate chips.Knead softly to form a smooth dough.
Keep aside for 5-10 minutes then form smooth balls(lime sized) and place on an ungreased cookie tray.
Bake for 20-24 minutes or till done.
Cool on a wire rack and store in air tight containers.

IMG_6859 
Notes
  • Basic recipe of this cookie can be tweaked to make different types of cookies.You could add orange zest or coffee extract to make it taste different.
  • The amount of butter to flour ratio is a bit less,so you might have to add a tsp or so milk if the dough doesn't come together.Take care not to add too much liquid since this tends to make the cookie hard.
  • The amount of baking time given is for chewy-in-the-middle and crunchy-on-the-sides type of cookie.If you want crunchier cookies,flatten them a little before baking a bake for an extra two minutes.
  • You could also replace 2 tbsp of cornflour with cocoa powder and add white chocolate chips in place of milk chocolate chips for an opposite version of the same recipe.
-----
On another note,thanks to all of your support and encouragement,the Plagiarism issue is sorted out now.The blog is shut down by Google since it contained copied recipes from many blogs.A special thanks to Nags of Edible Garden for the timely help.


Related Posts Plugin for WordPress, Blogger...
 
Pin It button on image hover