Tuesday, March 13, 2012

Pavakkya Fry - Spicy Fried Bittergourd

I've eaten more Kerala food in Chennai than in Kerala.I still remember getting excited when I first had Puttu-Kadala at Kumarakom in Nungambakkam while I was new in Chennai.I've only had it at home and couldn't actually believe it was served in restaurants.Whenever Ajay asked me where to go out to eat,I'd say Kumarakom,I loved their fluffy appams,flaky parottas and of course Puttu.
Now of course,the excitement has died down and we seldom go there to eat.We absolutely loved the Kerala meals too and one of the star item in the 'thali' used to be pavakkya fry.I was always angry that they served only 2 or 3 chips in each plate and even when we asked for seconds,they served only as much.I've been so much fond of Karathe Fry that I make but this one was delicious on its own.


After a few trials and errors,I think I've made it very close to what they served in the restaurant.The recipe is very simple and it makes for a delicious side with meals.No more asking seconds to amused waiters in Kumarakom:)
Pavakkya fry - Spicy fried Bittergourd


Ingredients


Bittergourd - 1,sliced thin(either as a full circle,or a semi circle)
Onion - 1,sliced thin
Ginger - 1/2' piece,sliced thin
Garlic - 3-4 cloves,sliced thin
Red chilly powder - 1 tsp
Haldi - 1/2 tsp
Salt to taste
Oil to deep fry
Curry leaves - 1-2 sprigs


Method


Mix together all of the ingredients except oil and curry leaves and keep aside for 15-20 minutes.
In a kadai add enough oil to deep fry.
Squeeze the bittergourd mix and sprinkle over the hot oil.Fry on a high flame for a minute and then lower the flame till the bittergourd turns golden brown.
Drain on to a paper towel.Finish all the bittergourd and then fry curry leaves till crisp.
Serve with Red rice and Moru curry for a delicious meal.

Sunday, March 11, 2012

Sreedevi's Rice Kondattam

There are many foodie groups on facebook of which I am a part of.So my facebooking also involves checking out what people(sometimes friends,sometimes family too)are cooking in their kitchen and what experiment turned into disaster and which one tasted out of this world.
Sreedevi,a dear friend's wife is someone who clicks and posts everything she cooks in her kitchen on her facebook profile.She is a very pleasant and enthusiastic girl who replies within seconds when I ask her for a recipe and I love her for that.I've been telling her to start a blog of her own since she has such an array of dishes,but (it seems)she is content with her facebook album.


So I invited her to share her recipe for Easycooking readers and she readily obliged.She has prepared Rice Kondattam from scratch,something which even I have not attempted till date.Kudos to you Sreedevi!


Rice Kondattam
Ingredients


Raw rice/Pachari - 1 cup
Boiled rice/Puzhungalari - 1 1/4 cup
Salt - approximately 3 spoons
Green chilly - 3-4
Black sesame seeds - a handful


Method


Soak the raw rice and boiled rice together for 4-5 hours.
Blend together everything except the sesame seeds to a smooth paste adding enough water.
Add 2 - 2 1/2 cups of water to the batter and mix well.
Cook this batter on medium flame stirring continuously till the batter starts turning thick.
Keep stirring till the batter attains a wobbly consistency-thicker than dosa-idli batter.Take care not to overcook after this stage which would make the odi/vadi dry.
Switch off and add the sesame seeds.Mix well.
To prepare the odi/vadis
Drop spoonfuls of batter on a plastic sheet or baking paper and dry in sunlight till the vadis get dried completely.Anywhere between 2-3 days depending on the weather.
Tip-Spread baking paper on a thick cardboard sheet so that it becomes easier to take the sheets in and out while drying.


Heat oil in a kadai and fry the odi/vadis till crisp.It takes less than a minute to fry up one batch.


Happy Cooking!

Thursday, March 8, 2012

Paneer Masala Bread

Some recipes should be attacked instantly,if you think too much about how and when to make/bake it,it might get postponed.When I saw Hetal and Anuja's video on SMTC,I thought to myself 'ah,this is one bread I could try',off I went to check my kitchen stuff and saw something else and completely forgot about it.My excuse was,I didn't have paneer!! IMG_0578
Even after I got myself a block for making this bread,strangely I was looking for different recipes with Paneer.Yeah,I have a problem with yeast,I admit.I haven't baked much with yeast but the fear of failure with bread always pulled me back.Few days back,I tried baking a savory roll,which to my amusement came out really well despite quartering the recipe,but hard luck,I messed up the salt measurement.The rolls were so salty that it went straight to the bin.They baked up beautifully though.
IMG_0553 
I couldn't resist myself baking bread again when Ajay asked me why I was 'stuck' with cakes.Yes stuck!!Now I had to prove him wrong,double trouble.


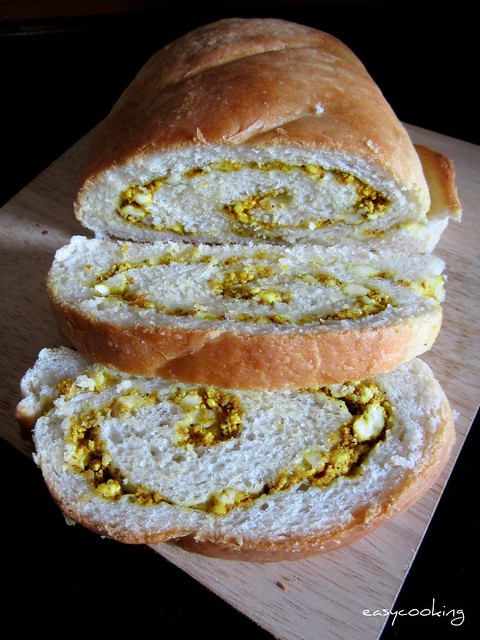
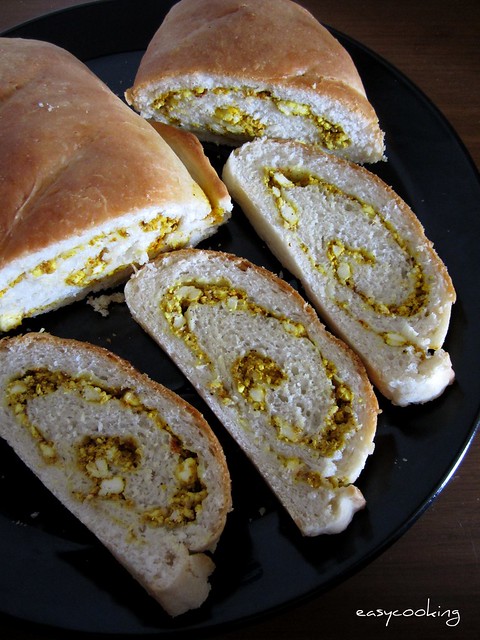
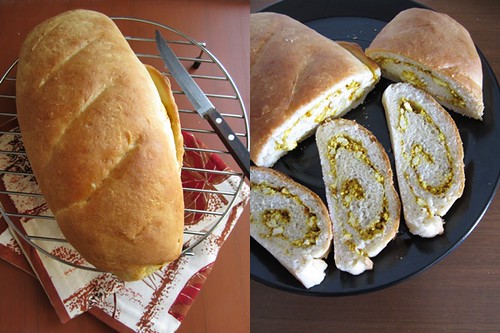
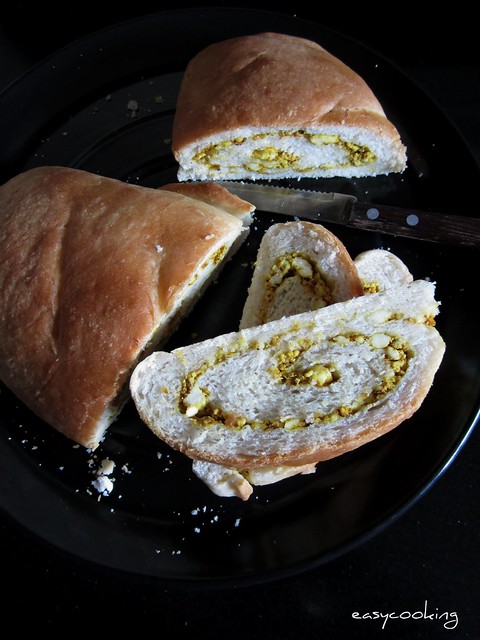
Home alone and armed with all the ingredients I just went with the flow.Everything was falling into place.The yeast bloomed well,the dough rose well and it baked perfectly too with a lovely golden crust.The icing on the cake was when I cut it-beautiful patterned bread and it tasted delicious.If you find bread baking adventurous,you should bake this bread too!
edited 
Paneer Masala Bread
Recipe source - Showmethecurry.com


Ingredients


Warm Water – 1 cup
Instant Yeast - 1 1/2 tsp
Sugar – 1 tsp
Salt – 1 1/2 tsp
Olive Oil – 1/3 cup (I used Saffola)
All-Purpose Flour (Maida) – 3 cups (plus little extra for dusting)
Paneer – 200 g or 1 1/2 cups, crumbled
Turmeric Powder – 1/4 tsp
Dry Mango Powder/Amchoor – 1 tsp
Red Chili Powder – 1/2 tsp
Garam Masala – 1 tsp
Salt – to taste
Juice of 1 lime
Pickled Jalapenos – 1/2 cup, chopped finely (I did not add this)
Method
In a mixing bowl,combine warm water,yeast,sugar,salt and oil. Mix well.
In a separate mixing bowl, combine above mixture (a little at a time) with All-Purpose Flour and knead into a soft dough. Once dough comes together, knead for 4 to 5 minutes, until dough is smooth and elastic. Additional flour can be used for dusting to prevent dough from sticking to hands.(I did not have to use extra flour at all).
Grease the mixing bowl with oil and place the dough in it.Cover with a damp kitchen towel and allow to proof for 45 minutes to an hour.
Combine crumbled paneer,turmeric powder,dry mango powder,red Chili powder,garam masala,salt and lime juice.Mix gently so that paneer doesn’t get mashed.
On a rolling surface, roll out dough into a rectangular shape (approx 9 inch by 13 inch).
Spread Paneer mixture evenly over the dough all the way to the edges and gently press in.From the side closest to you, start rolling the dough tightly into a log.
Lightly grease the bottom and sides of a 9″x13″ baking pan(I used a round cookie tray) and place dough log in the center.
Loosely cover with a damp kitchen towel and place pan in a warm place for 1 hour to allow dough to rise.
Take a serrated knife and make shallow diagonal slits into the top of the dough.
Preheat oven to 450 degrees F (232C) and then reduce temperature to 425 degrees F (218C).
Place pan in the oven and bake for 30 to 35 minutes. Every oven is different so please keep an eye on it towards the end of the cooking period.
(it took exactly 35 minutes in my oven @ 215C)
Remove bread from oven and allow it to cool for 5 minutes in the pan. Remove bread from pan and place on a cooling rack for 30 minutes before cutting or serving.
Cool completely before storing.IMG_0586
  • The original recipe calls for rapid rise yeast,it can be substituted with the same quantity of active dry yeast,with slight changes in the procedure.I was not sure if my yeast was instant or dry so I played it safe by blooming the yeast for 5 minutes and then proofing the dough for an hour before stuffing.
  • The temperature of the water plays a crucial role in blooming the yeast.I warm the water for about 30 seconds in the microwave and then carry on with the procedure.
  • The stuffing for the bread could also be according to your taste.I am thinking Mushroom pepper masala next.
Related Posts Plugin for WordPress, Blogger...
 
Pin It button on image hover