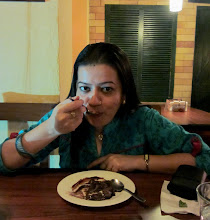
It was a while back that Ria asked me about starting a baking group with her and Maria.It sounded fun to me and we started discussing about it enthusiastically day in and day out.Being a self-learned baker myself,I identified with people’s fear of baking.As we said in the introductory post,you just need a reliable recipe,fresh ingredients and you are good to go.The introductory Punch was to be decided by the mastermind herself and she chose this wonderful recipe Tiramisu Cake.

Like many,I was intimidated by the recipe the first time I saw it and read through the lengthy recipe.But,it is just a detailed explanation and hence even more foolproof.If planned correctly,you could do one component each at a time and the final assembly would be a breeze!!

Making Homemade Mascarpone Cheese was one big leap for me.Except that I chose the wrong time to do it.Peak of summer with temperatures touching 42C,I shouldn’t have blamed the cheese after all[more on that later].
 My Sweet Punch Experience –
I made the Mascarpone cheese first and as I said,it was a big leap for me.Never did I think that I would be making something as exquisite,luscious and creamy as this at home.I might reduce the quantity next time,though.I had to make 2 more cakes and use it up as filling to finish the whole batch..no one’s complaining!!

The cake is a simple Butter Cake and I can see myself making this cake again[with different fillings/frosting next time].The crumbs tasted so good that I was tempted to have it plain.
The easiest part,which is the final assembly of the cake is where I struggled.I chose one of the hottest days in May to make this cake and that by itself was a big mistake.The cheese wouldn’t set and what was supposed to be a filling turned out to be so flowy that I kept the cake inside the fridge,sat down with the fridge door open and did the whole filling frosting job much to Ajay’s amusement!!To make matters more worse,I couldn't find my camera anywhere while I was doing this[yes,it was the same day I made this].So I had to do with my phone camera and you can see the results for yourselves!![Ok,I take that back,I don't take extra-ordinary pics with my camera,but then you know..!!]But as they say,it was all worth it when I had a slice of the cake.Heavenly and delicious,that’s how I would describe it!!
Tiramisu Cake
Baking: From My Home to Yours by Dorie Greenspan
For the cake layers:
2 cups cake flour
2 teaspoons baking powder
1/8 teaspoon baking soda
1/4 teaspoon salt
1 1/4 sticks (10 tablespoons) unsalted butter, room temperature
1 cup sugar
3 large eggs
1 large egg yolk
1 1/2 teaspoons pure vanilla extract
3/4 cup buttermilk
For the espresso extract:
2 tablespoons instant espresso powder
2 tablespoons boiling water
For the espresso syrup:
2 tablespoons boiling water
For the espresso syrup:
1/2 cup water
1/3 cup sugar
1 tablespoon amaretto, Kahlua, or brandy[I skipped this,added a tsp of Vanilla essence instead]
For the filling and frosting:
1 8-ounce container mascarpone (store-bought or homemade)
1/2 cup confectioners’ sugar, sifted
1 1/2 teaspoons pure vanilla extract
1 tablespoon amaretto, Kahlua, or brandy[I skipped this]
1 cup cold heavy cream
2 1/2 ounces bittersweet or semisweet chocolate, finely chopped, or about 1/2 cup store-bought mini chocolate chips[I used chopped chocolate]
Chocolate-covered espresso beans, for decoration (optional)
Cocoa powder, for dusting
Getting ready:
Center a rack in the oven and preheat the oven to 350 degrees F. Butter two 9×2 inch round cake pans, dust the insides with flour, tap out the excess, and line the bottoms of the pans with parchment or wax paper. Put the pans on a baking sheet.
To make the cake:
1/3 cup sugar
1 tablespoon amaretto, Kahlua, or brandy[I skipped this,added a tsp of Vanilla essence instead]
For the filling and frosting:
1 8-ounce container mascarpone (store-bought or homemade)
1/2 cup confectioners’ sugar, sifted
1 1/2 teaspoons pure vanilla extract
1 tablespoon amaretto, Kahlua, or brandy[I skipped this]
1 cup cold heavy cream
2 1/2 ounces bittersweet or semisweet chocolate, finely chopped, or about 1/2 cup store-bought mini chocolate chips[I used chopped chocolate]
Chocolate-covered espresso beans, for decoration (optional)
Cocoa powder, for dusting
Getting ready:
Center a rack in the oven and preheat the oven to 350 degrees F. Butter two 9×2 inch round cake pans, dust the insides with flour, tap out the excess, and line the bottoms of the pans with parchment or wax paper. Put the pans on a baking sheet.
To make the cake:
Sift together the cake flour, baking powder, baking soda, and salt.
Working with a stand mixer, preferably fitted with a paddle attachment, or with a hand mixer in a large bowl, beat the butter on medium speed until soft and creamy.
Add the sugar and beat for another 3 minutes. Add the eggs one by one, and then the yolk, beating for 1 minute after each addition. Beat in the vanilla; don’t be concerned if the mixture looks curdled. Reduce the mixer speed to low and add the dry ingredients alternately with the buttermilk, adding the dry ingredients in 3 additions and the milk in 2 (begin and end with the dry ingredients); scrape down the sides of the bowl as needed and mix only until the ingredients disappear into the batter. Divide the batter evenly between the two pans and smooth the tops with a rubber spatula.
Bake for 28 to 30 minutes, rotating the pans at the midway point. When fully baked, the cakes will be golden and springy to the touch and a thin knife inserted into the centers will come out clean. Transfer the cakes to a rack and cool for about 5 minutes, then run a knife around the sides of the cakes, unmold them, and peel off the paper liners. Invert and cool to room temperature right-side up.
To make the extract:
Working with a stand mixer, preferably fitted with a paddle attachment, or with a hand mixer in a large bowl, beat the butter on medium speed until soft and creamy.
Add the sugar and beat for another 3 minutes. Add the eggs one by one, and then the yolk, beating for 1 minute after each addition. Beat in the vanilla; don’t be concerned if the mixture looks curdled. Reduce the mixer speed to low and add the dry ingredients alternately with the buttermilk, adding the dry ingredients in 3 additions and the milk in 2 (begin and end with the dry ingredients); scrape down the sides of the bowl as needed and mix only until the ingredients disappear into the batter. Divide the batter evenly between the two pans and smooth the tops with a rubber spatula.
Bake for 28 to 30 minutes, rotating the pans at the midway point. When fully baked, the cakes will be golden and springy to the touch and a thin knife inserted into the centers will come out clean. Transfer the cakes to a rack and cool for about 5 minutes, then run a knife around the sides of the cakes, unmold them, and peel off the paper liners. Invert and cool to room temperature right-side up.
To make the extract:
Stir the espresso powder and boiling water together in a small cup until blended. Set aside
To make the syrup:
Stir the water and sugar together in a small saucepan and bring just to a boil. Pour the syrup into a small heatproof bowl and stir in 1 tablespoon of the espresso extract and the liqueur or brandy; set aside.
To make the filling and frosting:
Put the mascarpone, sugar, vanilla, and liqueur in a large bowl and whisk just until blended and smooth.
Working with the stand mixer with the whisk attachment or with a hand mixer, whip the heavy cream until it holds firm peaks. Switch to a rubber spatula and stir about one quarter of the whipped cream into the mascarpone. Fold in the rest of the whipped cream with a light touch.
To assemble the cake:
If the tops of the cake layers have crowned, use a long serrated knife and a gentle sawing motion to even them. Place one layer right-side up on a cardboard round or a cake plate protected with strips of wax or parchment paper. Using a pastry brush or a small spoon, soak the layer with about one third of the espresso syrup. Smooth some of the mascarpone cream over the layer – user about 1 1/4 cups – and gently press the chopped chocolate into the filling. Put the second cake layer on the counter and soak the top of it with half the remaining espresso syrup, then turn the layer over and position it, soaked side down, over the filling. Soak the top of the cake with the remaining syrup.
For the frosting, whisk 1 to 1 1/2 tablespoons of the remaining espresso extract into the remaining mascarpone filling. Taste the frosting as you go to decide how much extract you want to add. If the frosting looks as if it might be a little too soft to spread over the cake, press a piece of plastic wrap against its surface and refrigerate it for 15 minutes or so. Refrigerate the cake too.
With a long metal icing spatula, smooth the frosting around the sides of the cake and over the top. If you want to decorate the cake with chocolate-covered espresso beans, press them into the filling, making concentric circles of beans or just putting some beans in the center of the cake.
Refrigerate the cake for at least 3 hours (or for up to 1 day) before serving – the elements need time to meld.
Just before serving, dust the top of the cake with cocoa.
To make the syrup:
Stir the water and sugar together in a small saucepan and bring just to a boil. Pour the syrup into a small heatproof bowl and stir in 1 tablespoon of the espresso extract and the liqueur or brandy; set aside.
To make the filling and frosting:
Put the mascarpone, sugar, vanilla, and liqueur in a large bowl and whisk just until blended and smooth.
Working with the stand mixer with the whisk attachment or with a hand mixer, whip the heavy cream until it holds firm peaks. Switch to a rubber spatula and stir about one quarter of the whipped cream into the mascarpone. Fold in the rest of the whipped cream with a light touch.
To assemble the cake:
If the tops of the cake layers have crowned, use a long serrated knife and a gentle sawing motion to even them. Place one layer right-side up on a cardboard round or a cake plate protected with strips of wax or parchment paper. Using a pastry brush or a small spoon, soak the layer with about one third of the espresso syrup. Smooth some of the mascarpone cream over the layer – user about 1 1/4 cups – and gently press the chopped chocolate into the filling. Put the second cake layer on the counter and soak the top of it with half the remaining espresso syrup, then turn the layer over and position it, soaked side down, over the filling. Soak the top of the cake with the remaining syrup.
For the frosting, whisk 1 to 1 1/2 tablespoons of the remaining espresso extract into the remaining mascarpone filling. Taste the frosting as you go to decide how much extract you want to add. If the frosting looks as if it might be a little too soft to spread over the cake, press a piece of plastic wrap against its surface and refrigerate it for 15 minutes or so. Refrigerate the cake too.
With a long metal icing spatula, smooth the frosting around the sides of the cake and over the top. If you want to decorate the cake with chocolate-covered espresso beans, press them into the filling, making concentric circles of beans or just putting some beans in the center of the cake.
Refrigerate the cake for at least 3 hours (or for up to 1 day) before serving – the elements need time to meld.
Just before serving, dust the top of the cake with cocoa.


 Pour the cream into a medium heat-resistant bowl, then place the bowl into the skillet.